Agents for Amazon Bedrock+SlackでS3バケットを操作する仕組みを作ってみた
こんにちは!KINTOテクノロジーズ生成AI活用プロジェクトの顧です。
みなさんの会社はどんな方法でAWS上のリソースを操作しますか?
Terraform、AWS CLI、あるいはAWSコンソール上で手動など、さまざまなな手段がありますね。
今回、生成AIの力を利用し、slack上で自然言語の操作命令を入力することで、バックエンドのAgents for Amazon Bedrock(以下Bedrock)と連携しながらAWSのリソース操作をする仕組みを作成してみました。
全体構成
全体構成は以下の図のようになっています。

全体構成
使用するイメージ
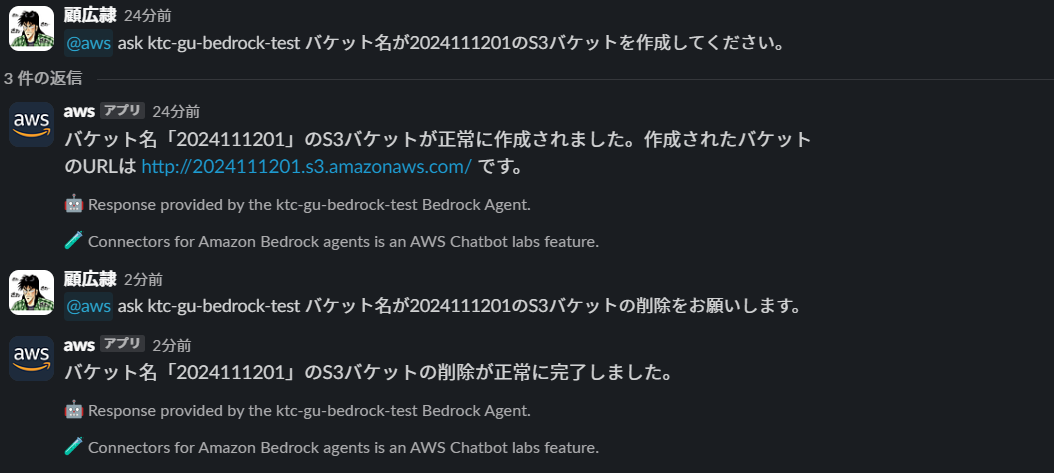
ユーザはSlack上で自然言語で入力し、バックエンドのBedrockは入力に基づき、S3上でバケットを作成したり、削除したりします。
使用するイメージ
作成手順
作成手順は、以下の3ステップとなります。
- Bedrock上でAgentを作成
- AWS Chatbotを作成
- Slackを設定
以下、詳しく作成手順を説明します。
みなさん、その手順に沿って同じことができるようになるので、やってみてくださいね。
Bedrock上でAgentを作成
-
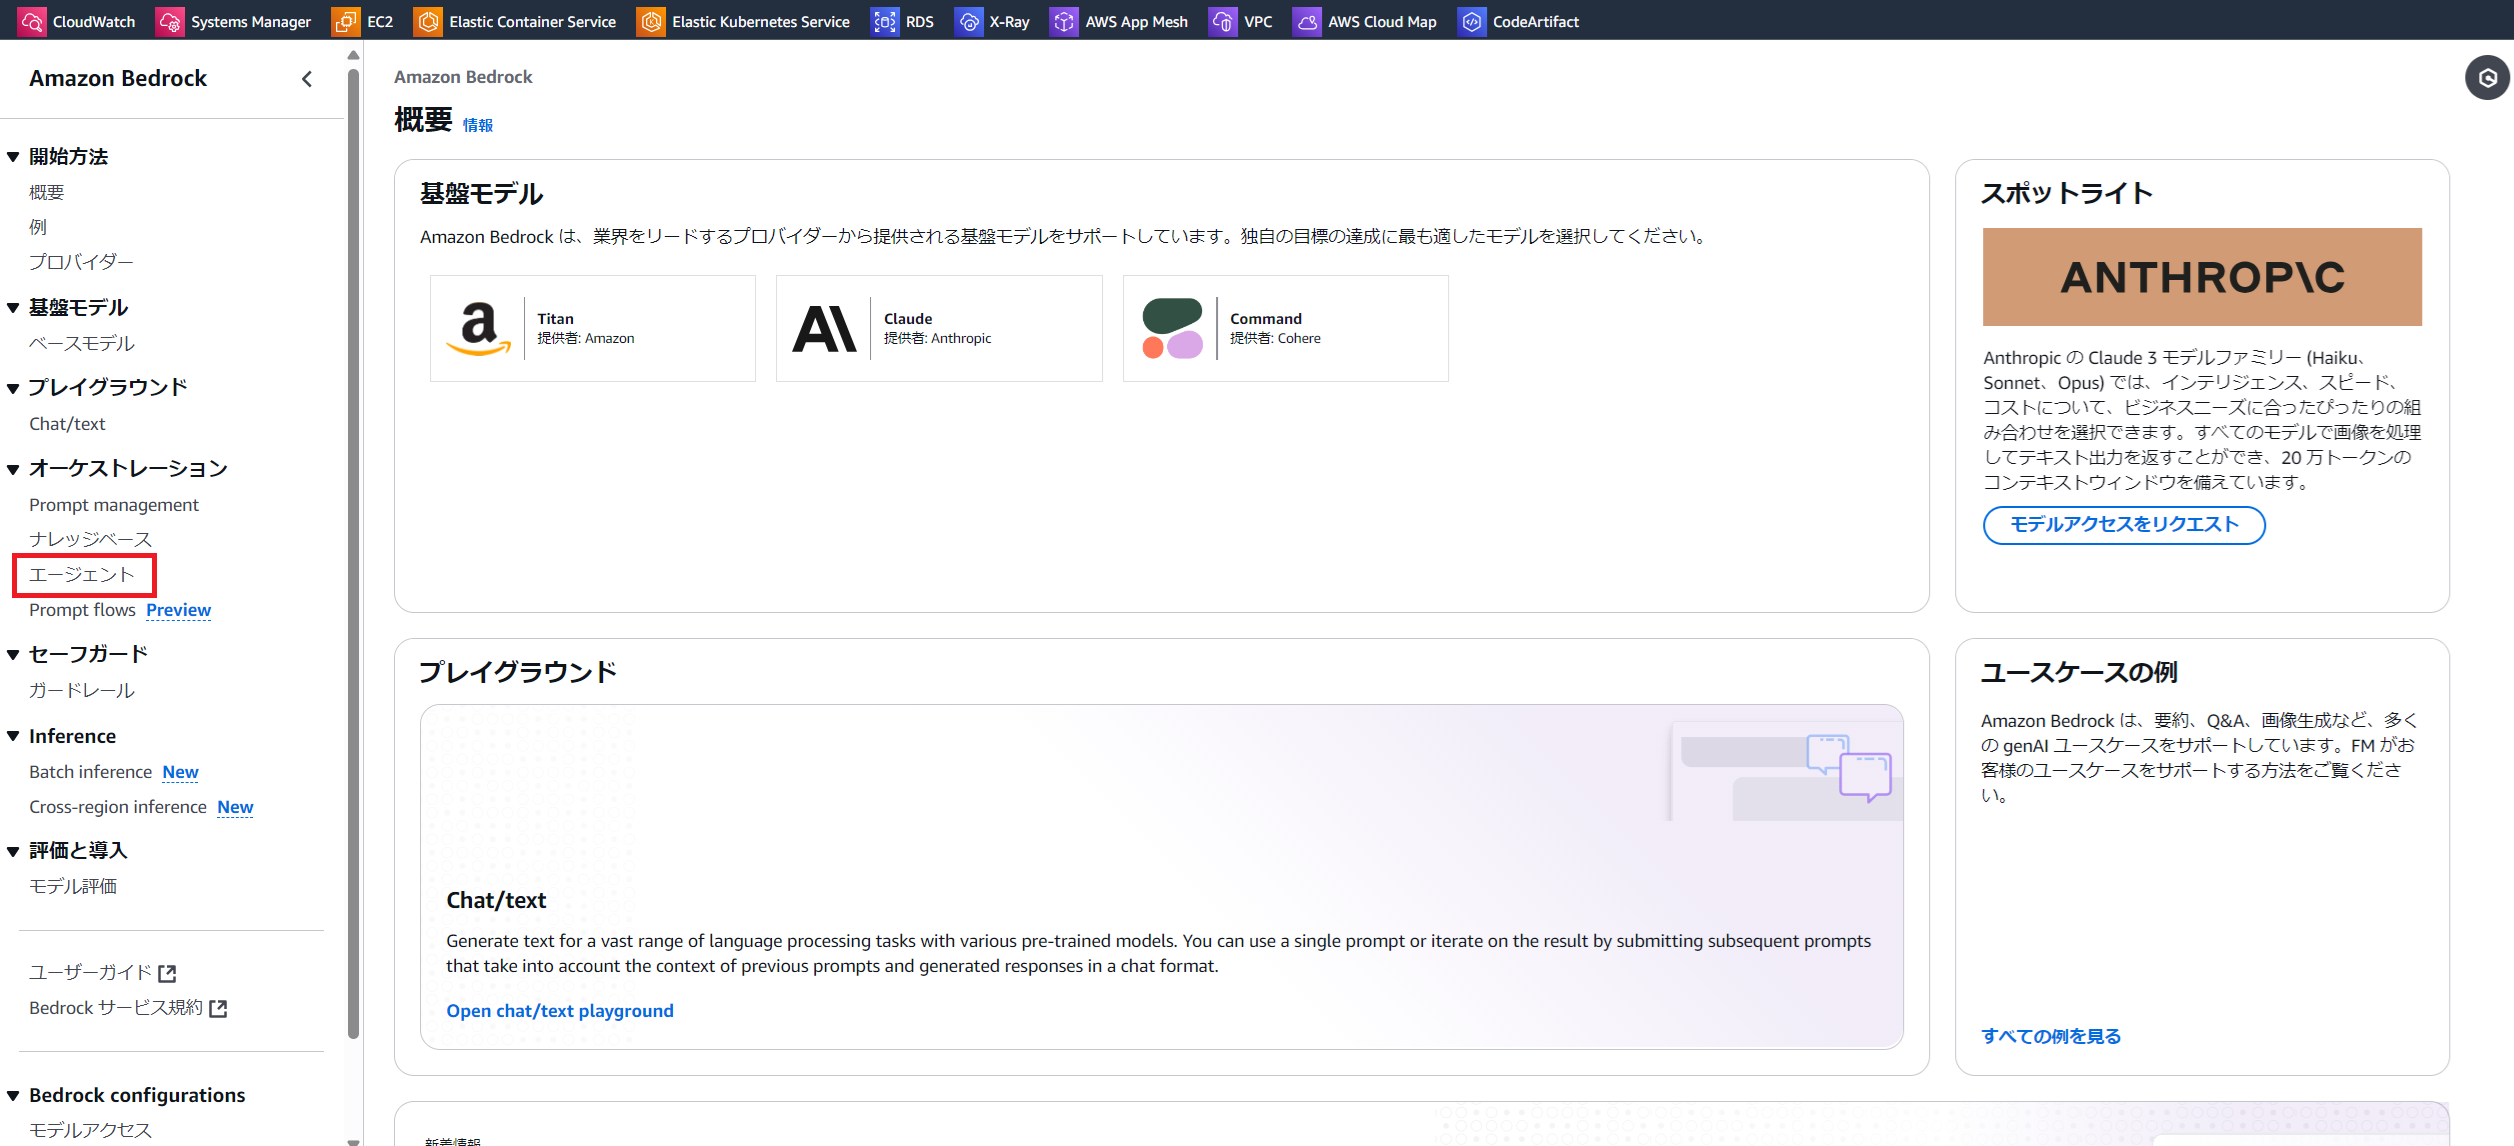
マネジメントコンソールでBedrockの管理画面を開きます
左メニューの「エージェント」をクリックします
-
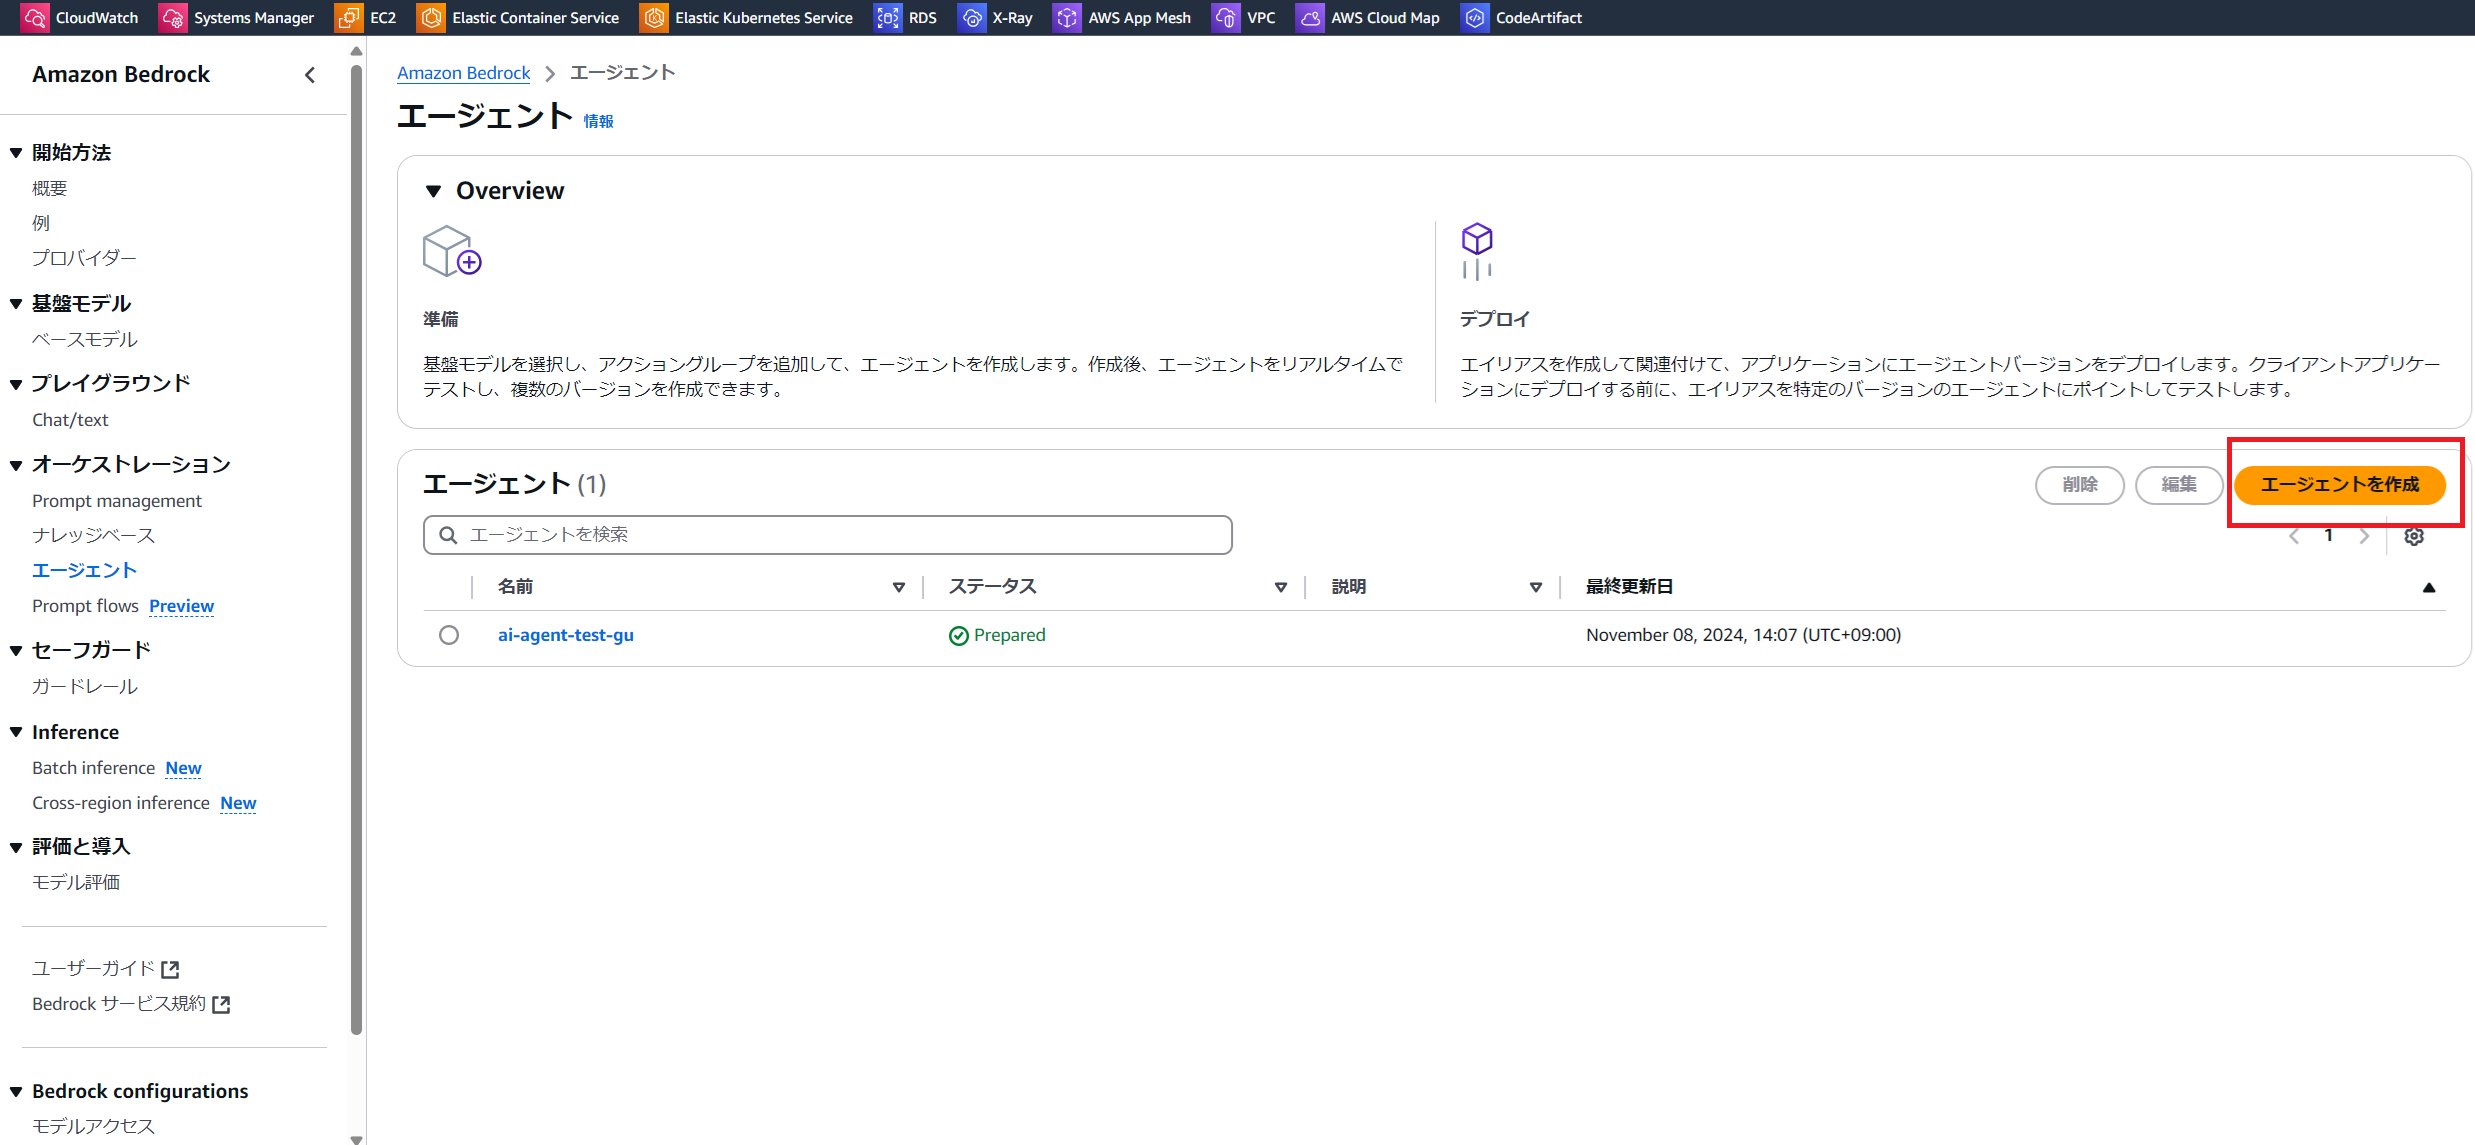
「エージェントを作成」をクリックします
-
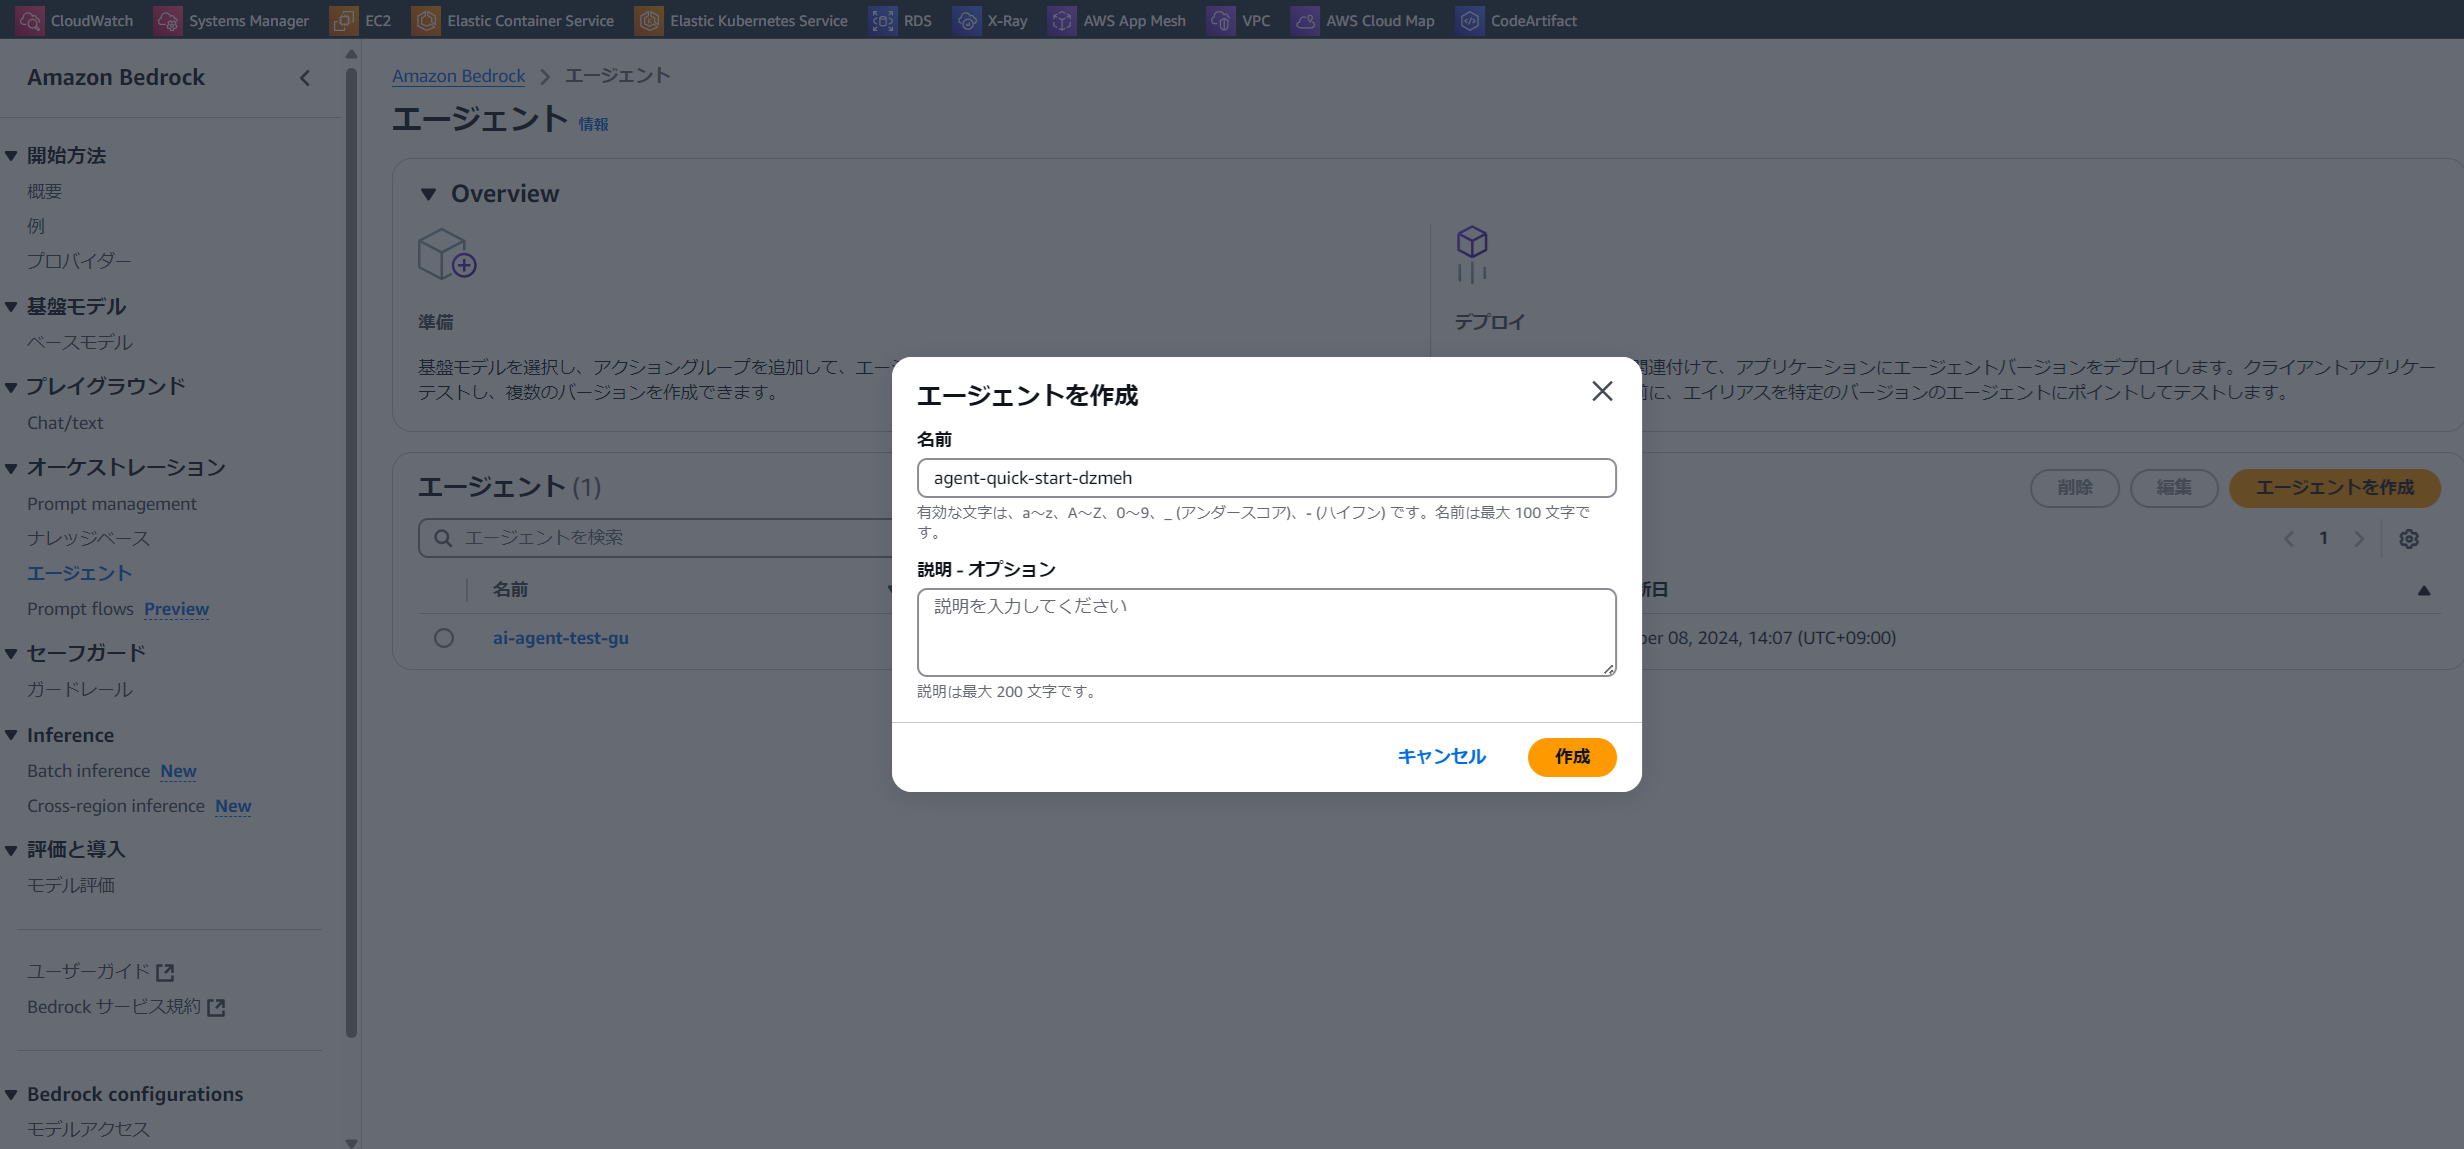
エージェント名を入力して「作成」をクリックします
-
エージェントビルダーの画面に遷移します
Claude 3 Sonnetモデルを選択します。(好きなモデルを選択すればいいです)
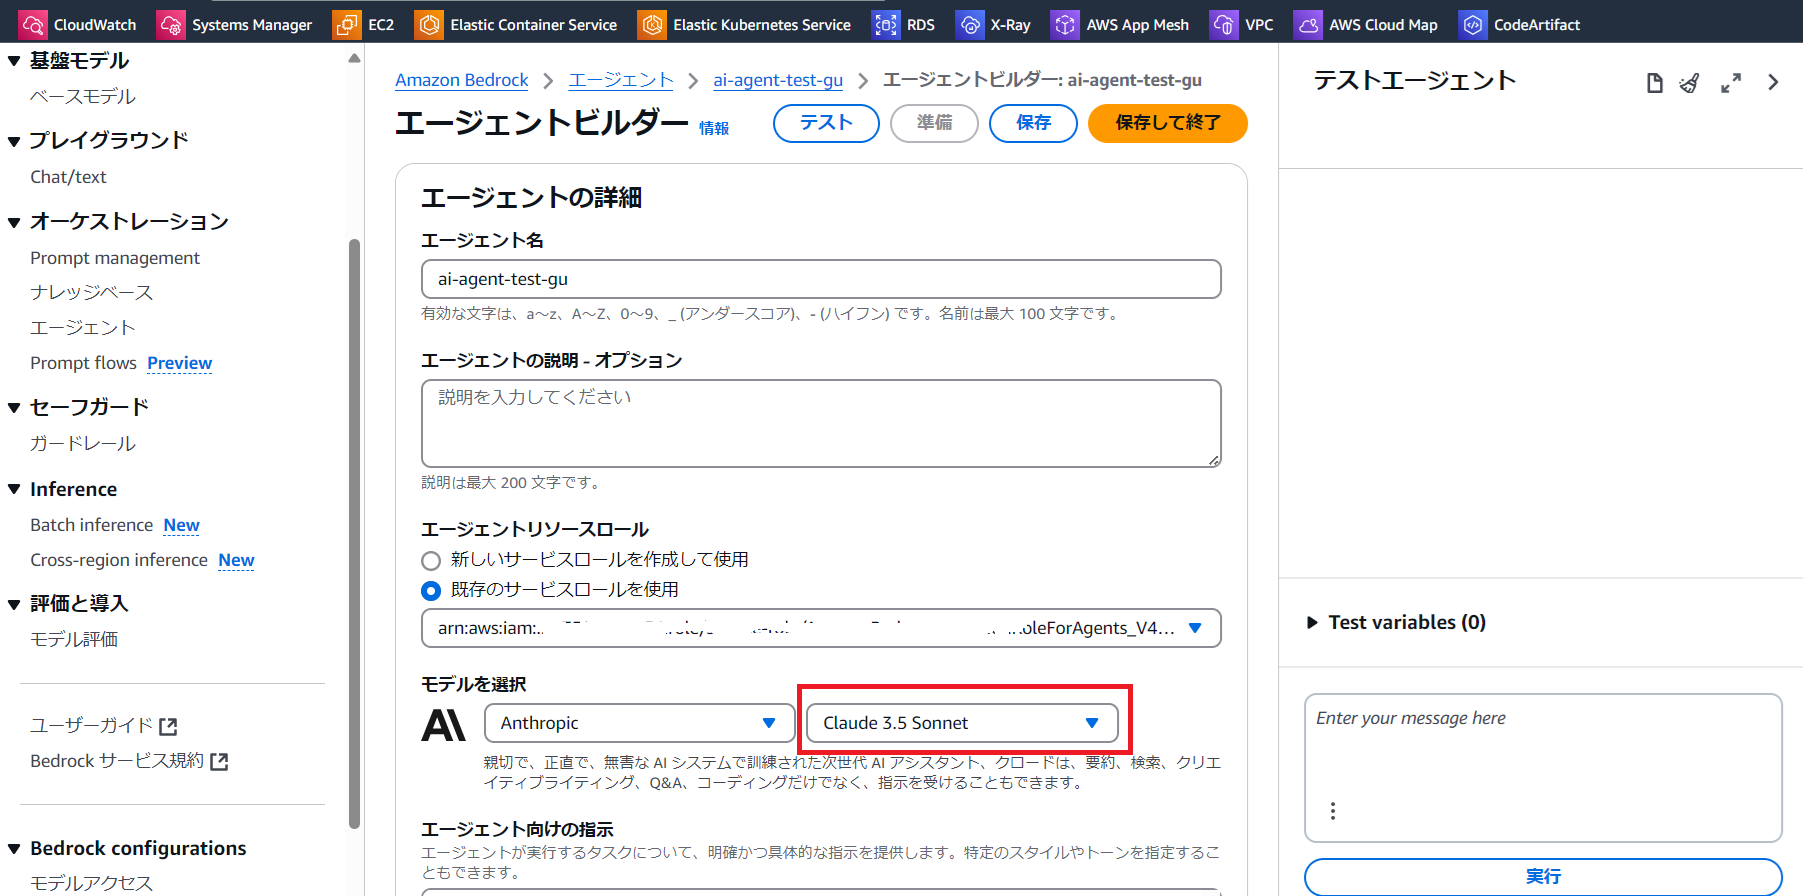
右上の「保存して終了」をクリックします -
右側に表示される「準備」をクリックします
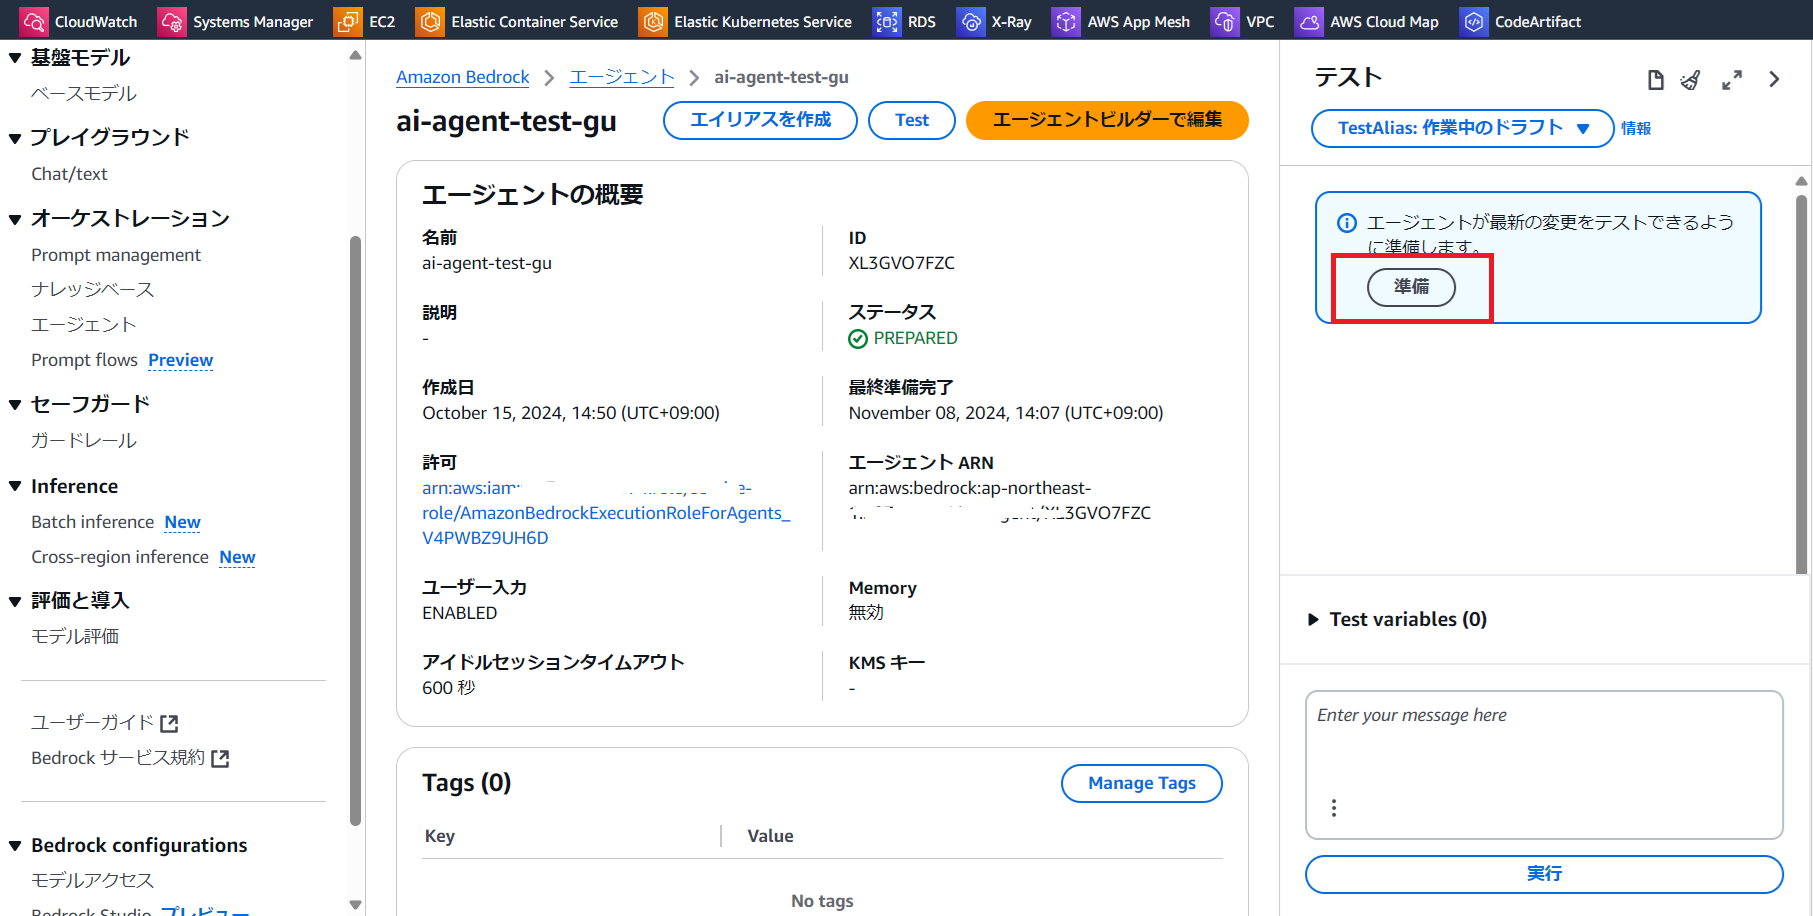
-
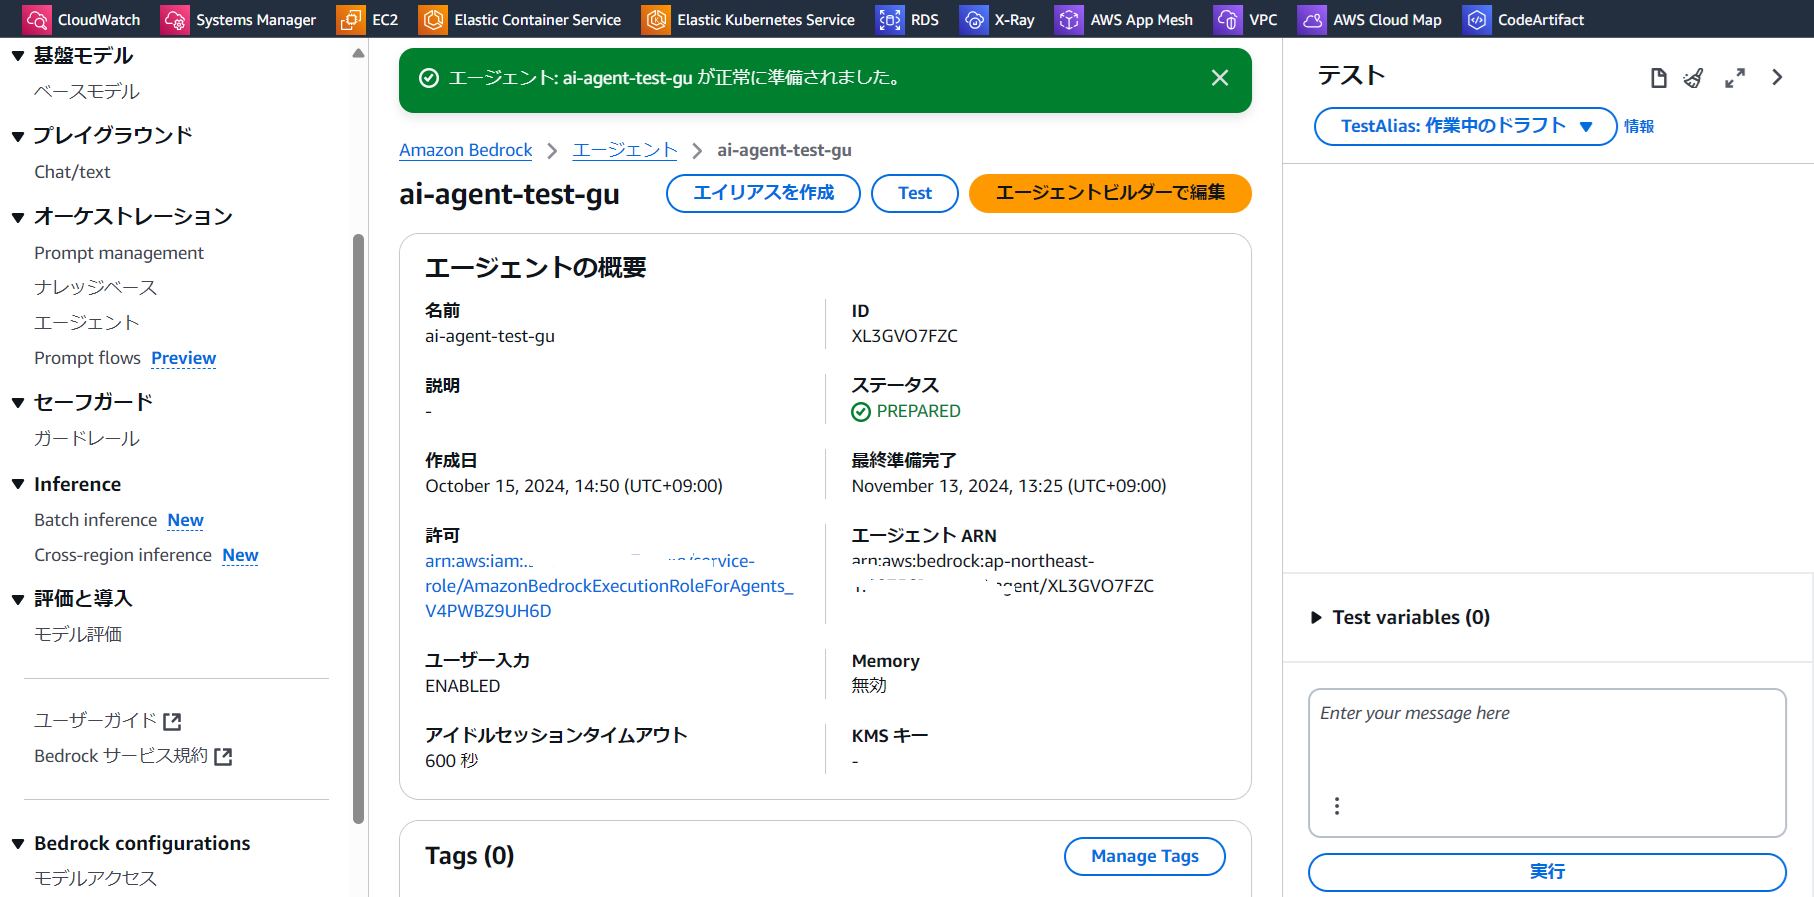
上に「正常に準備されました」と表示されます
-
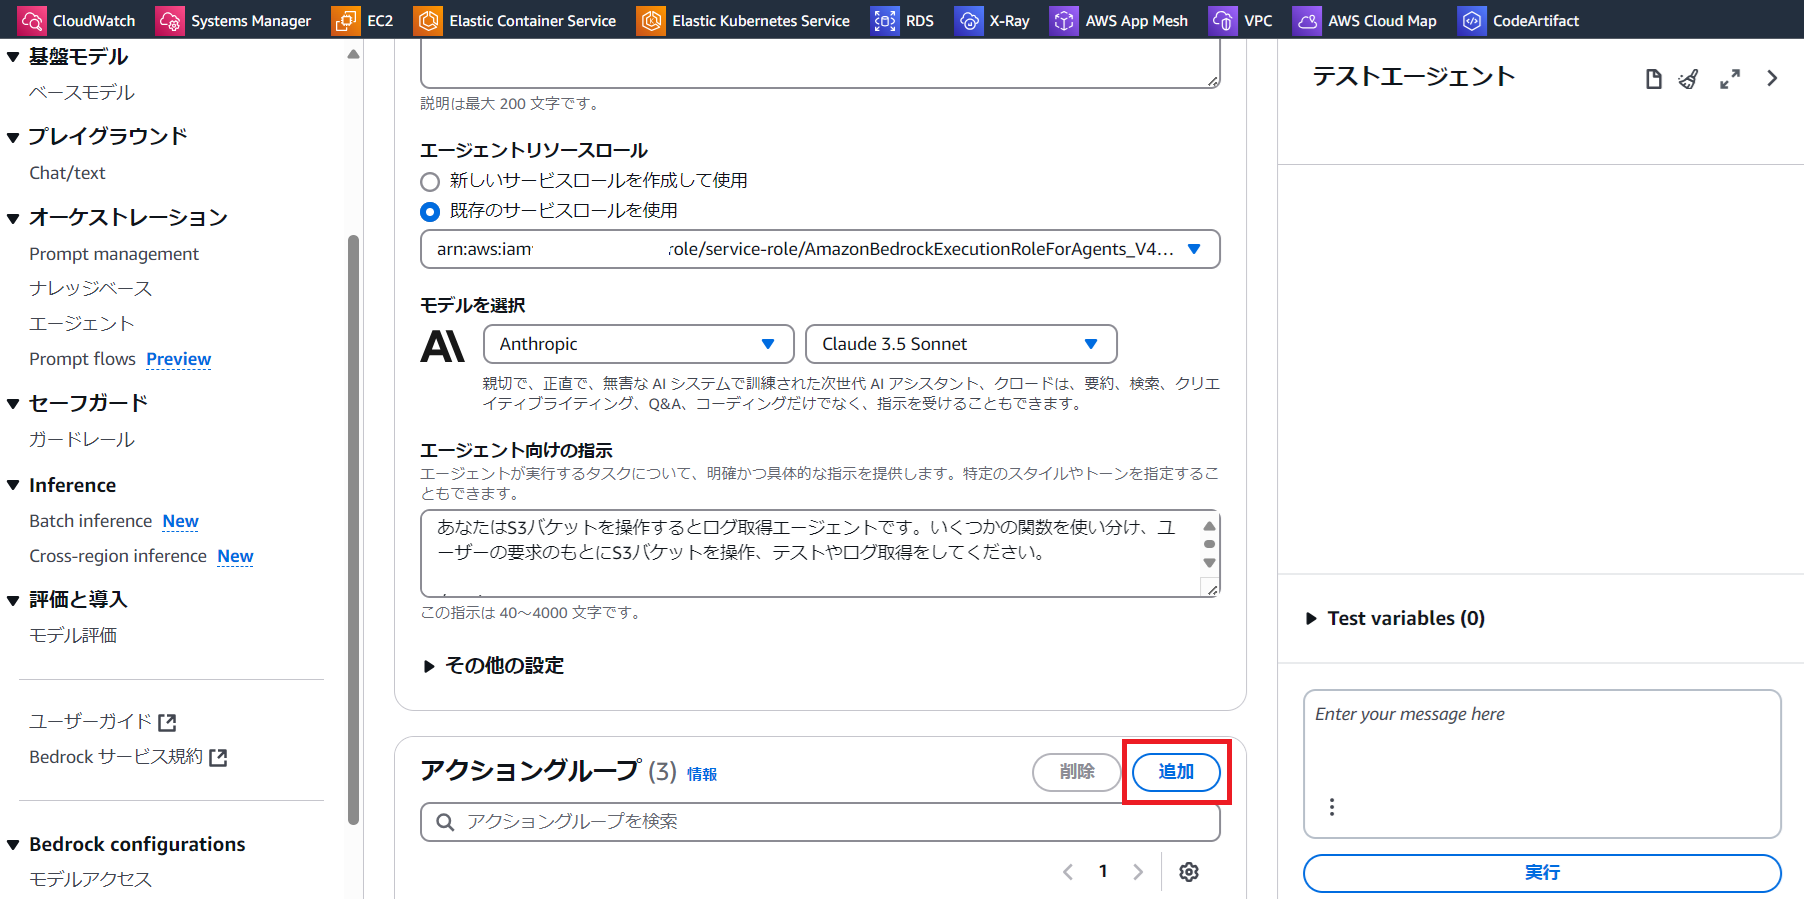
アクショングループを追加します
アクショングループ項目の右上の「追加」をクリックします
-
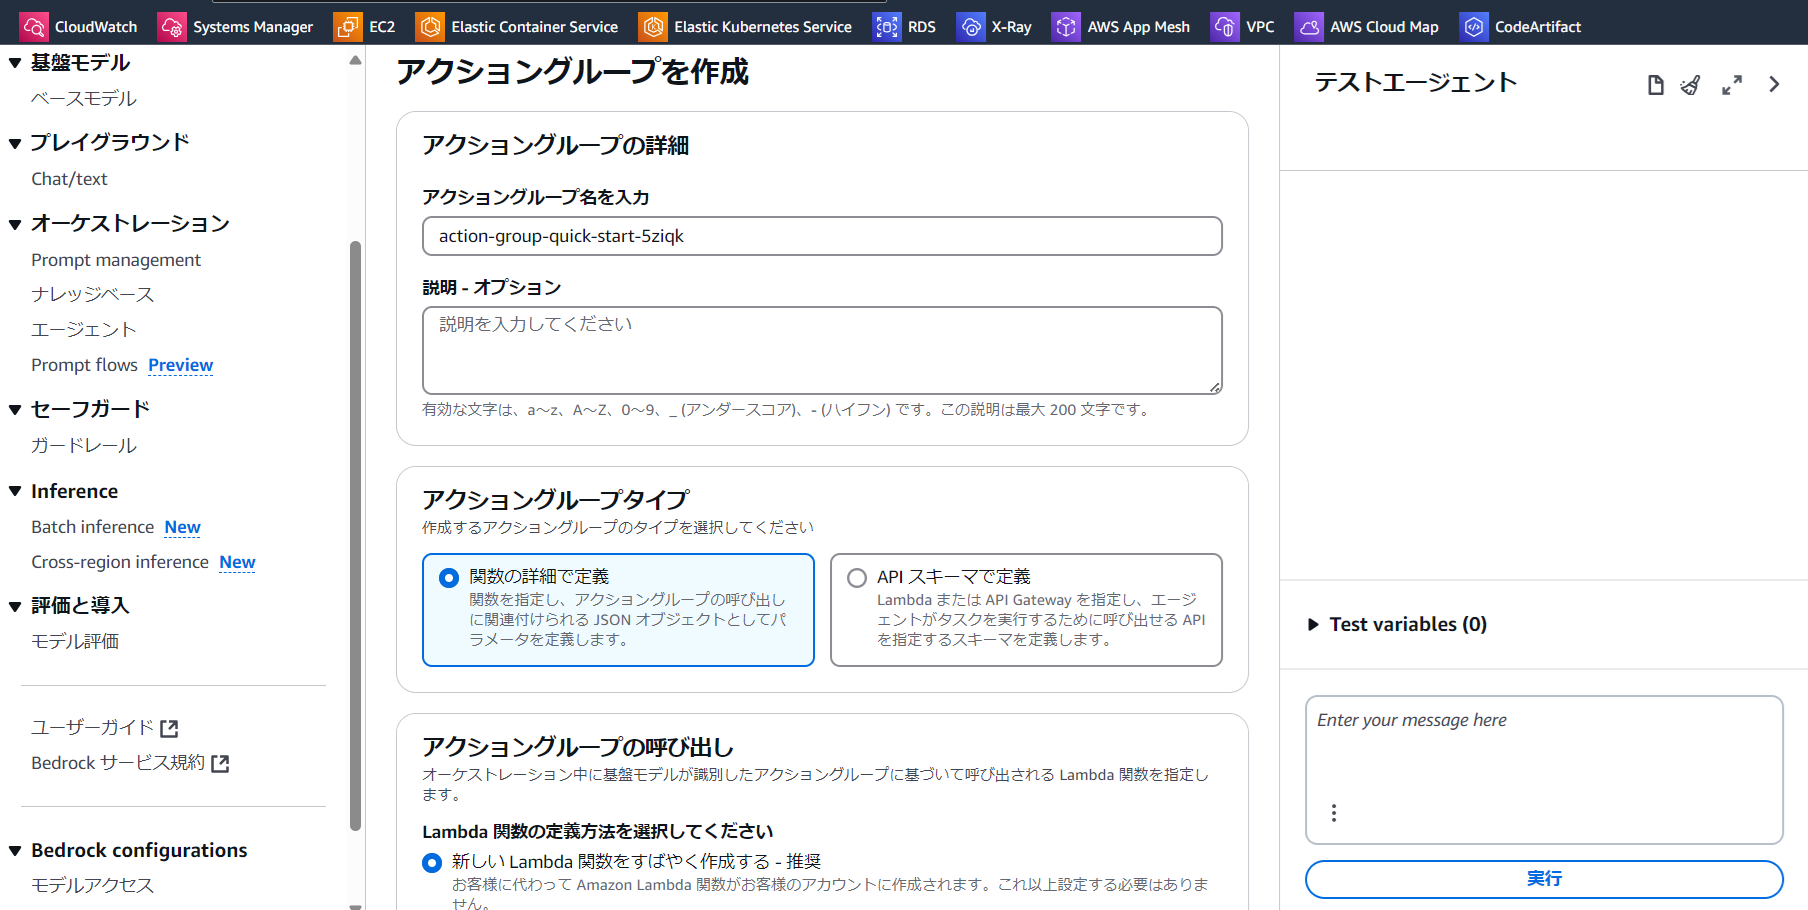
アクショングループを設定します
・アクショングループ名を入力します
・アクショングループタイプを「関数の詳細で定義」を選択します
・ 「Lambda 関数の定義方法を選択してください」のところ、「新しいLambda関数をすばやく作成する-推奨」を選択します
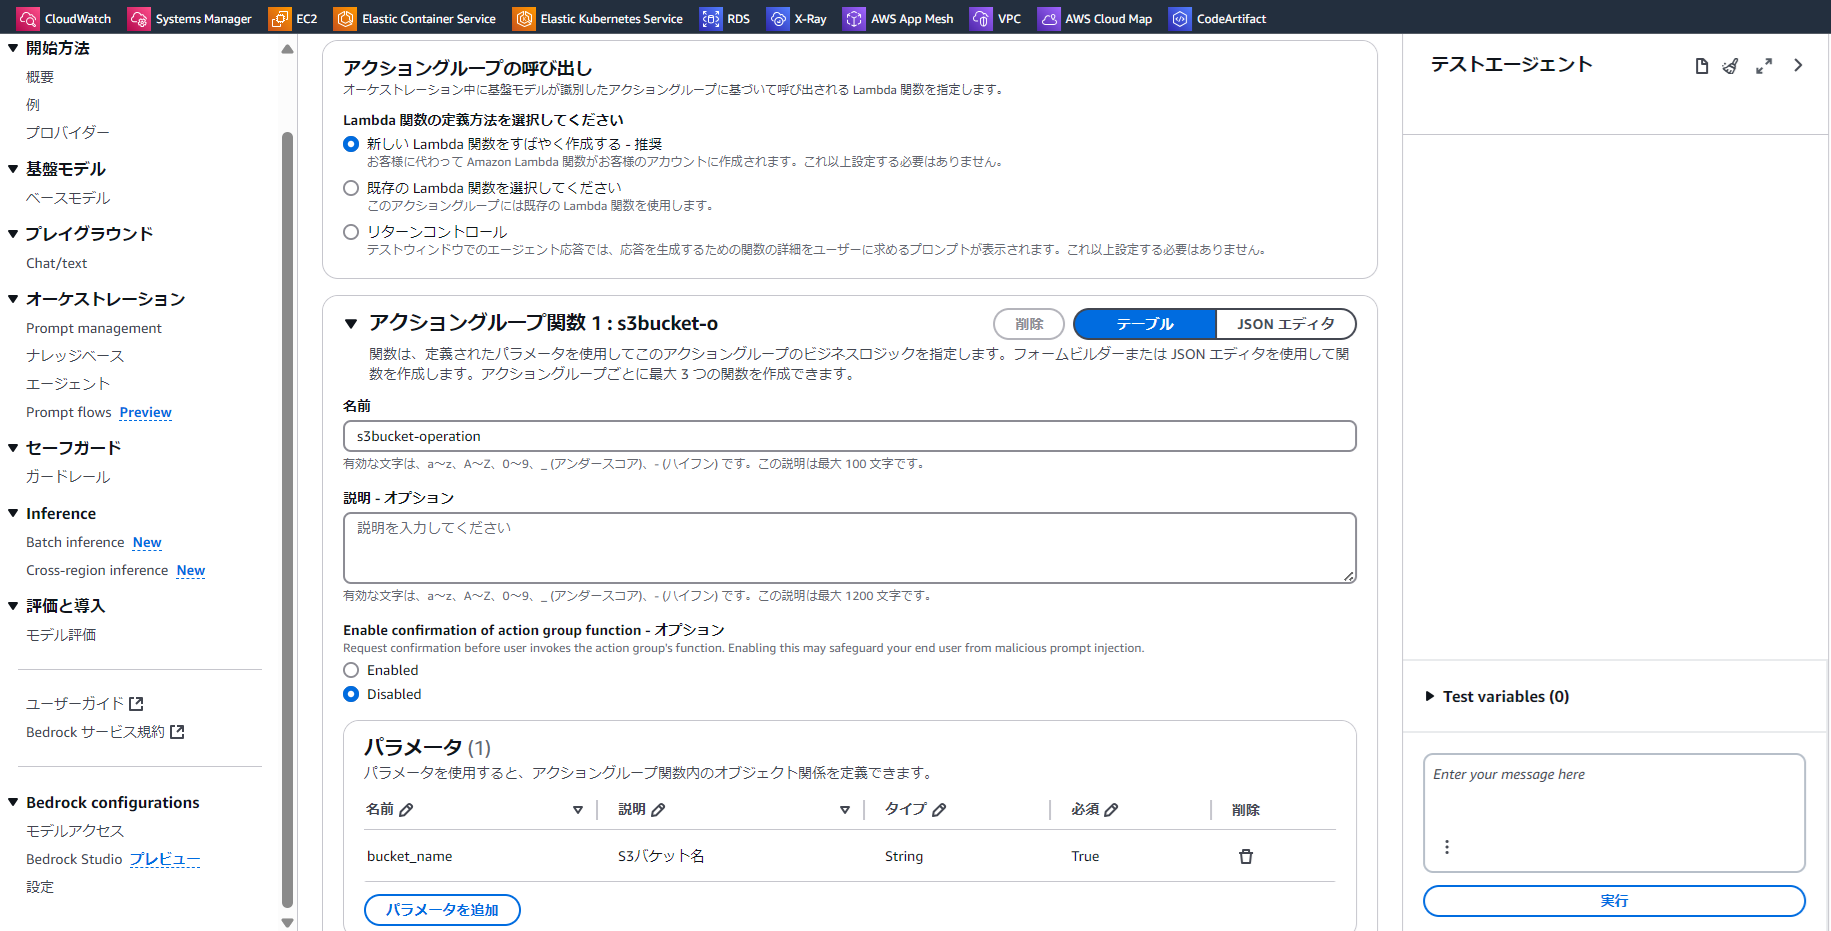
・アクショングループの呼び出しは、おすすめの「新しい Lambda 関数をすばやく作成する - 推奨」を選択します
-
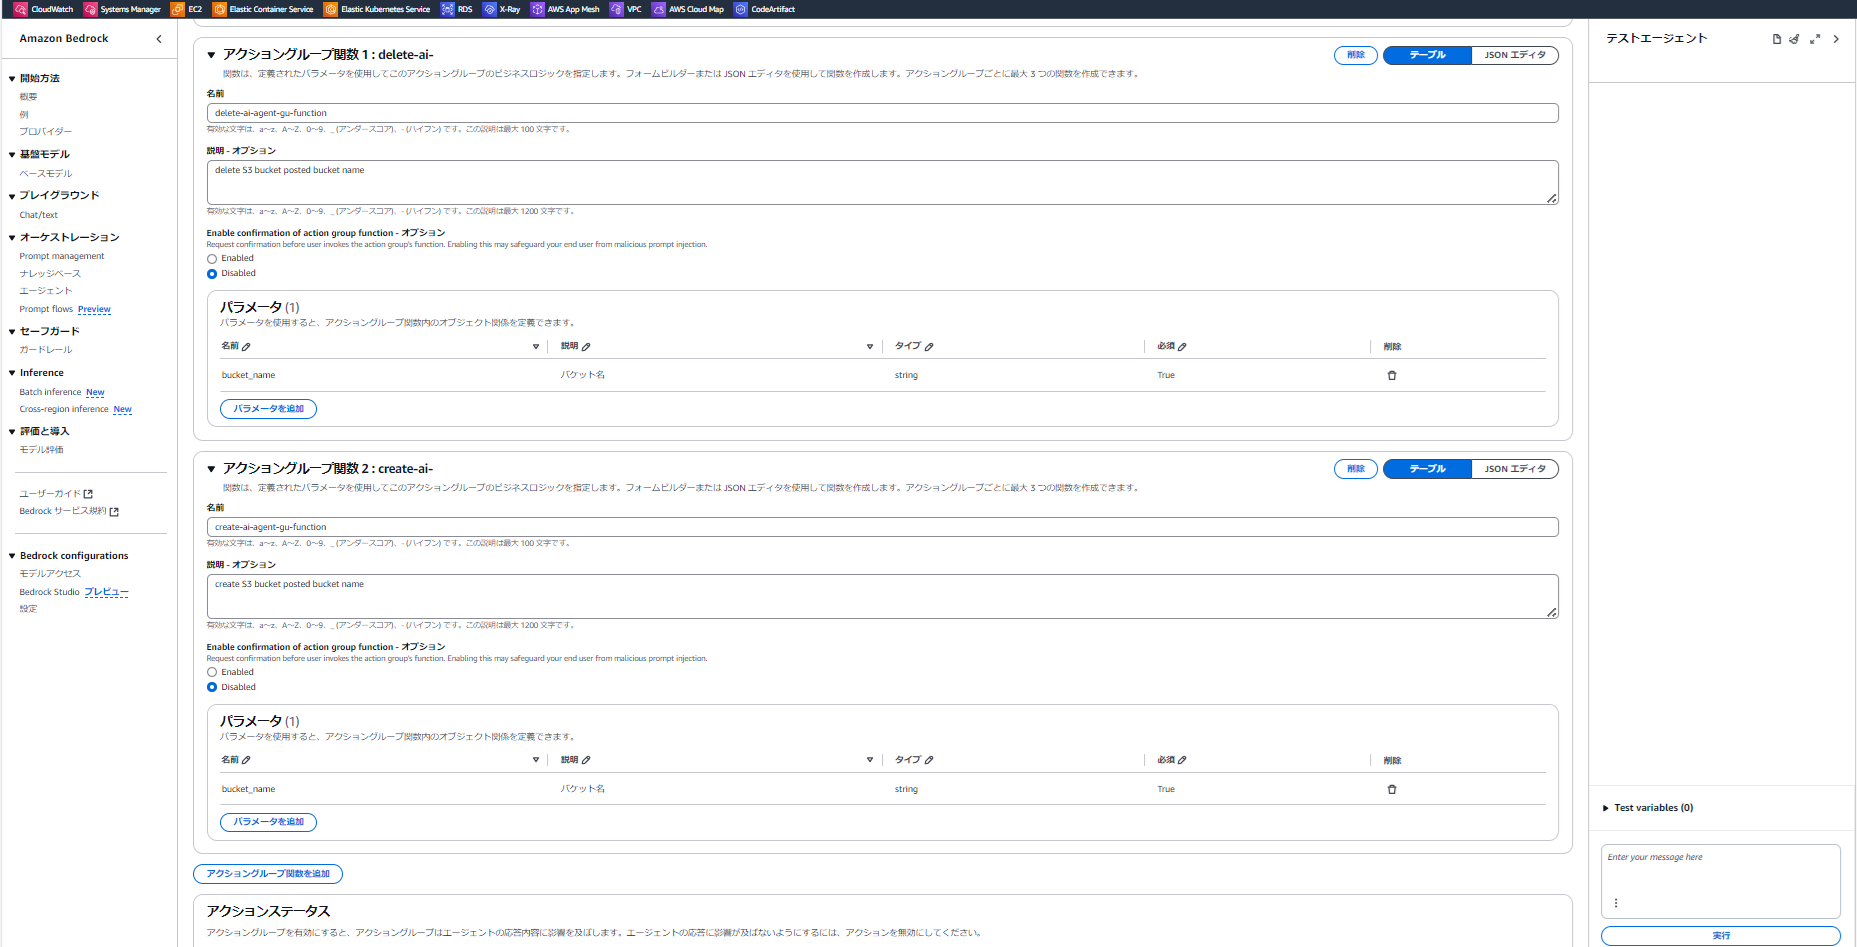
アクショングループ関数を作成します
・名前がdelete-ai-agent-gu-functionとcreate-ai-agent-gu-functionのアクショングループ関数を追加します
・ 「説明-オプション」にそれぞれ「delete S3 bucket posted bucket name」と「create S3 bucket posted bucket name」を記入
・パラメータとして、名前はbucket_name、説明はS3バケット名、タイプはString、必須はTrueにします。
-
エージェント向けの指示を作成します
エージェントの編集画面を開き、「エージェント向けの指示」に以下の指示を入力しますあなたはS3バケットを操作するエージェントです。いくつかの関数を使い分け、ユーザーの要求のもとにS3バケットを作成か削除をしてください。 タスク1: もし、例えば「バケット名がtest-guのS3バケットを作成してください」というように、S3バケットの作成を要求されたら、create-ai-agent-gu-functionというLambda関数を実行してください。 タスク2: もし、例えば「バケット名がtest-guのS3バケットを削除してください」というように、S3バケットの削除を要求されたら、delete-ai-agent-gu-functionというLambda関数を実行してください。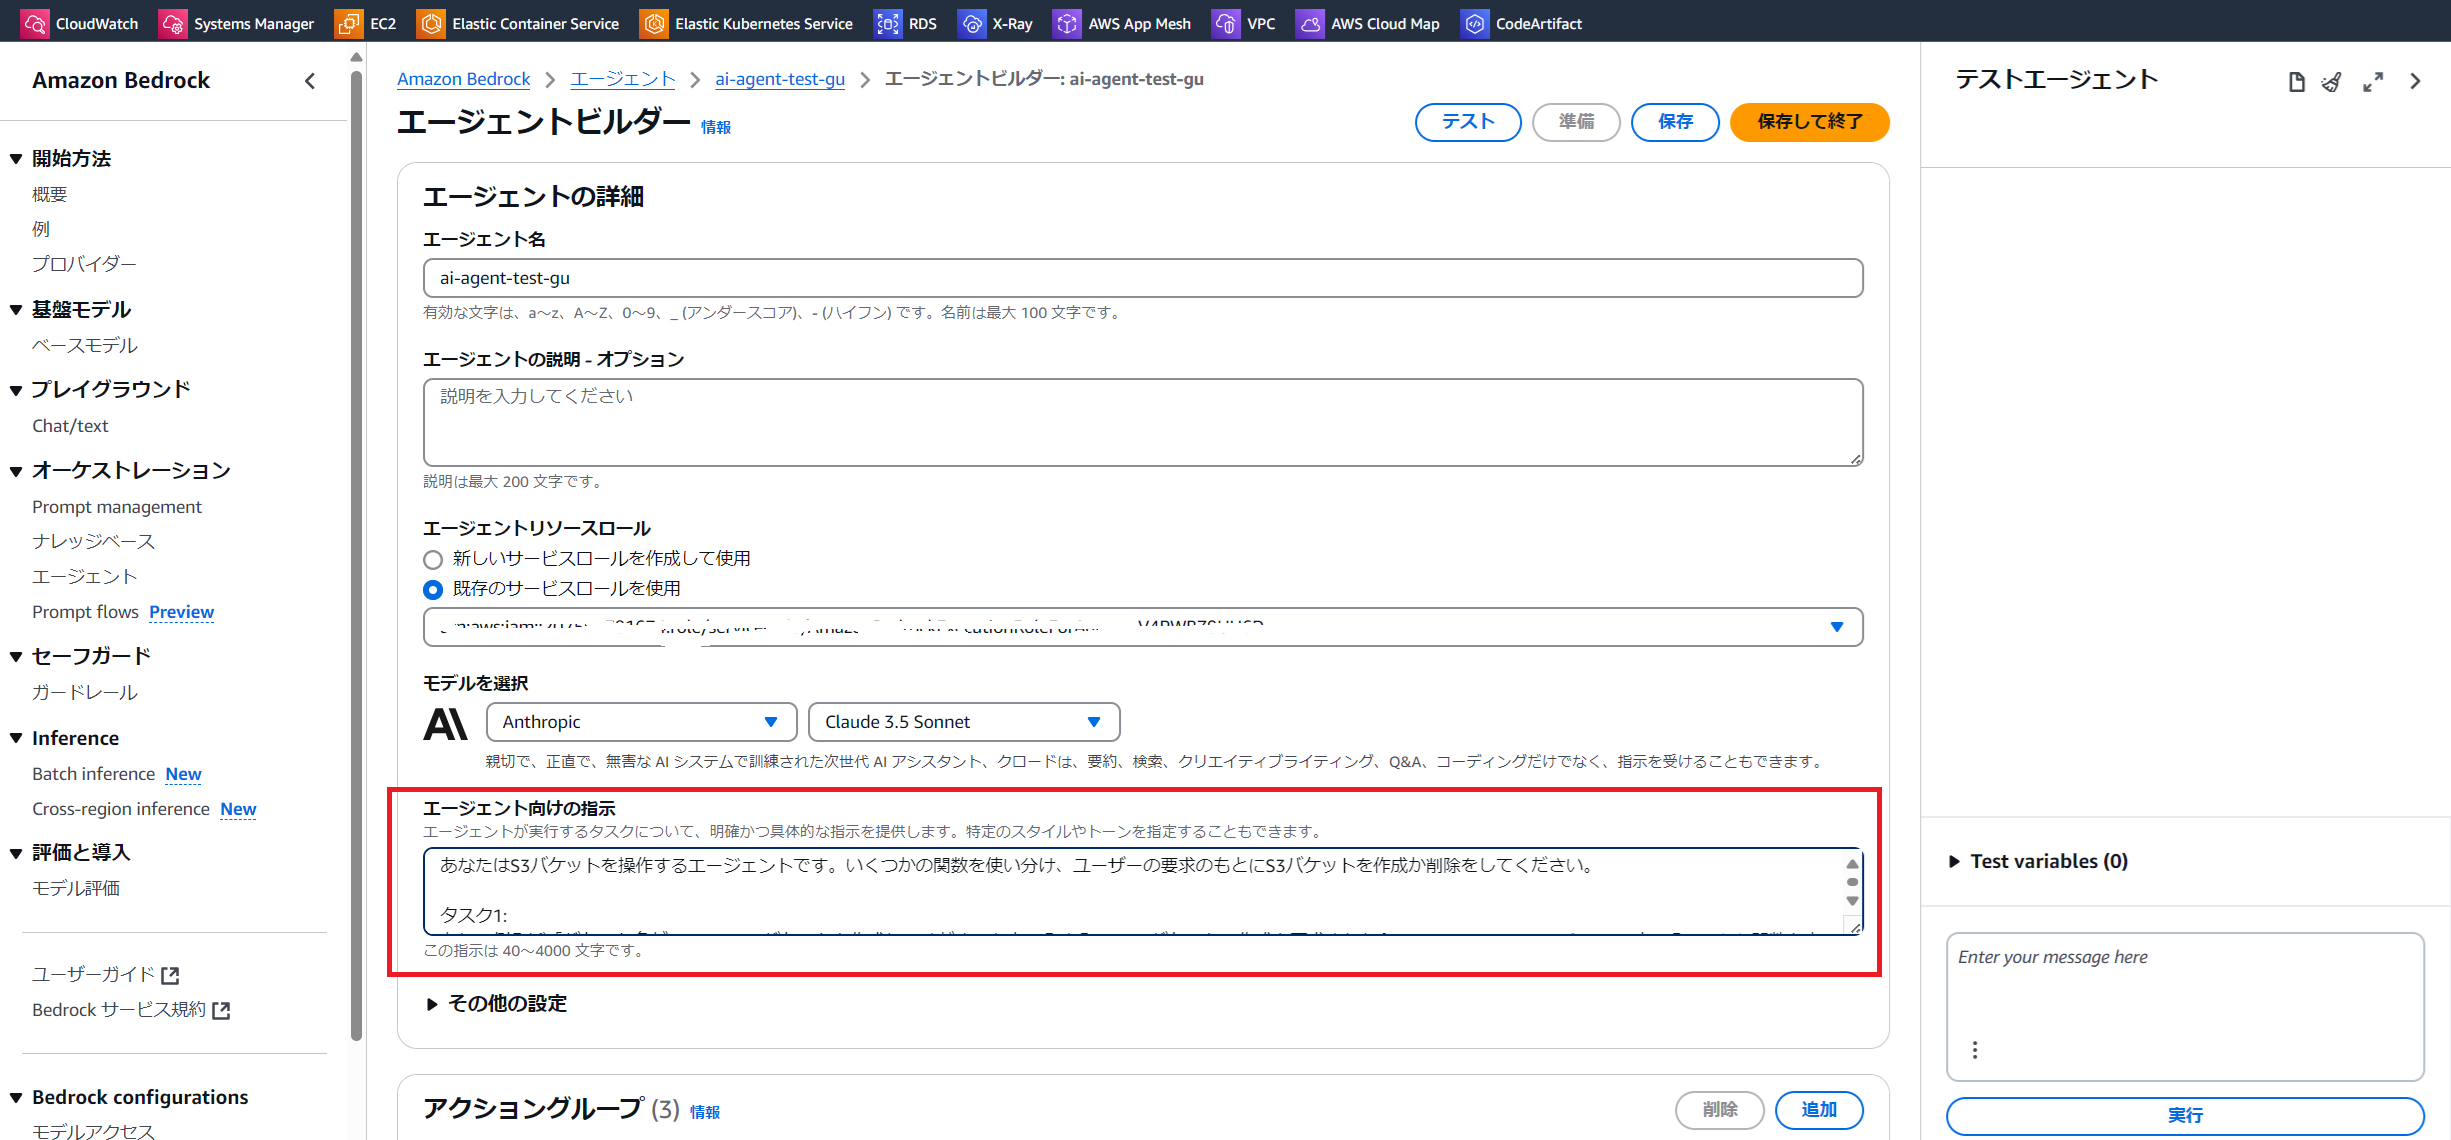
-
Lambdaを作成
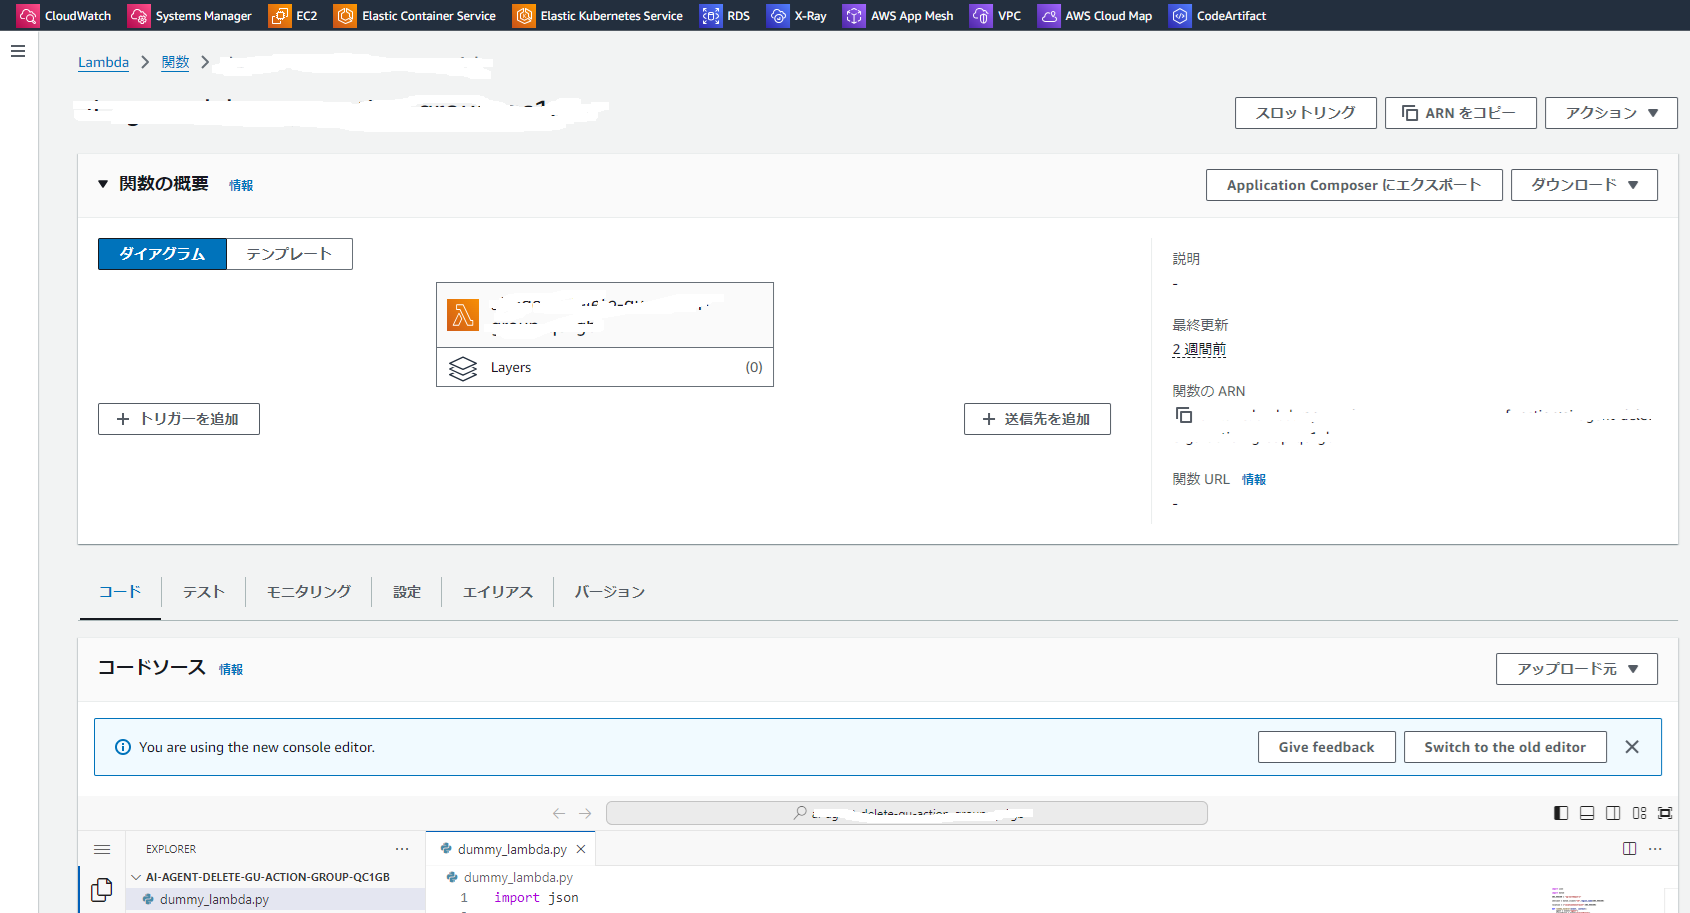
Lambdaの画面コンソールにアクセスします
新しいLambda関数を作る設定にしたため、dummyのlambda関数を作成されています
-
dummy_lambda.pyにS3の作成と削除コードを加えます
    import json

    import boto3

    AWS_REGION = "ap-northeast-1"

    s3Client = boto3.client("s3",region_name=AWS_REGION)

    location = {"LocationConstraint":AWS_REGION}

    def lambda_handler(event, context):
        agent = event["agent"]
        actionGroup = event["actionGroup"]
        function = event["function"]
        parameters = event.get("parameters", [])

        # Execute your business logic here. For more information,
        # refer to: https://docs.aws.amazon.com/bedrock/latest/userguide/agents-lambda.html

        bucket_name = next(item for item in parameters if item["name"] == "bucket_name")["value"]
        if function == 'delete-ai-agent-gu-function':
            bucket_instance=s3Client.delete_bucket(Bucket=bucket_name)

            responseBody =  {
                "TEXT": {
                    "body": f"Instance Deleted: {str(bucket_instance)}"
                }
            }
        elif function == 'create-ai-agent-gu-function':
            bucket_instance=s3Client.create_bucket(Bucket=bucket_name, CreateBucketConfiguration=location)

            responseBody =  {
                "TEXT": {
                    "body": f"Instance Created: {str(bucket_instance)}"
                }
            }

        action_response = {
            "actionGroup": actionGroup,
            "function": function,
            "functionResponse": {
                "responseBody": responseBody
            },
        }

        function_response = {"response": action_response, "messageVersion": event["messageVersion"]}
        print(f"Response: {function_response}")

        return function_response
dictionaryのeventからfunctionを取得し、前のステップの定義されたアクショングループ関数のcreate-ai-agent-gu-functionとdelete-ai-agent-gu-functionにより、処理を振り分けます
-
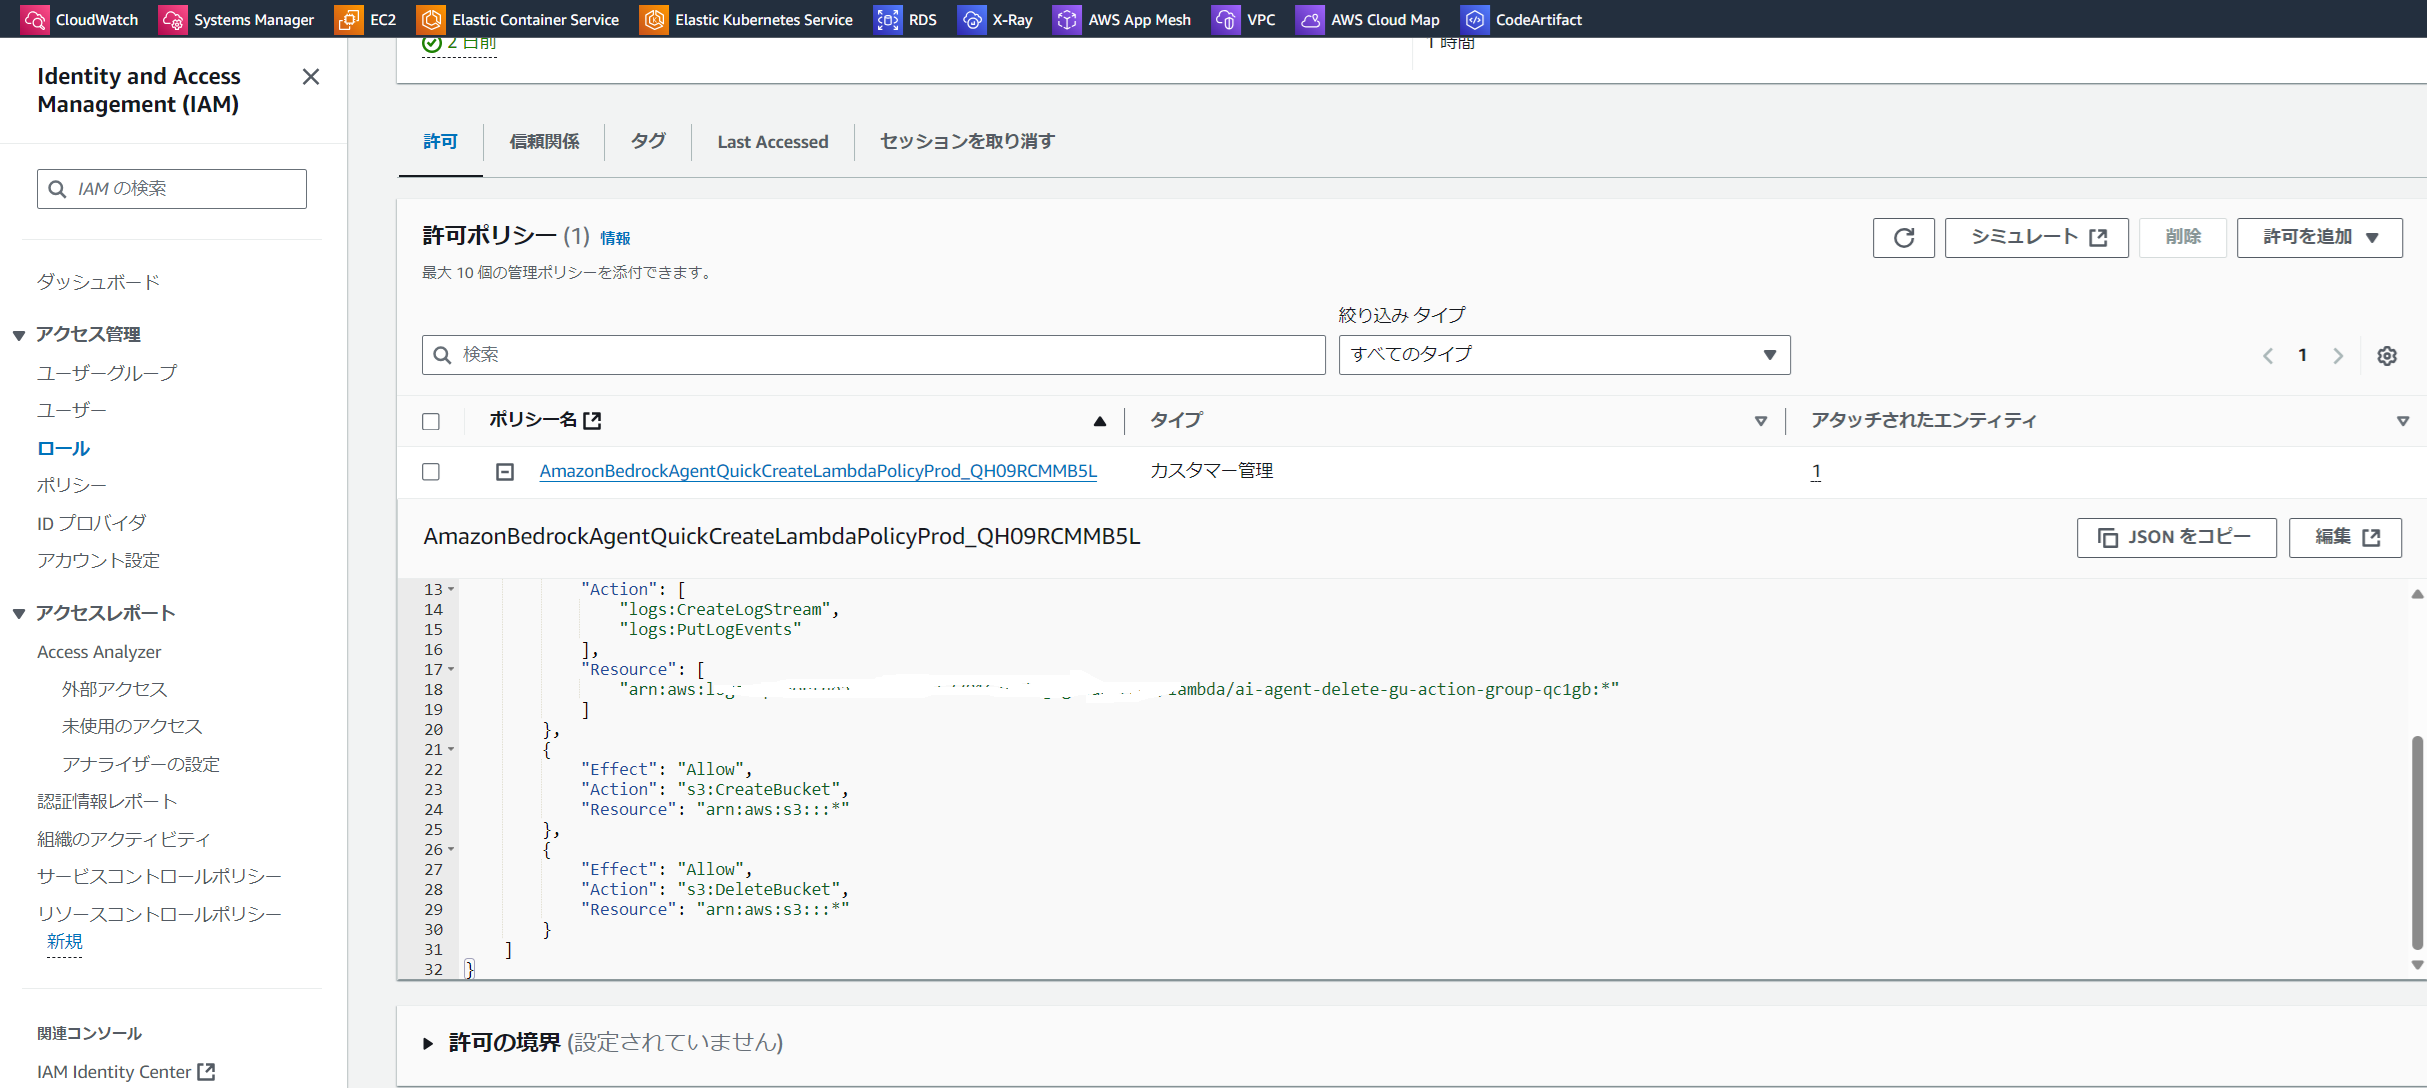
lambdaにS3のバケット操作権限を付与します
以下の権限を実行ロールに付与します。
-
左側の「Deploy(Ctrl+Shift+U)」をクリックします
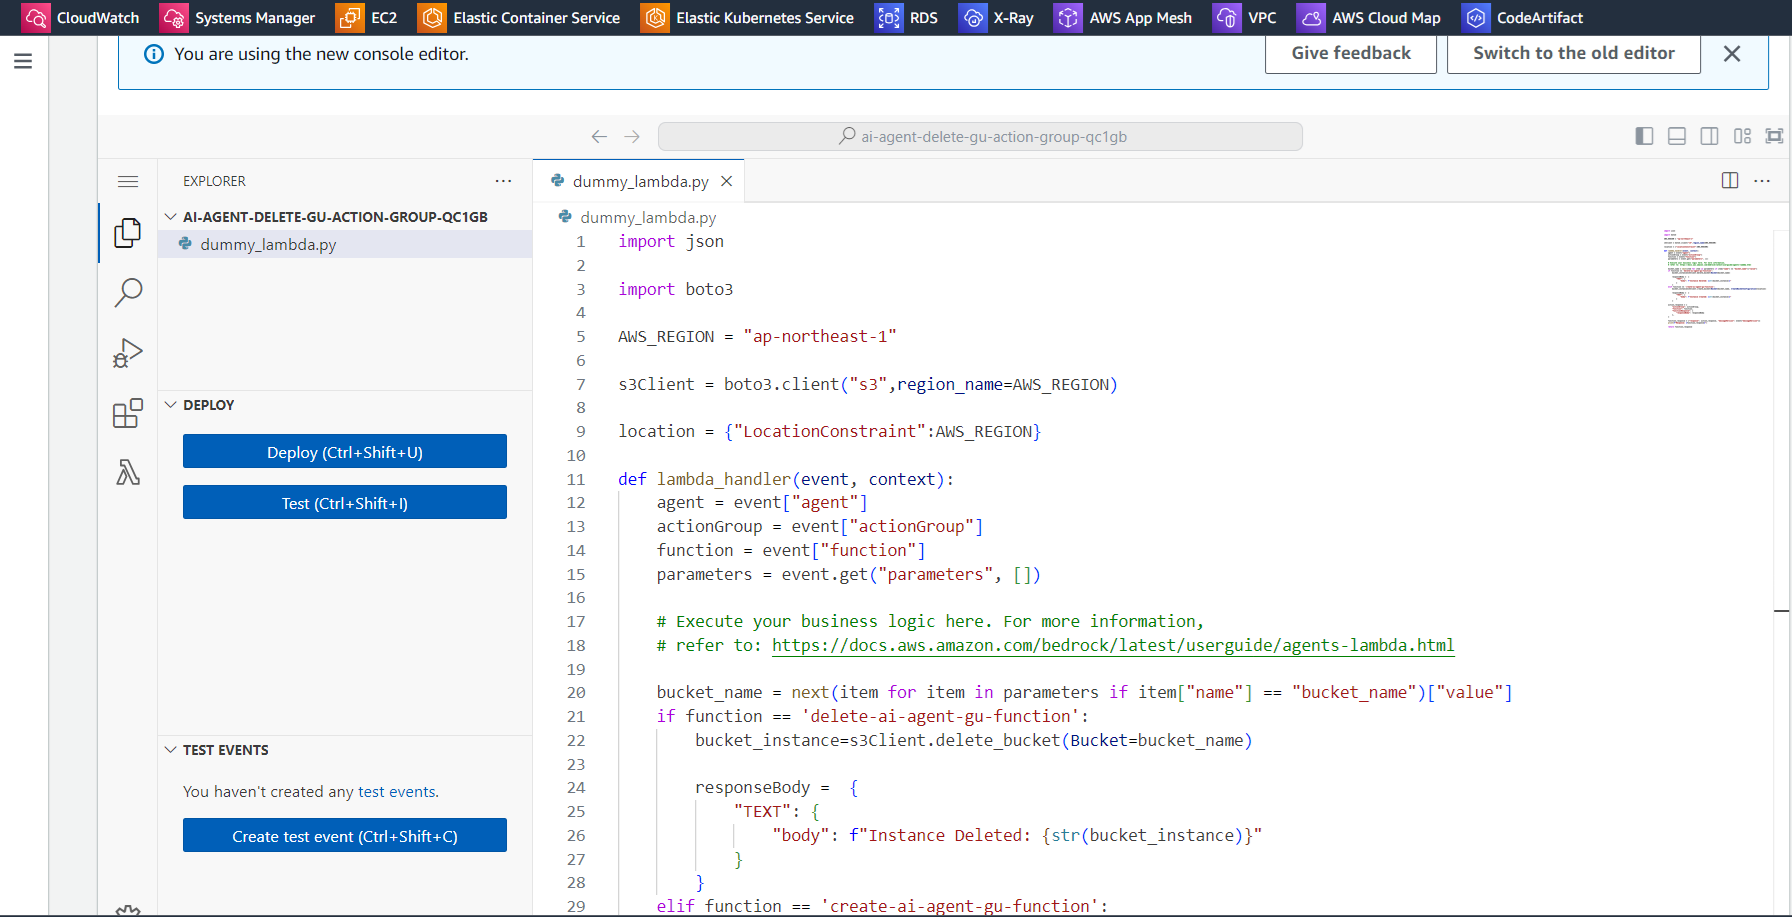
-
エージェント画面に戻り、画面上部の「エイリアスを作成」をクリックします
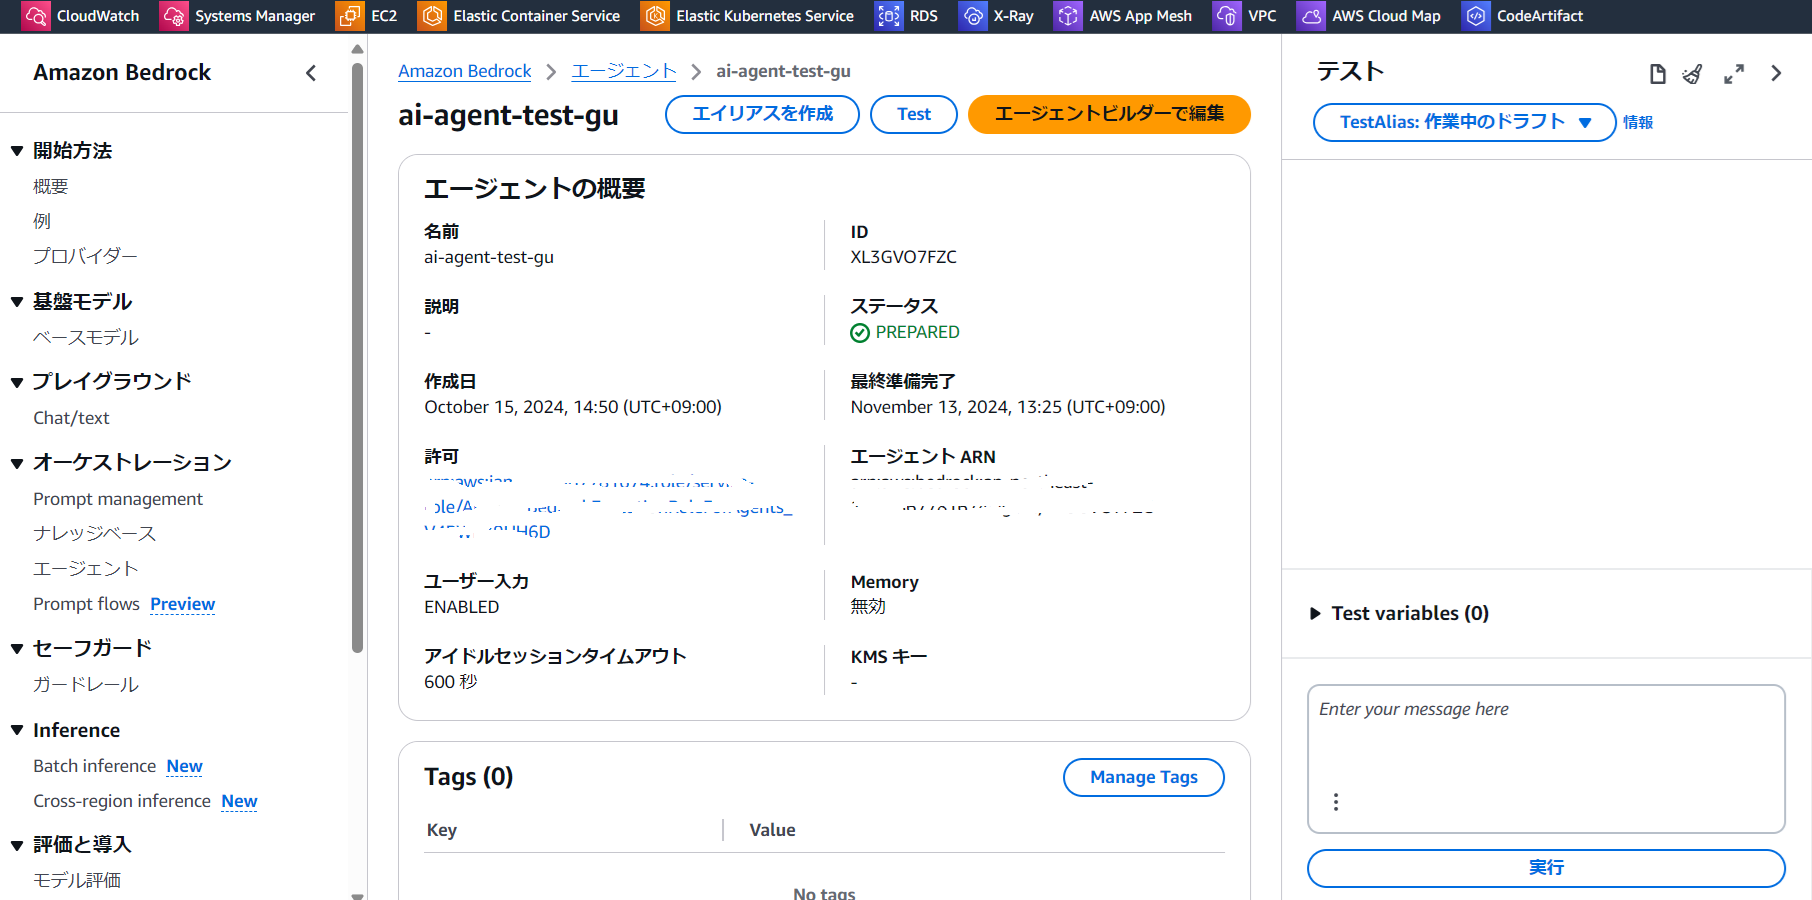
-
「エイリアス名」を入力し「エイリアスを作成」をクリックします
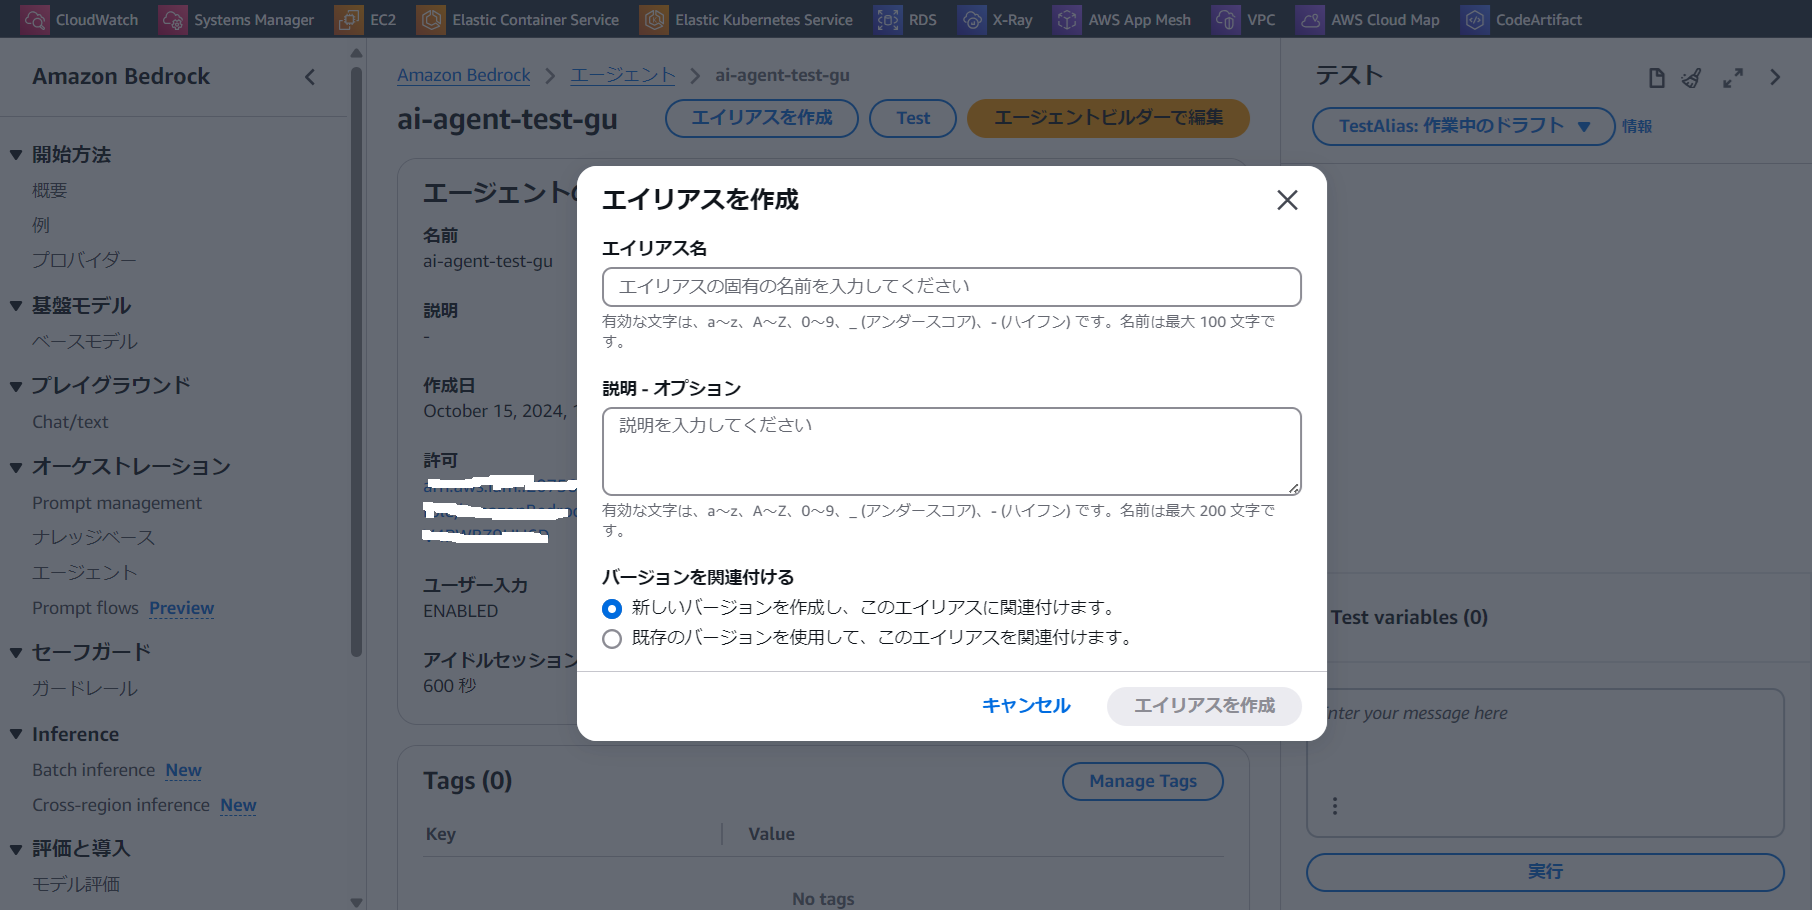
エイリアスが作成されます
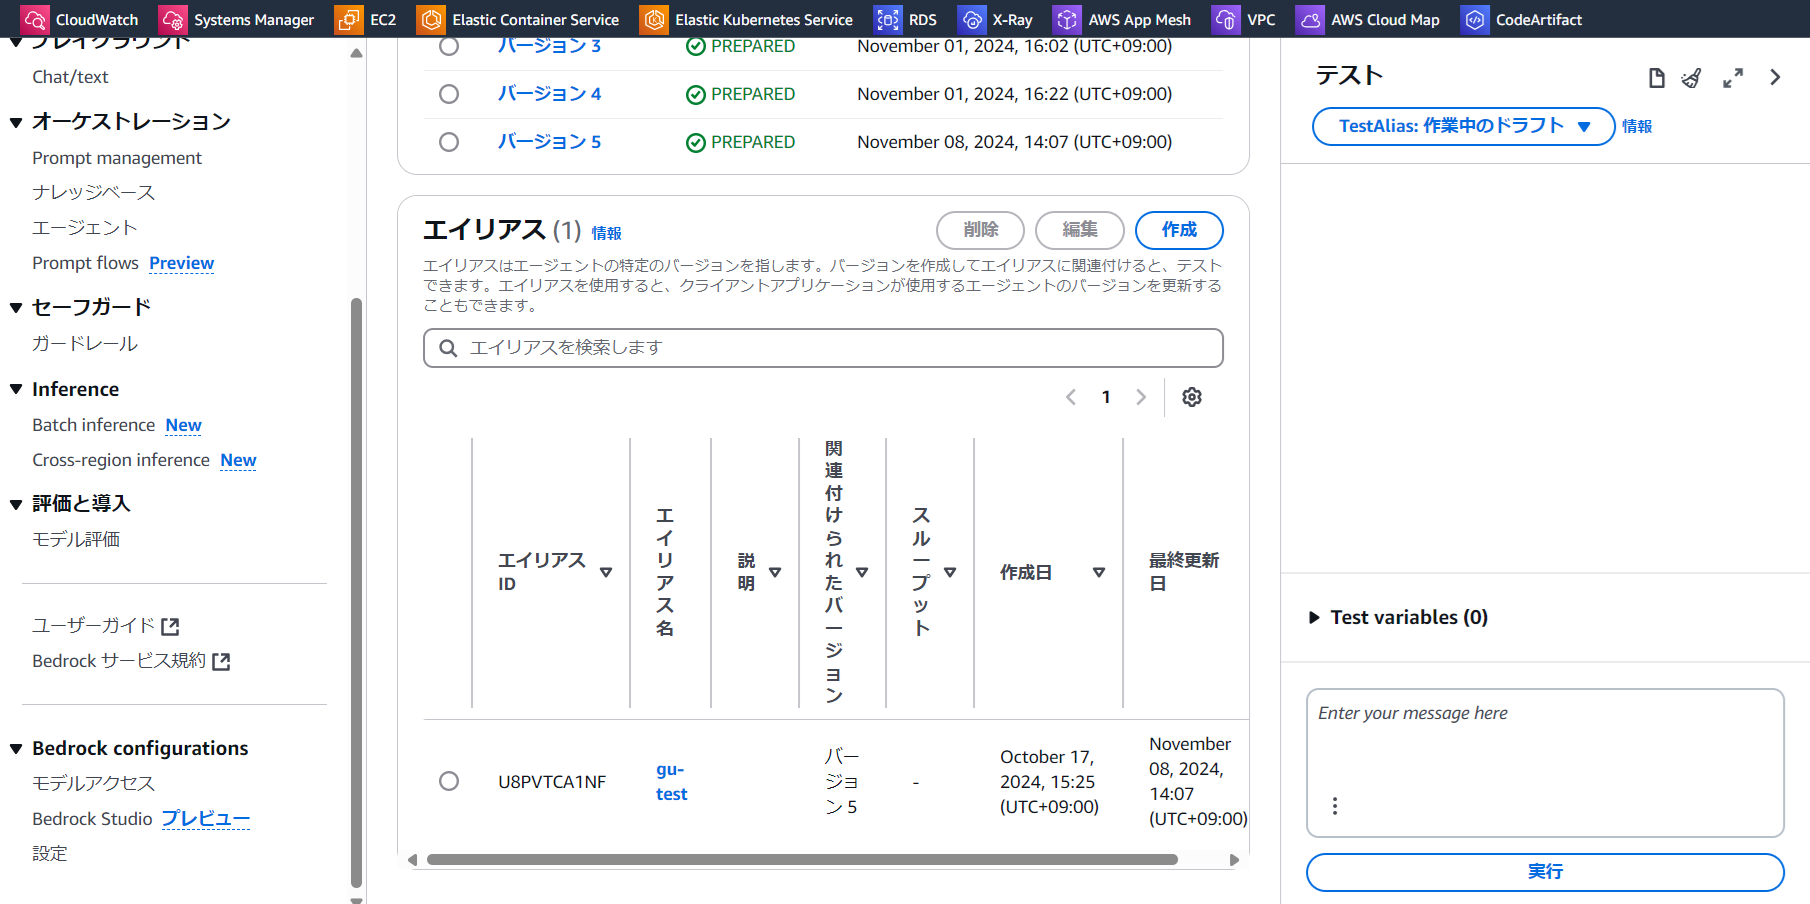
これでagentの作成は完了しました。
AWS Chatbotを作成する
-
AWSコンソールでChatbotの管理画面を開きます
「新しいクライアントを設定」をクリックします
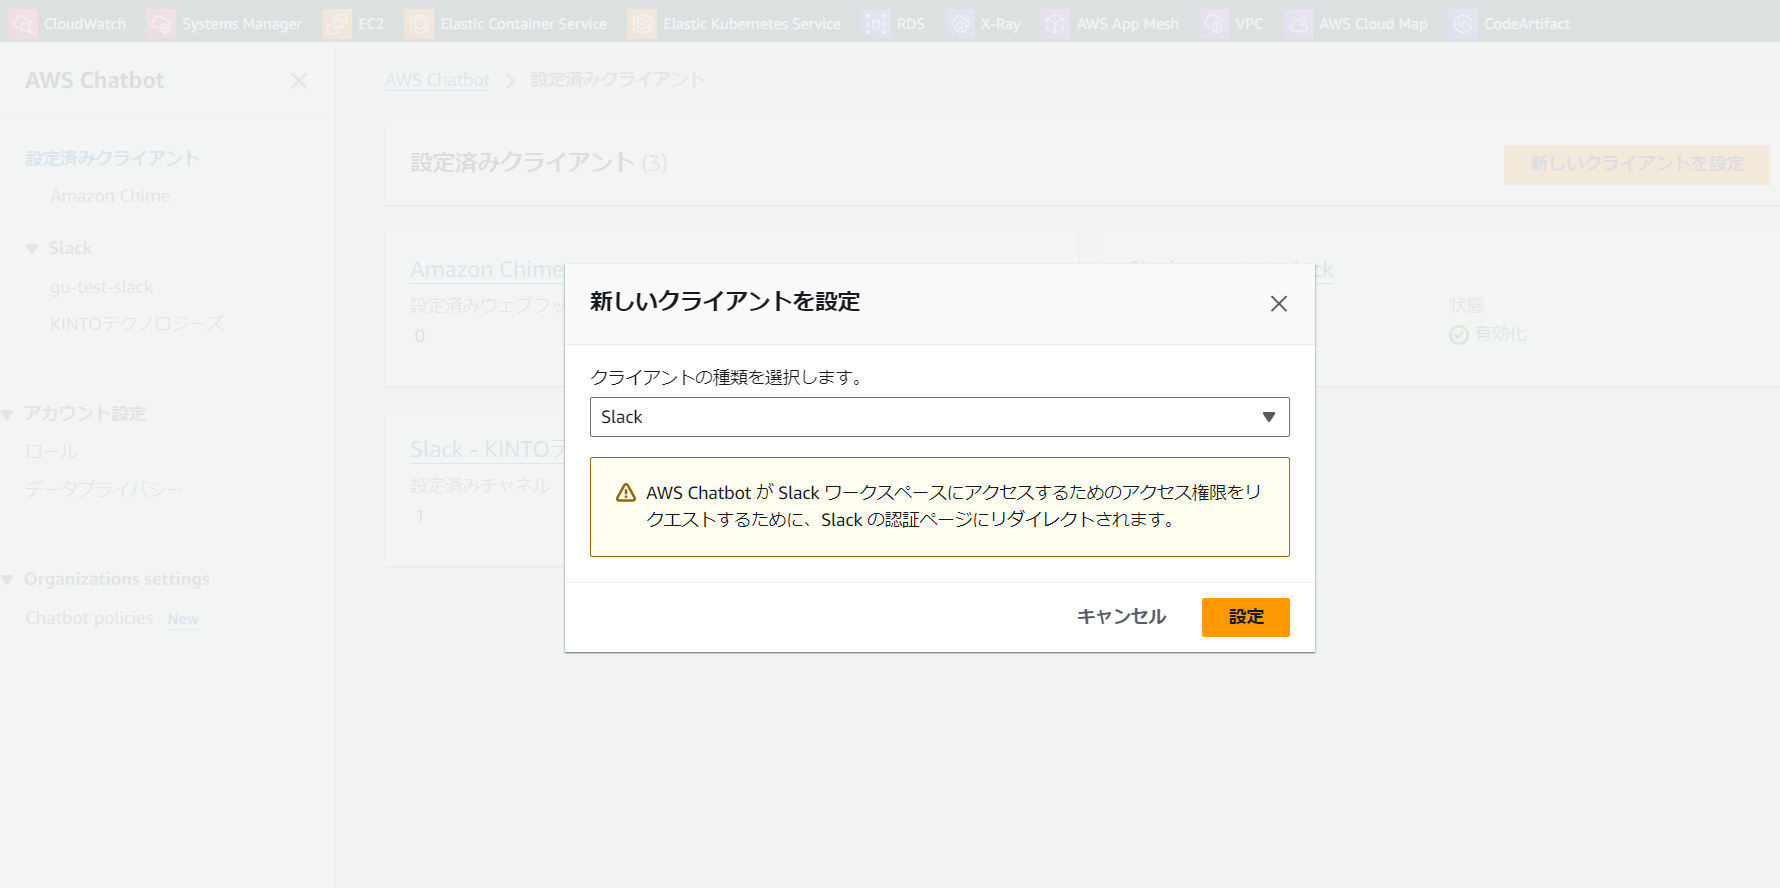
チャットクライアントを「slack」に設定し、「設定」をクリックします
-
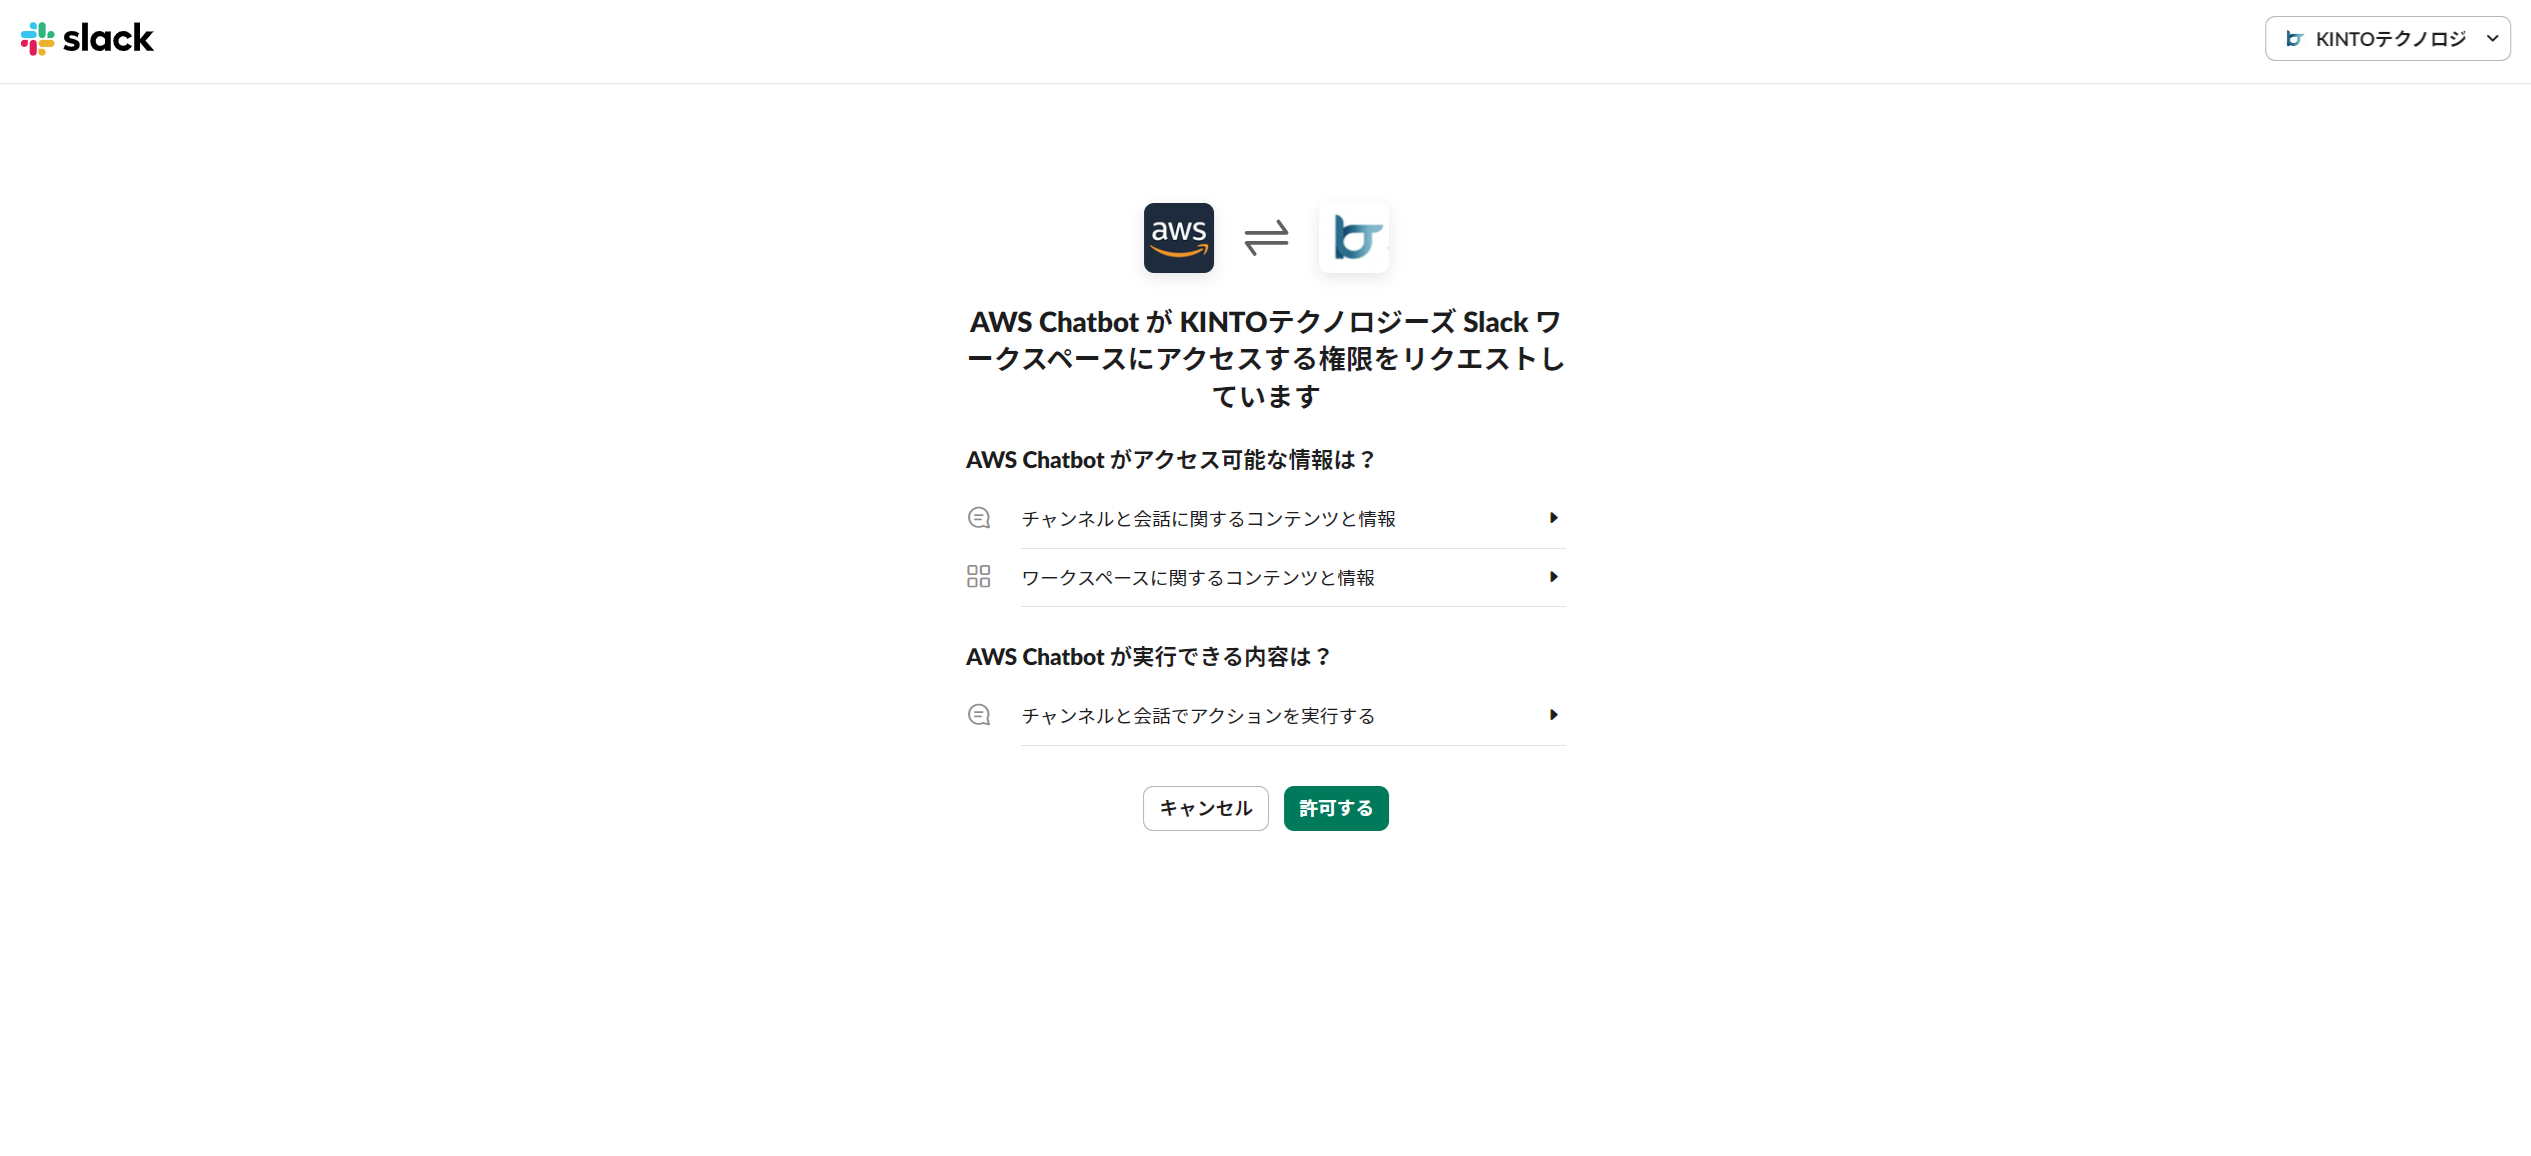
AWS Chatbotによるslackワークスペースへのアクセスを許可します
-
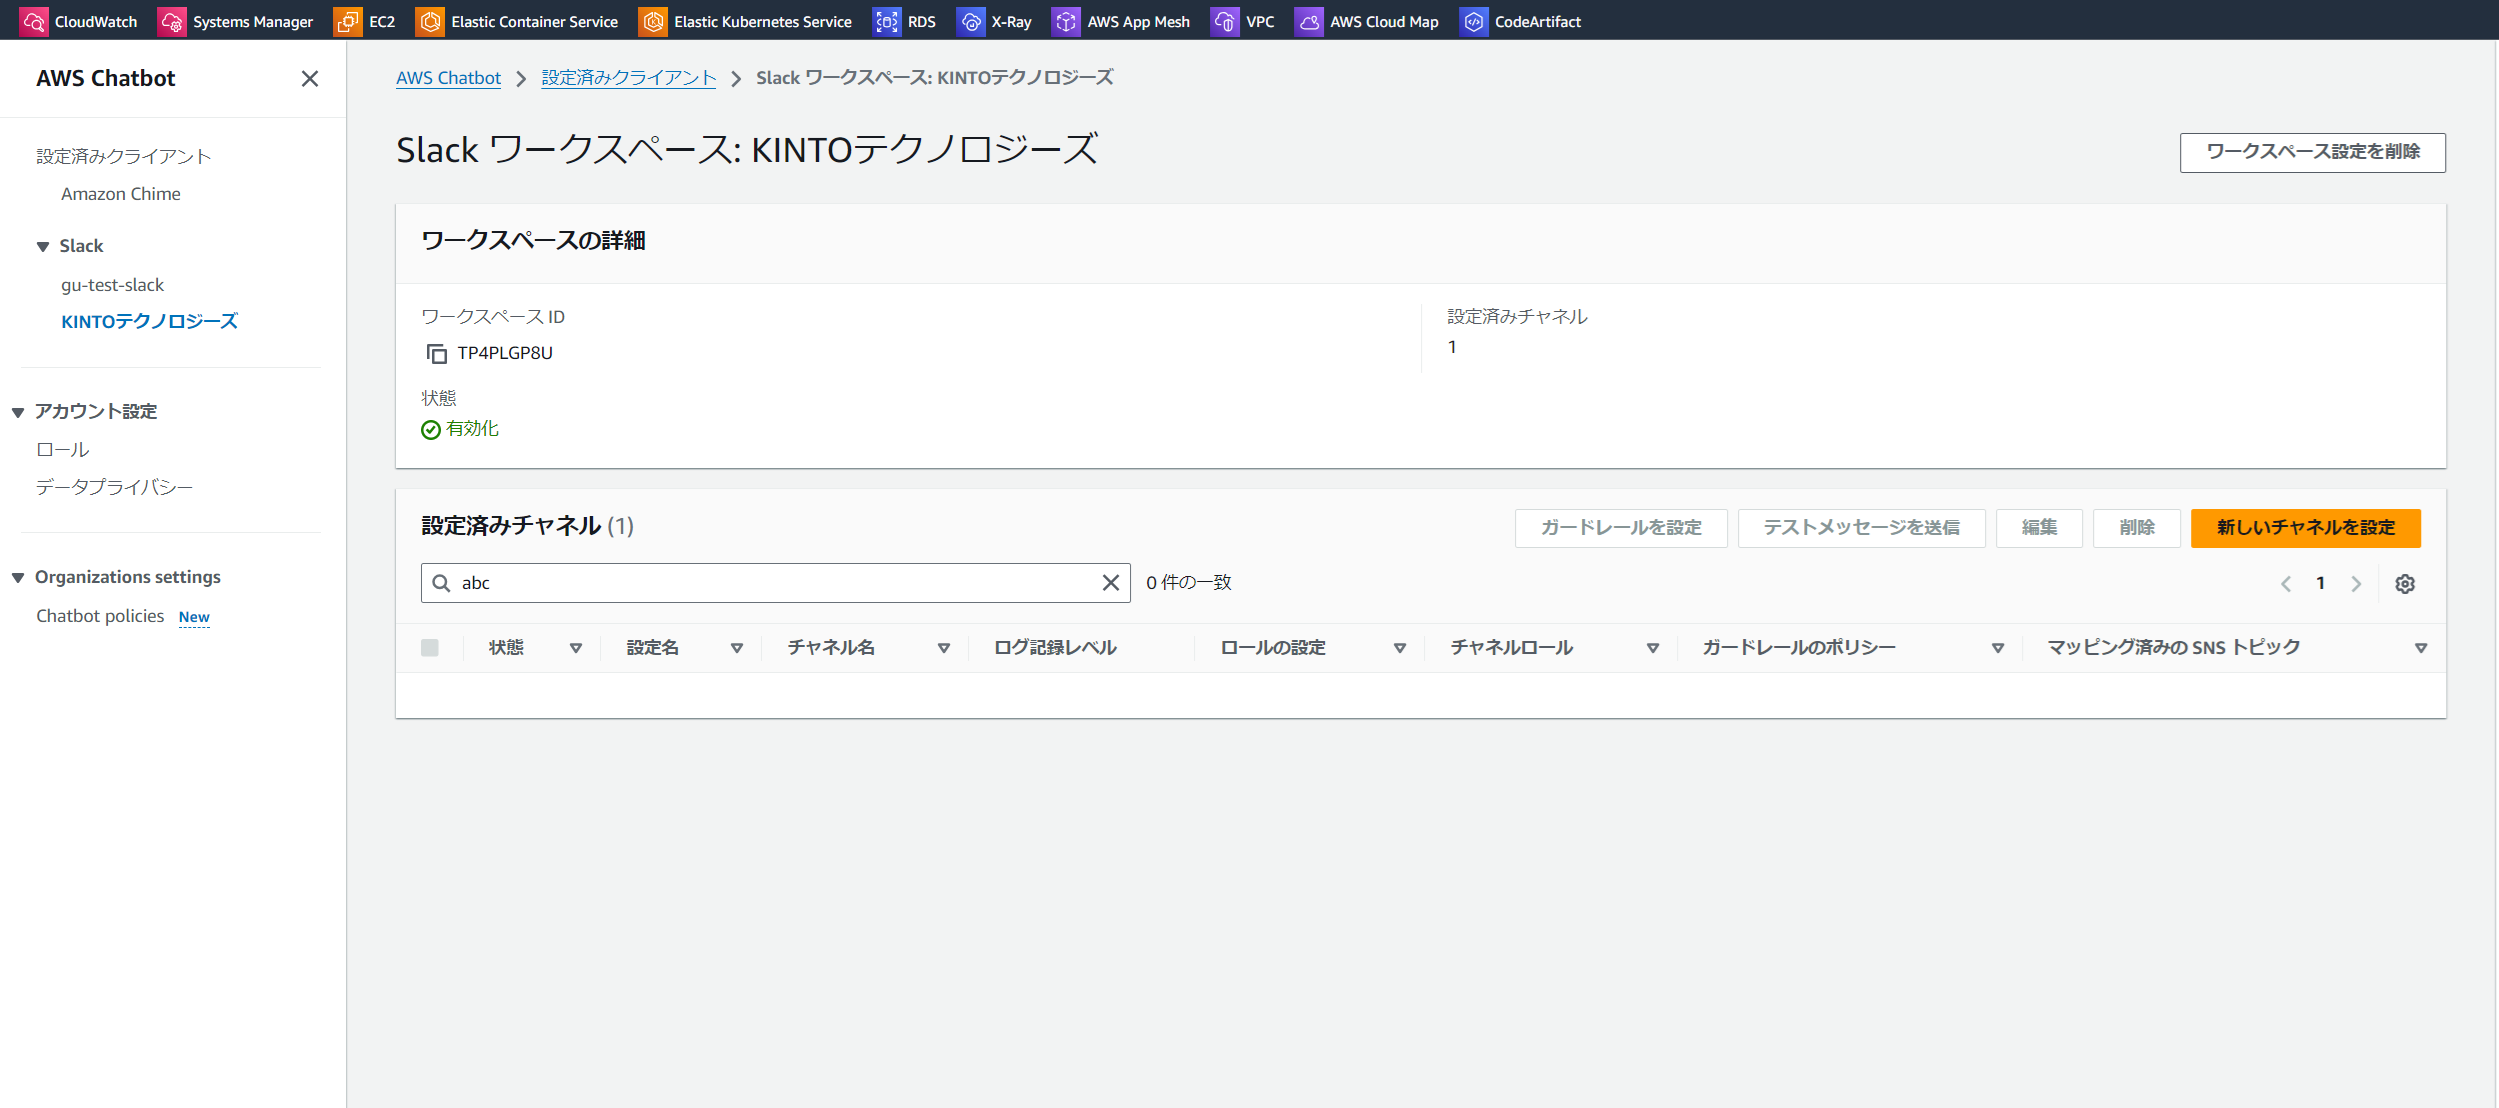
chatbotの管理画面に戻り、「新しいチャンネルを設定」をクリックします
-
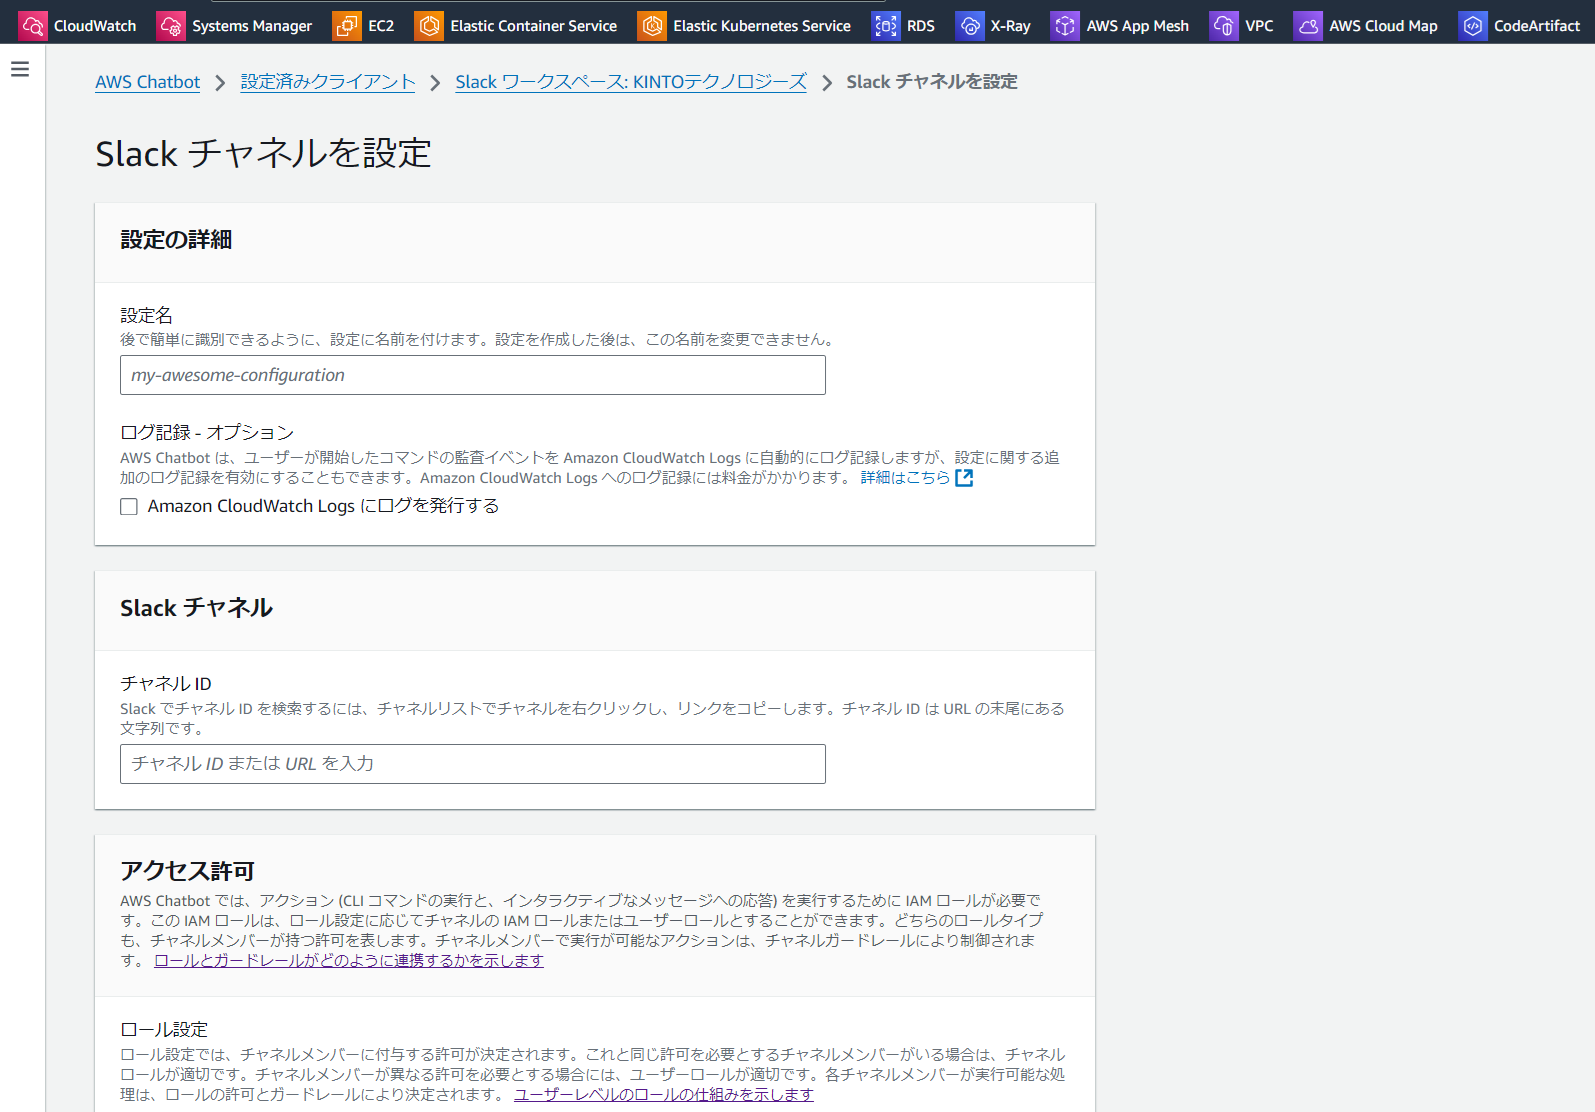
設定名とチャンネルIDを入力します
-
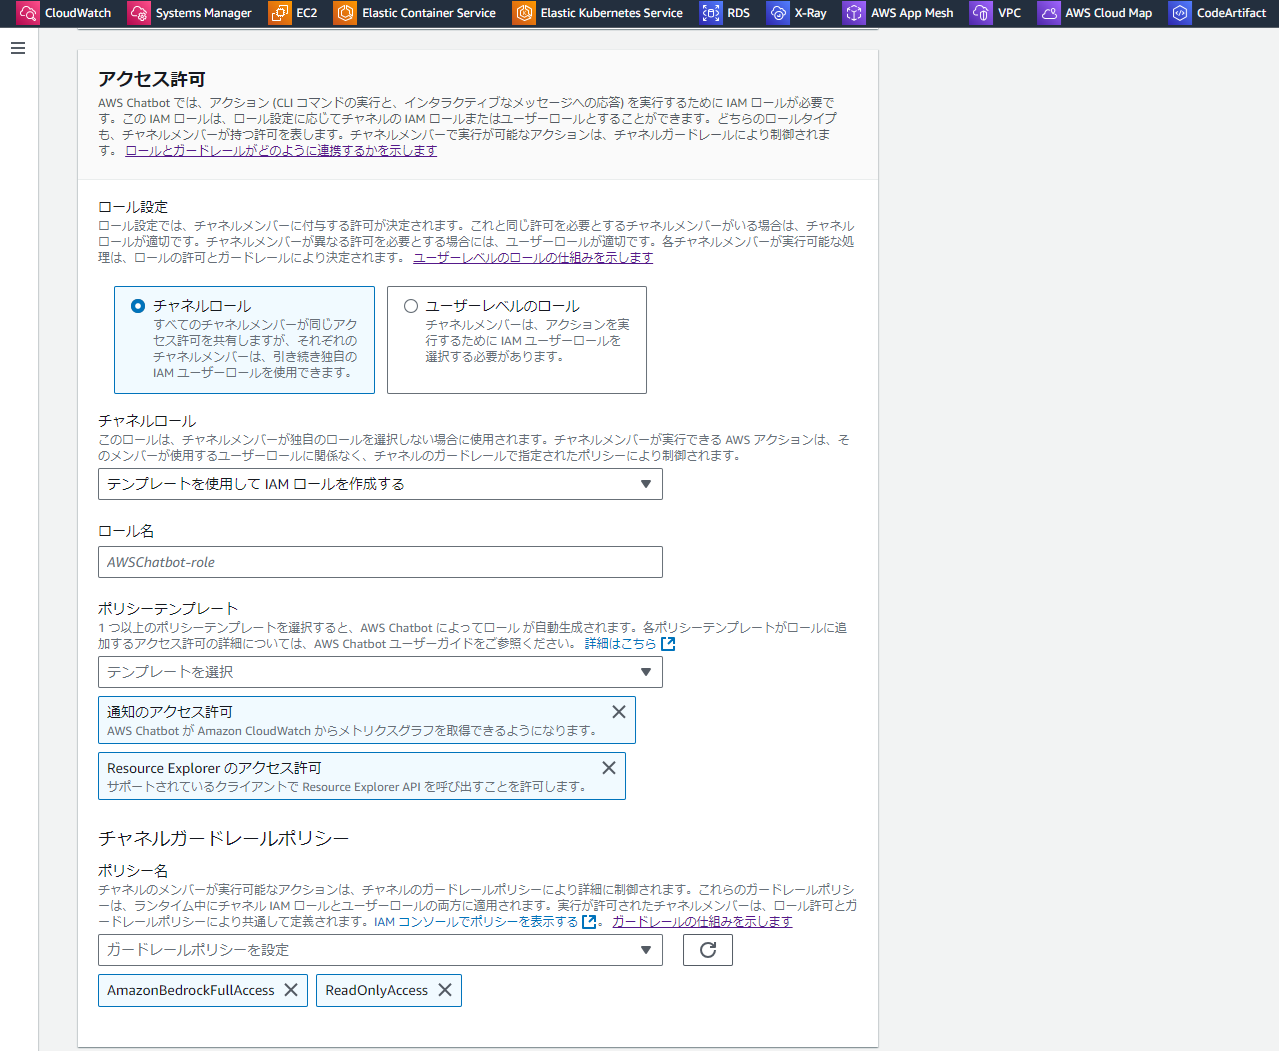
アクセス許可では以下のように設定します
・ロール名を入力
・チャネルガードレールポリシーにAmazonBedrockFullAccessを追加
(本番環境なら最小権限に絞ってください)
-
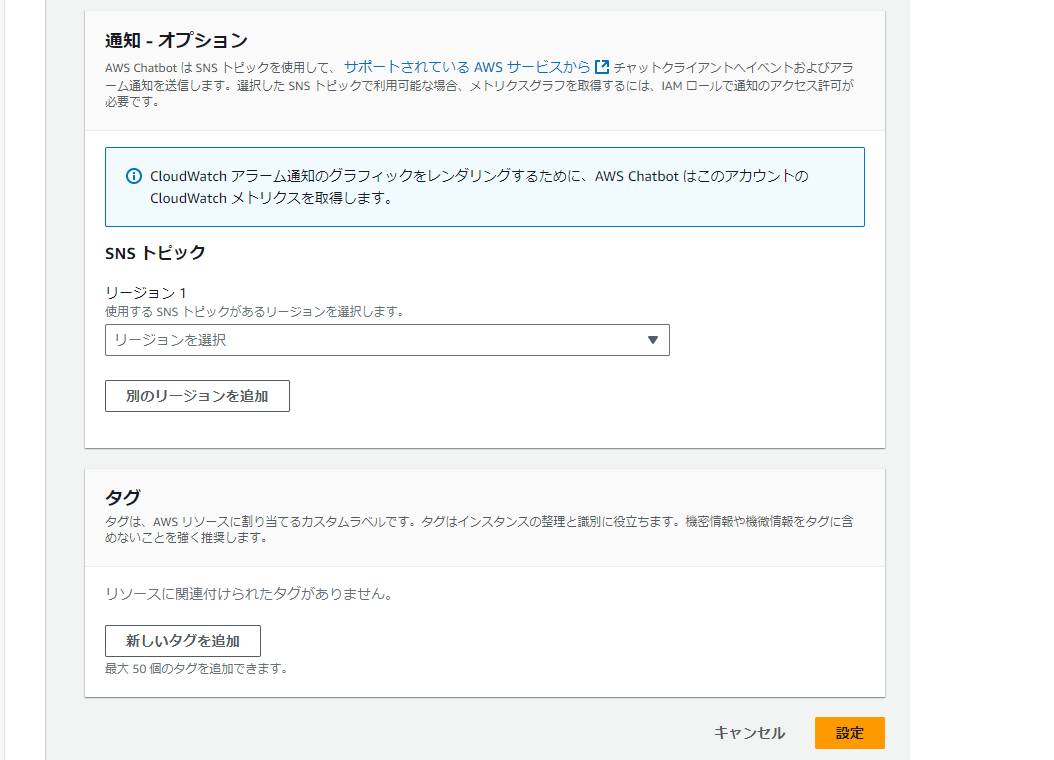
右下の設定をクリックします
-
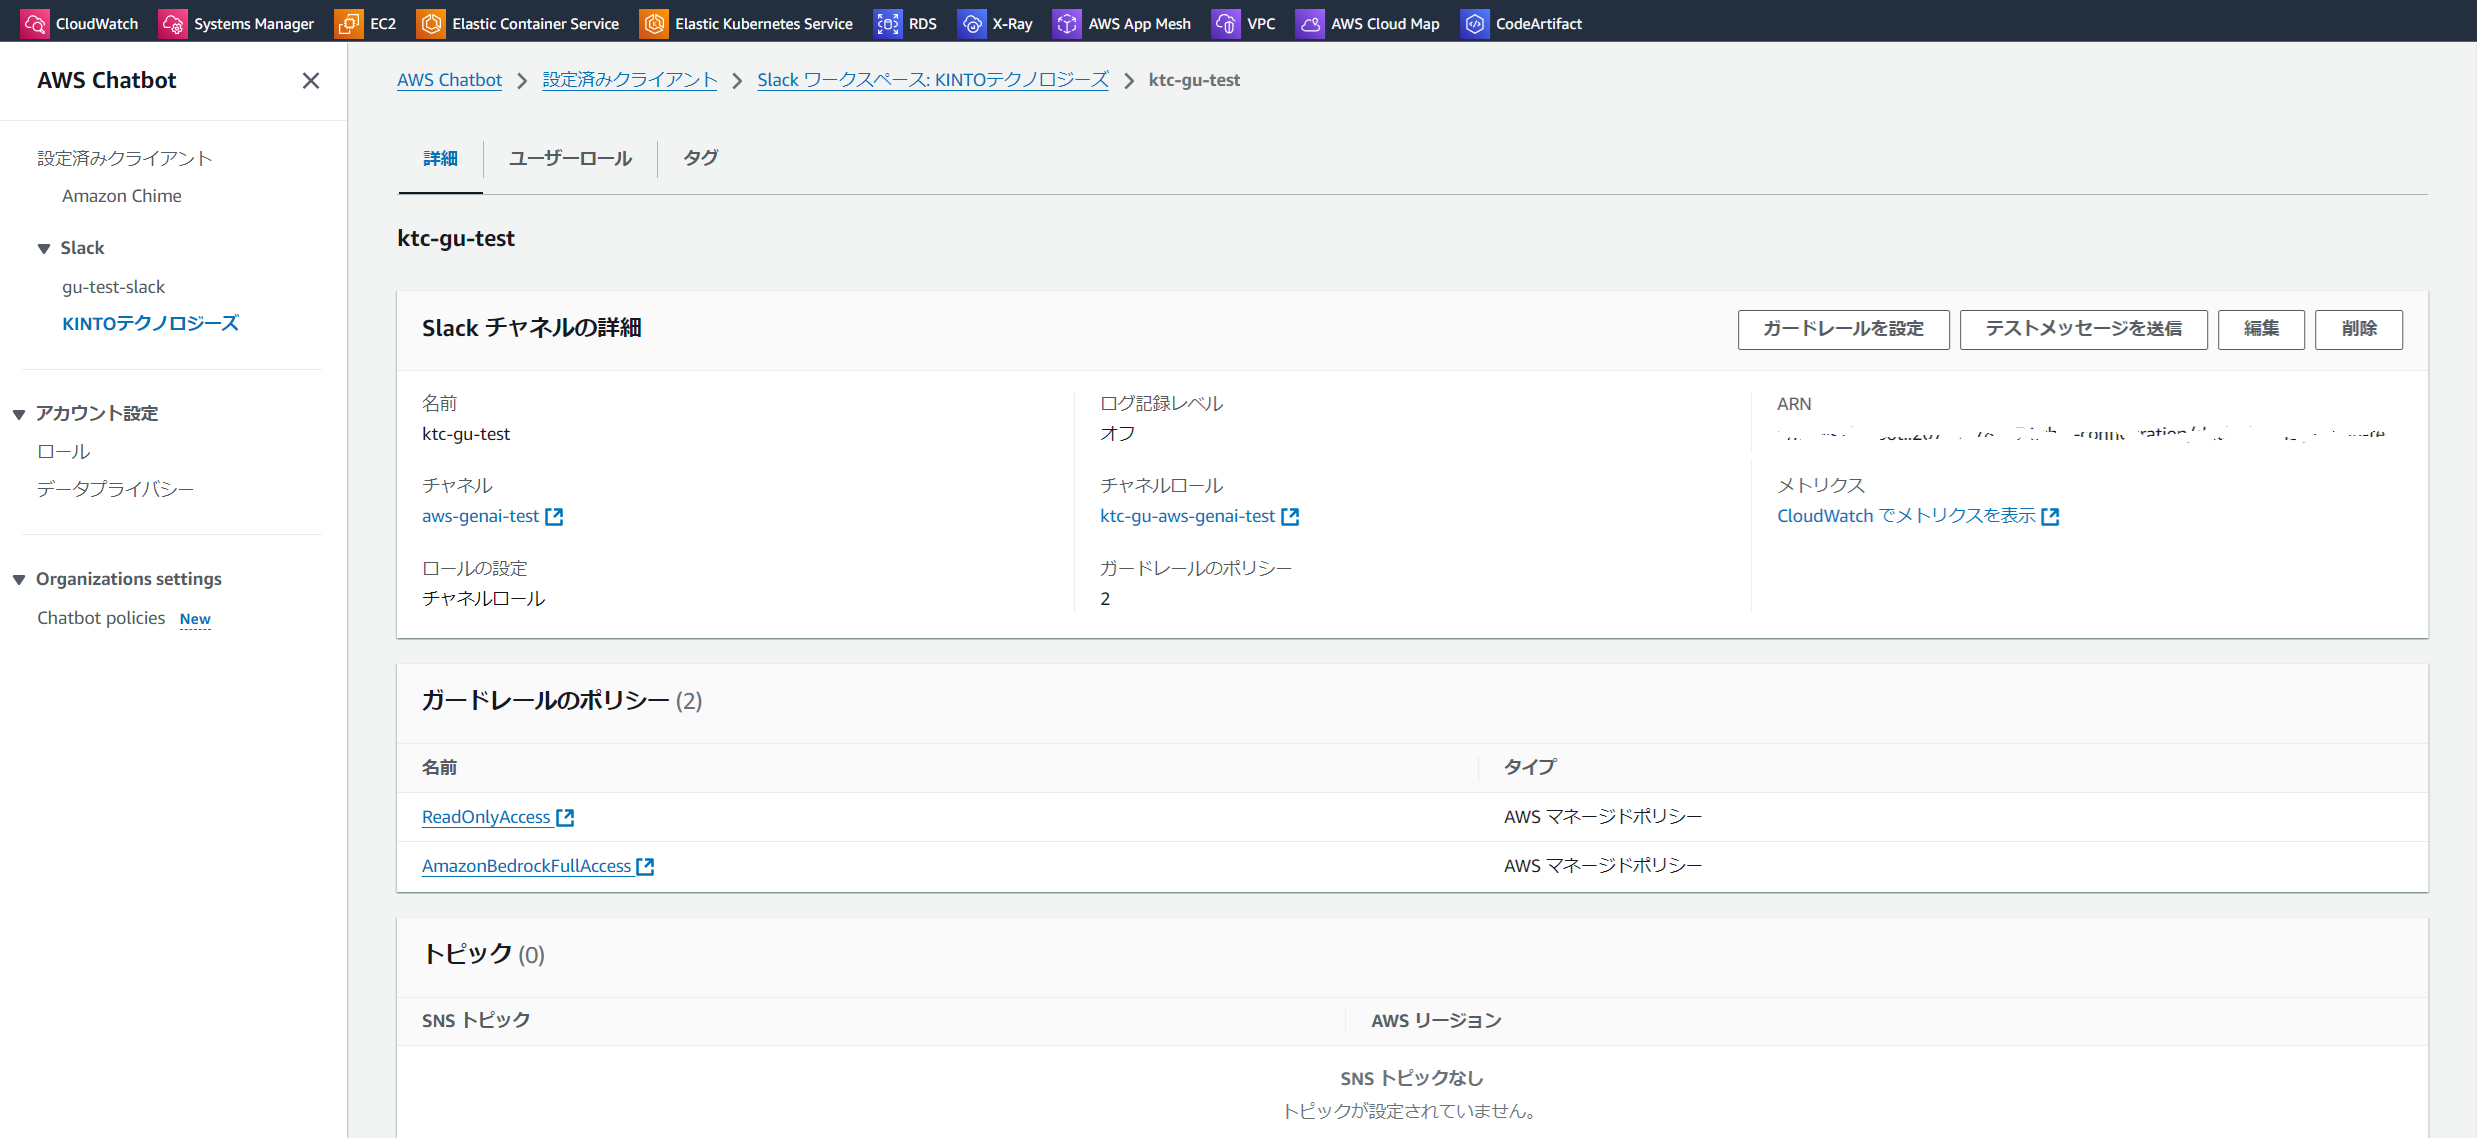
追加された設定(こちらがktc-gu-test)のリンクをクリックします

-
チャネルロールのリンクをクリックします
-
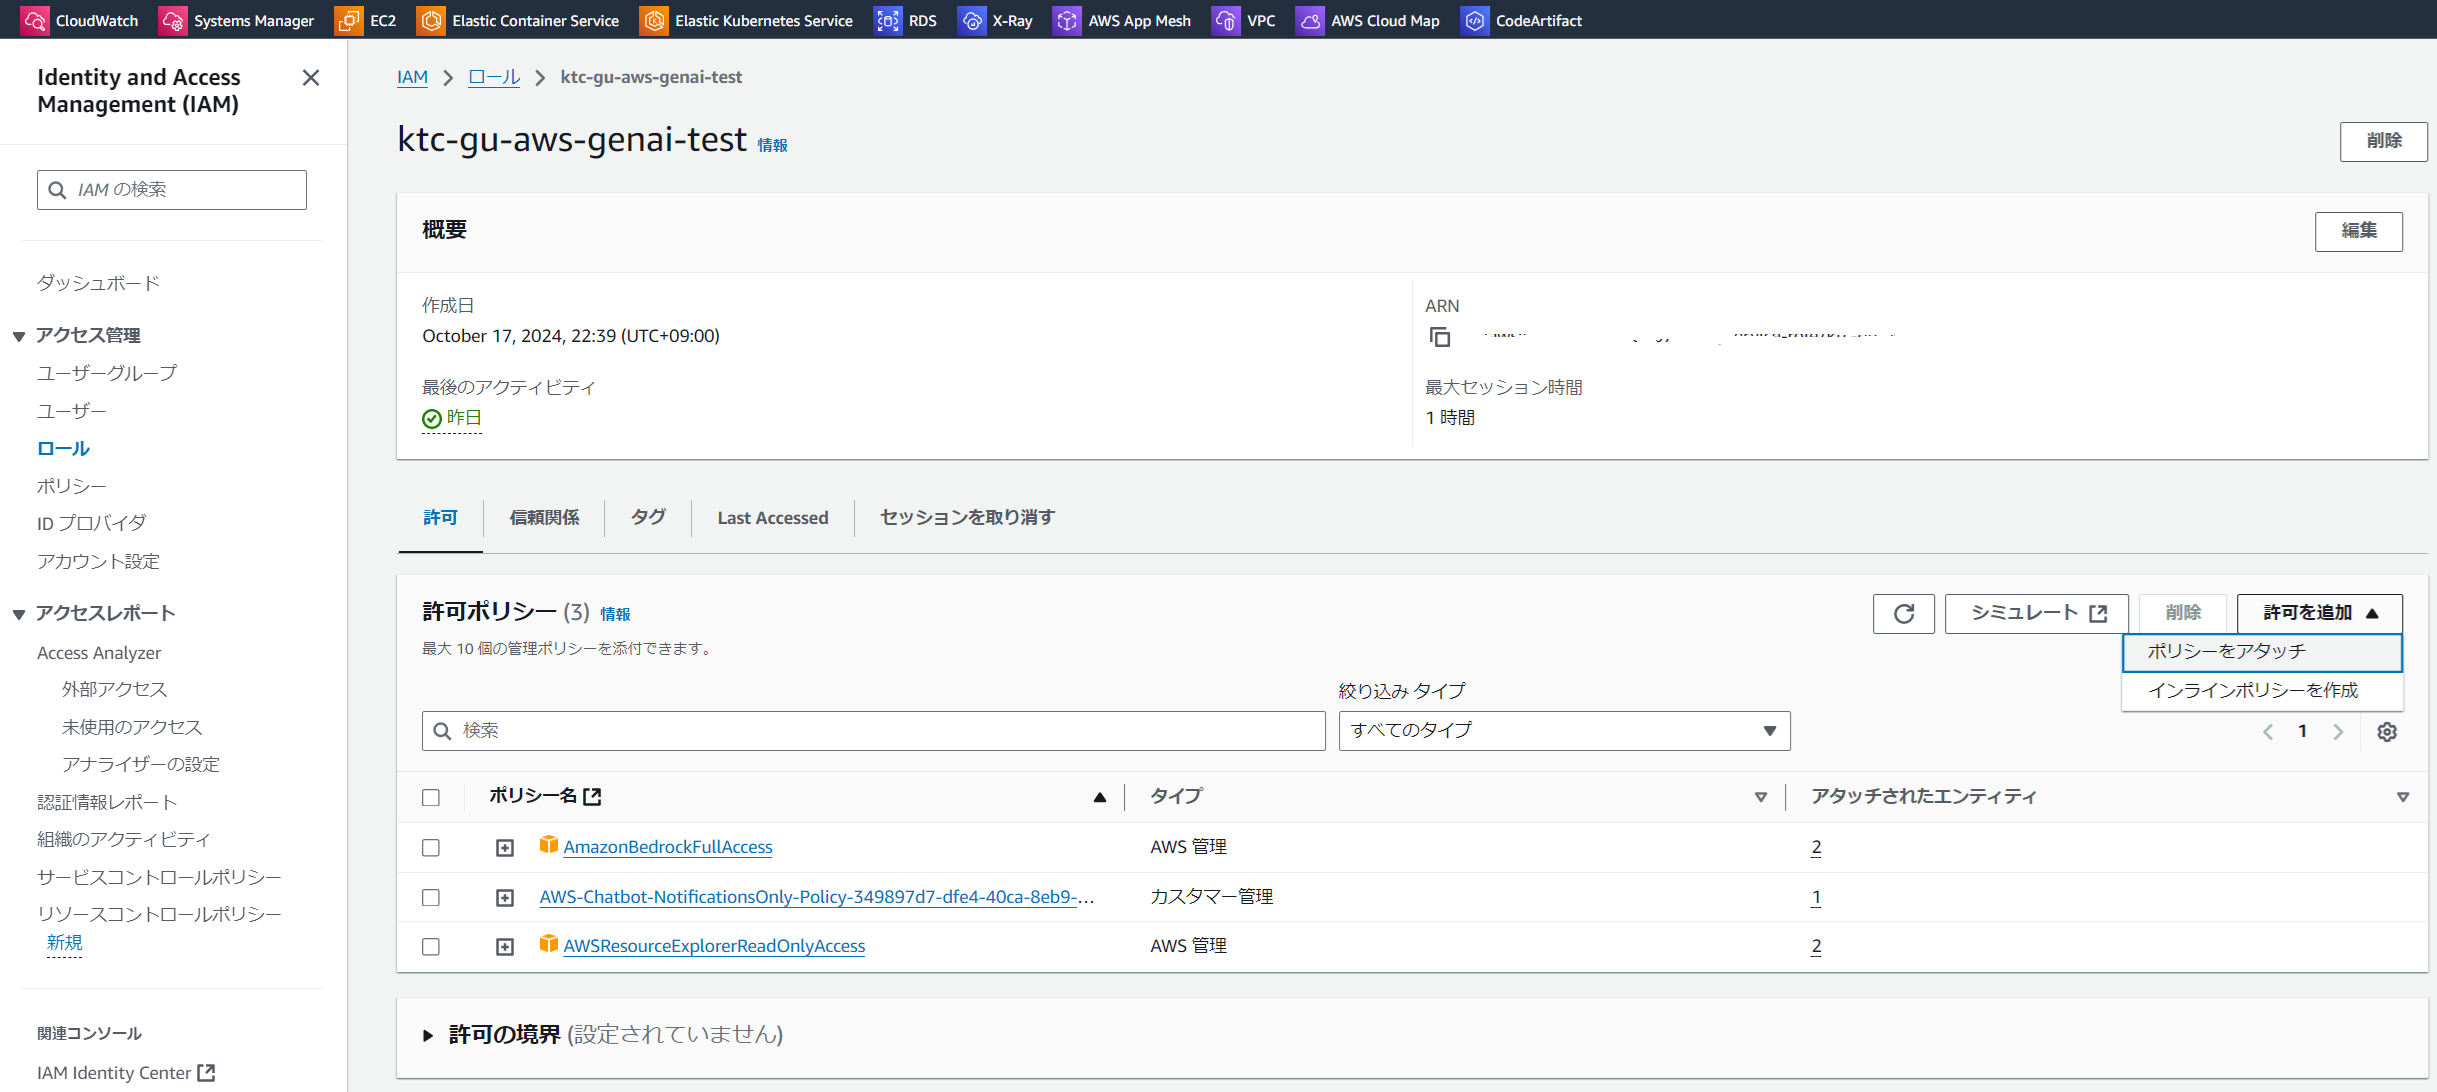
許可ポリシーの「許可を追加」をクリックし、「ポリシーをアタッチ」を選択します
-
「AmazonBedrockFullAccess」を検索と追加し、「許可を追加」をクリックします
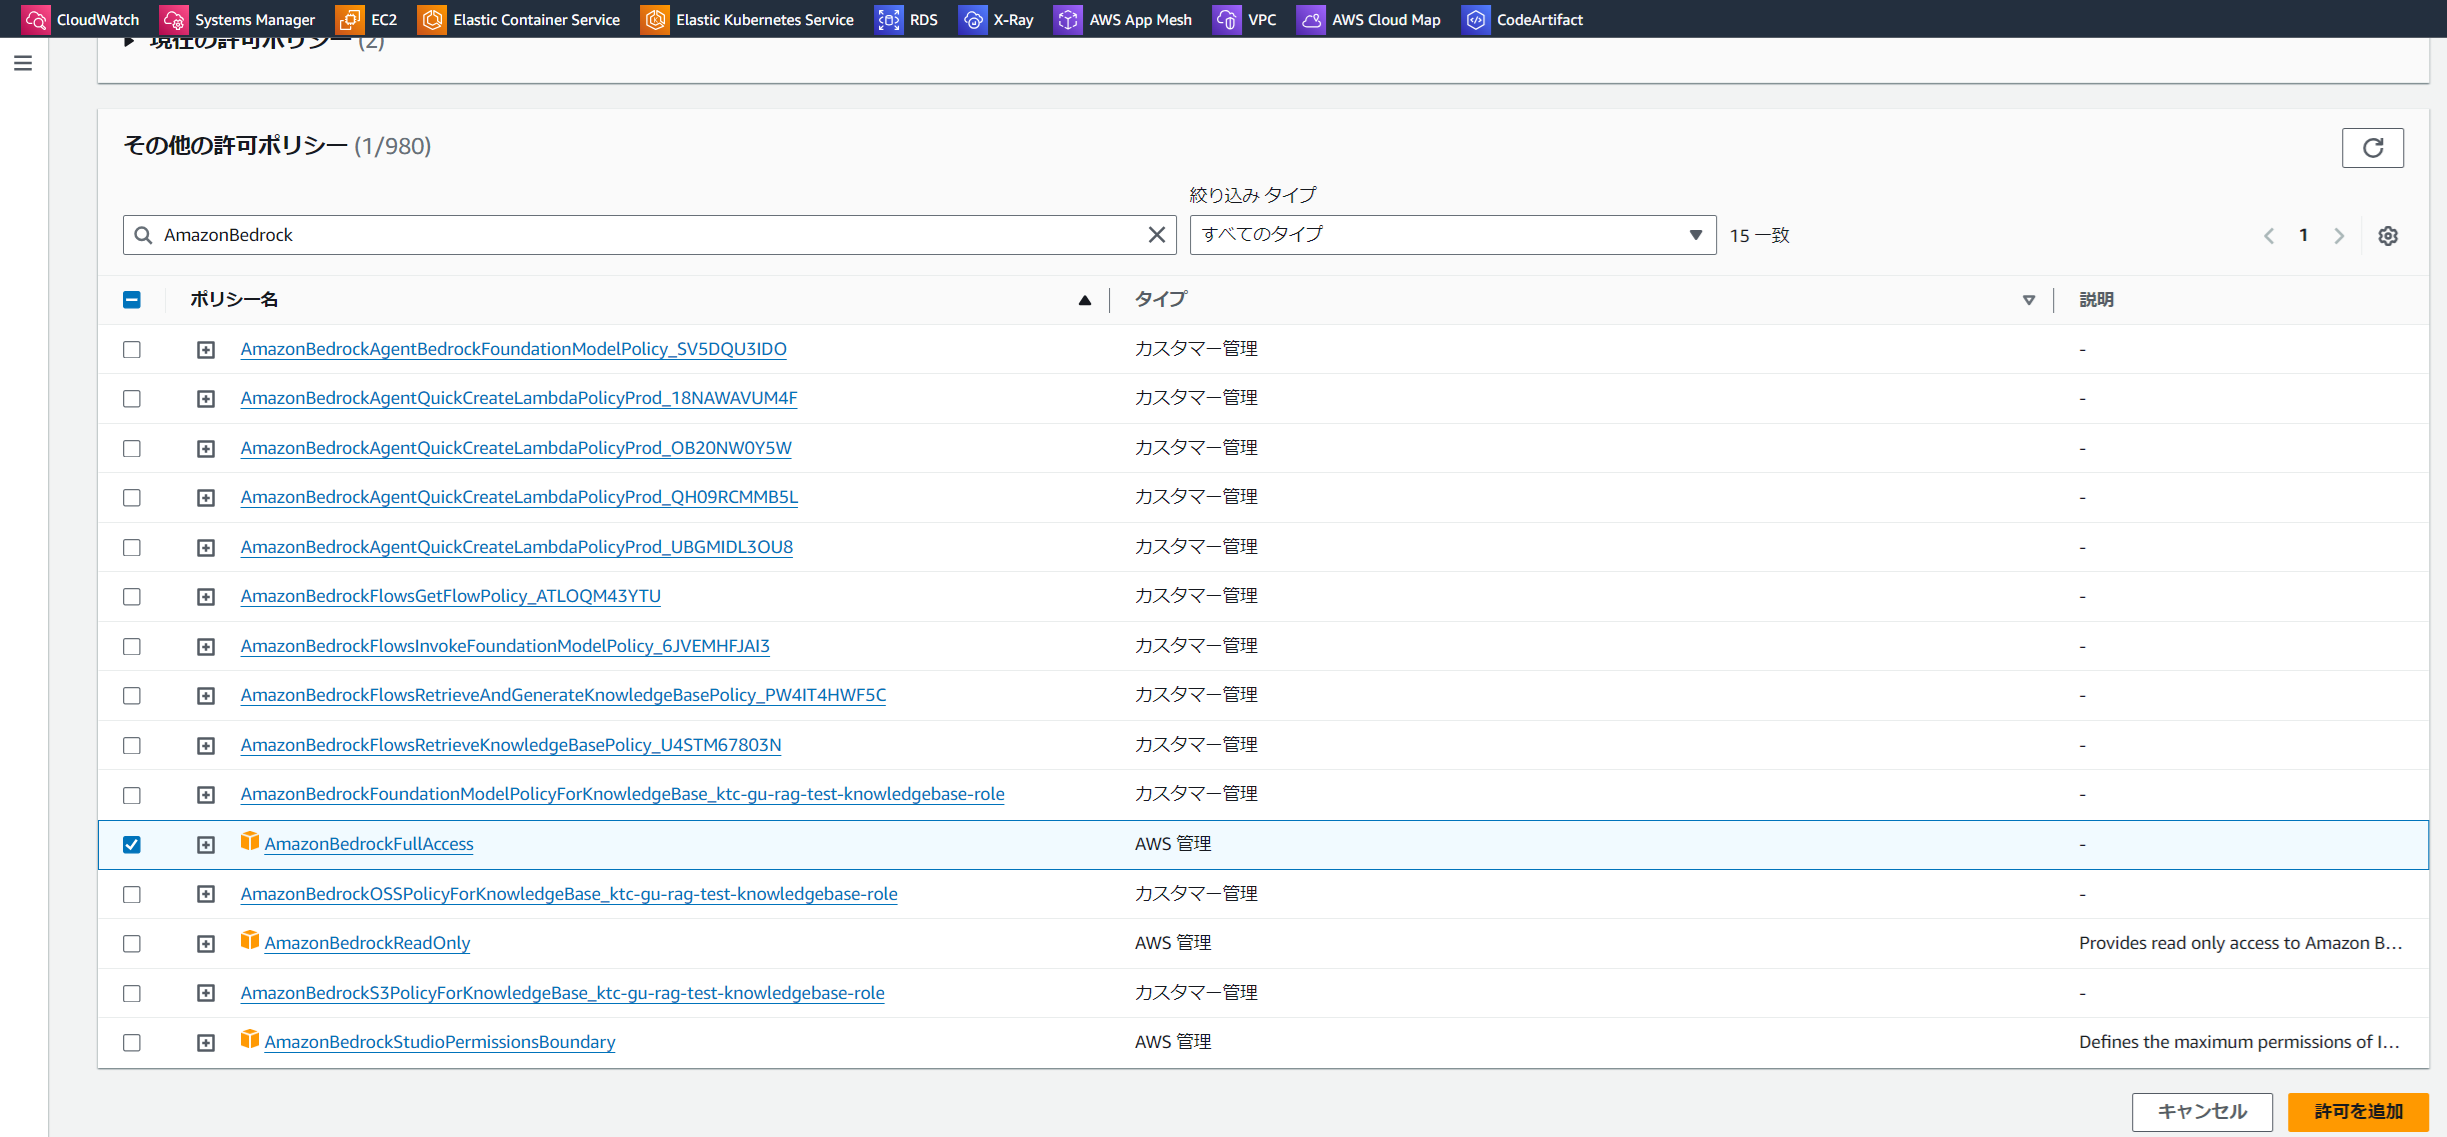
これでAWS Chatbotの作成は完了です。
Slackを設定します
最後にSlackの設定をします。
- Slack上のチャンネルに、以下のメッセージを送信します。接続ができたら、以下のメッセージが表示されます。
@aws connector add {コネクター名} {Bedrock agentのエージェント ARN} {Bedrock agentのエイリアスID}

これでSlackの設定は完了です。
これで動作確認をしましょう。
動作確認:SlackからS3の操作命令を入力します
@aws ask {コネクター名} {プロンプト}のように操作命令を入力してください
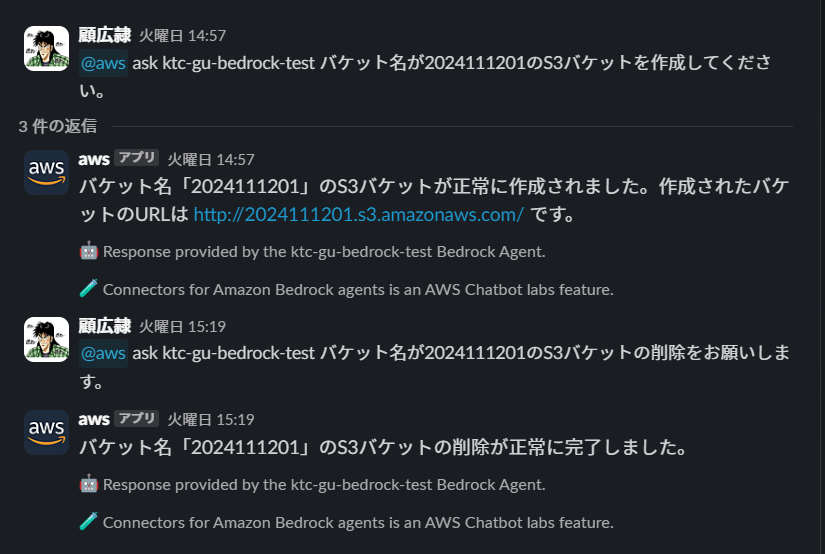
S3の作成と削除ができました!
まとめ
今回、AWSの生成AIエージェントサービスAgents for Bedrockを利用して、Slack上の自然言語の入力だけで、S3の作成と削除操作ができました。
これでいろいろなオペレーションが自然言語の入力でできるようになりました。
それでは、また次回お会いしましょう!
関連記事 | Related Posts
We are hiring!
【クラウドエンジニア】Cloud Infrastructure G/東京・大阪・福岡
KINTO Tech BlogWantedlyストーリーCloud InfrastructureグループについてAWSを主としたクラウドインフラの設計、構築、運用を主に担当しています。
生成AIエンジニア/AIファーストG/東京・名古屋・大阪・福岡
AIファーストGについて生成AIの活用を通じて、KINTO及びKINTOテクノロジーズへ事業貢献することをミッションに2024年1月に新設されたプロジェクトチームです。生成AI技術は生まれて日が浅く、その技術を業務活用する仕事には定説がありません。



![[Mirror]不確実な事業環境を突破した、成長企業6社独自のエンジニアリング](/assets/banners/thumb1.png)

