[iOS] It's quick and easy! CI Credit Super Stingy Savings Tips
![Cover Image for [iOS] It's quick and easy! CI Credit Super Stingy Savings Tips](/assets/blog/authors/ryomm/2025-04-21/thumbnail.png)
My name is Ryomm and I work at KINTO Technologies developing my route (iOS). Here are some things I've done to save CI credits:
Introduction
In our project, we use Bitrise as a CI tool. Last year, in addition to regular unit testing, we introduced snapshot testing and moved to SPM. Before we knew it, the time it took for each Bitrise CI run had ballooned to around 25 minutes, and in months when a lot of implementation was happening, we often ended up exceeding our budget. Bitrise becomes expensive if you exceed the contracted amount, so at the exchange rate at the time of writing, it costs about 400 yen for each excess CI run. That's expensive! For this reason, when credits were about to exceed the limit, a trend was created to limit PR merging to the bare minimum in order to avoid moving CI.
In order to overcome this situation, we have been working on some credit saving techniques for our project.
Reviewing the CLI Tool Setup
By looking at the Bitrise Build results, you can see how long each step took.
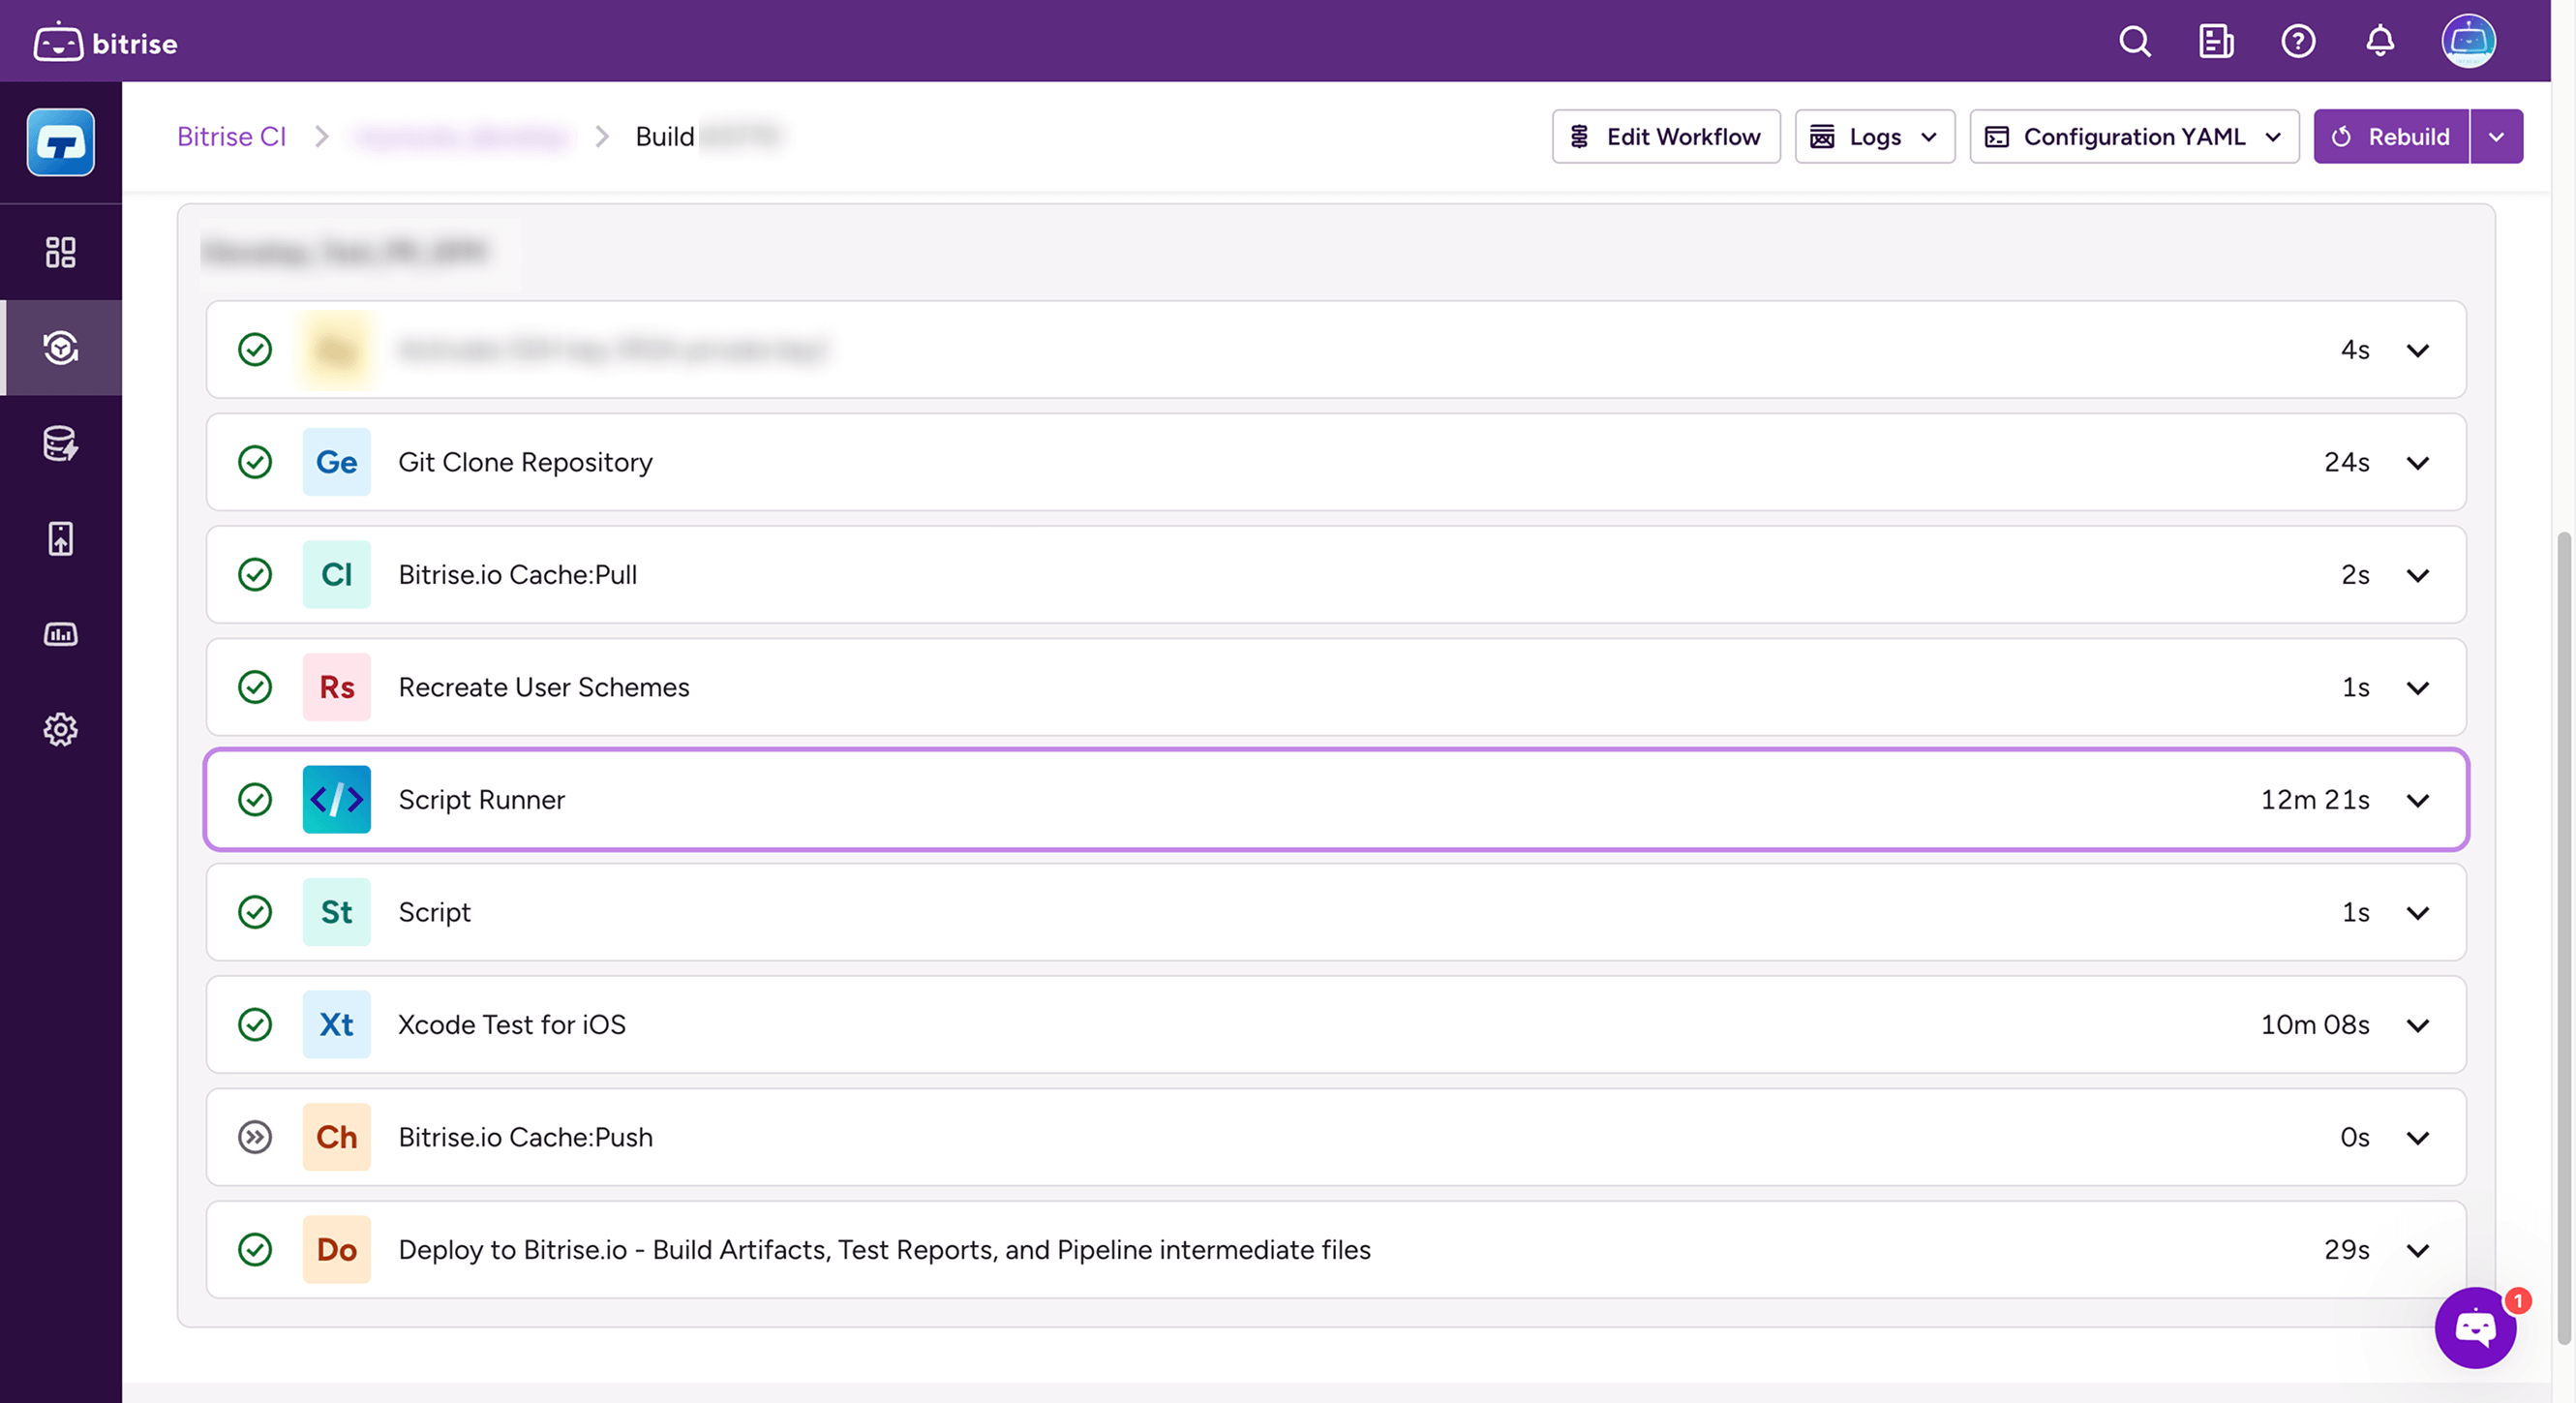 Bitrise Build Result
Looking at this, we can see that it took 12 minutes in "Script Runner". This is the step where we set up swiftLint and LicensePlist. As I mentioned in my previous article, the libraries can be downloaded and used in a package created separately from the workspace in order to be executed in the Build Phase.
Well, this certainly does take time, so I'll try to shorten it. Fortunately, the library we want to use here is compatible with the Build Tool Plugin, so we can skip this step by transferring it to that library.
Since the settings such as license_plist.yml and .swiftlint.yml have already been made, all you need to do is add the package to the project's Package Dependencies and add the plugin to Run Build Tool Plug-ins in the target Build Phase.
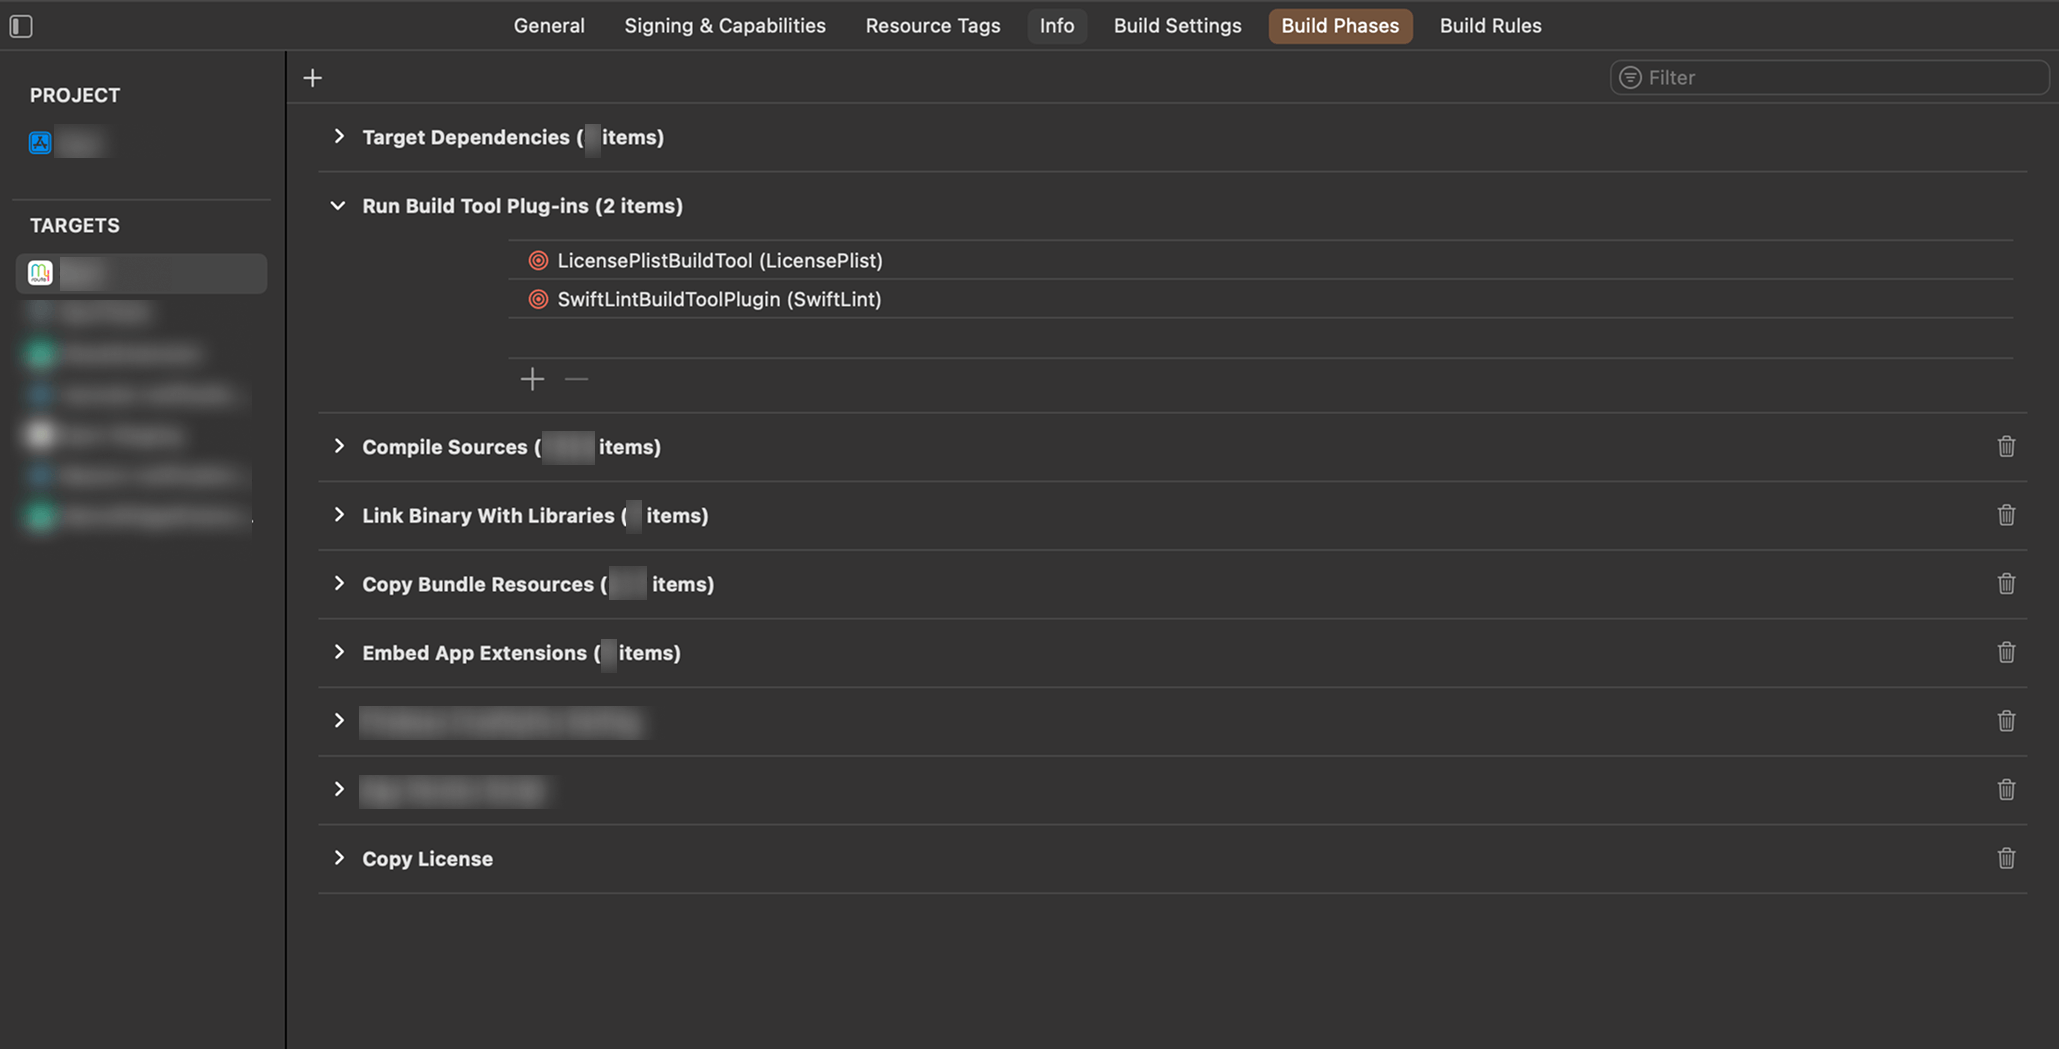 Build Phase settings
Since the location of LicensePlist cannot be specified by outputPath when it is a plugin, you need to include it in BuildPhase so that the license file is moved under Settings.bundle as described in README. Also, the package needs to be included in the app itself, not just a package linked via Frameworks.
This completely eliminated the "Script Runner" step, saving me 12 minutes... and cutting my credit costs in half!🎉 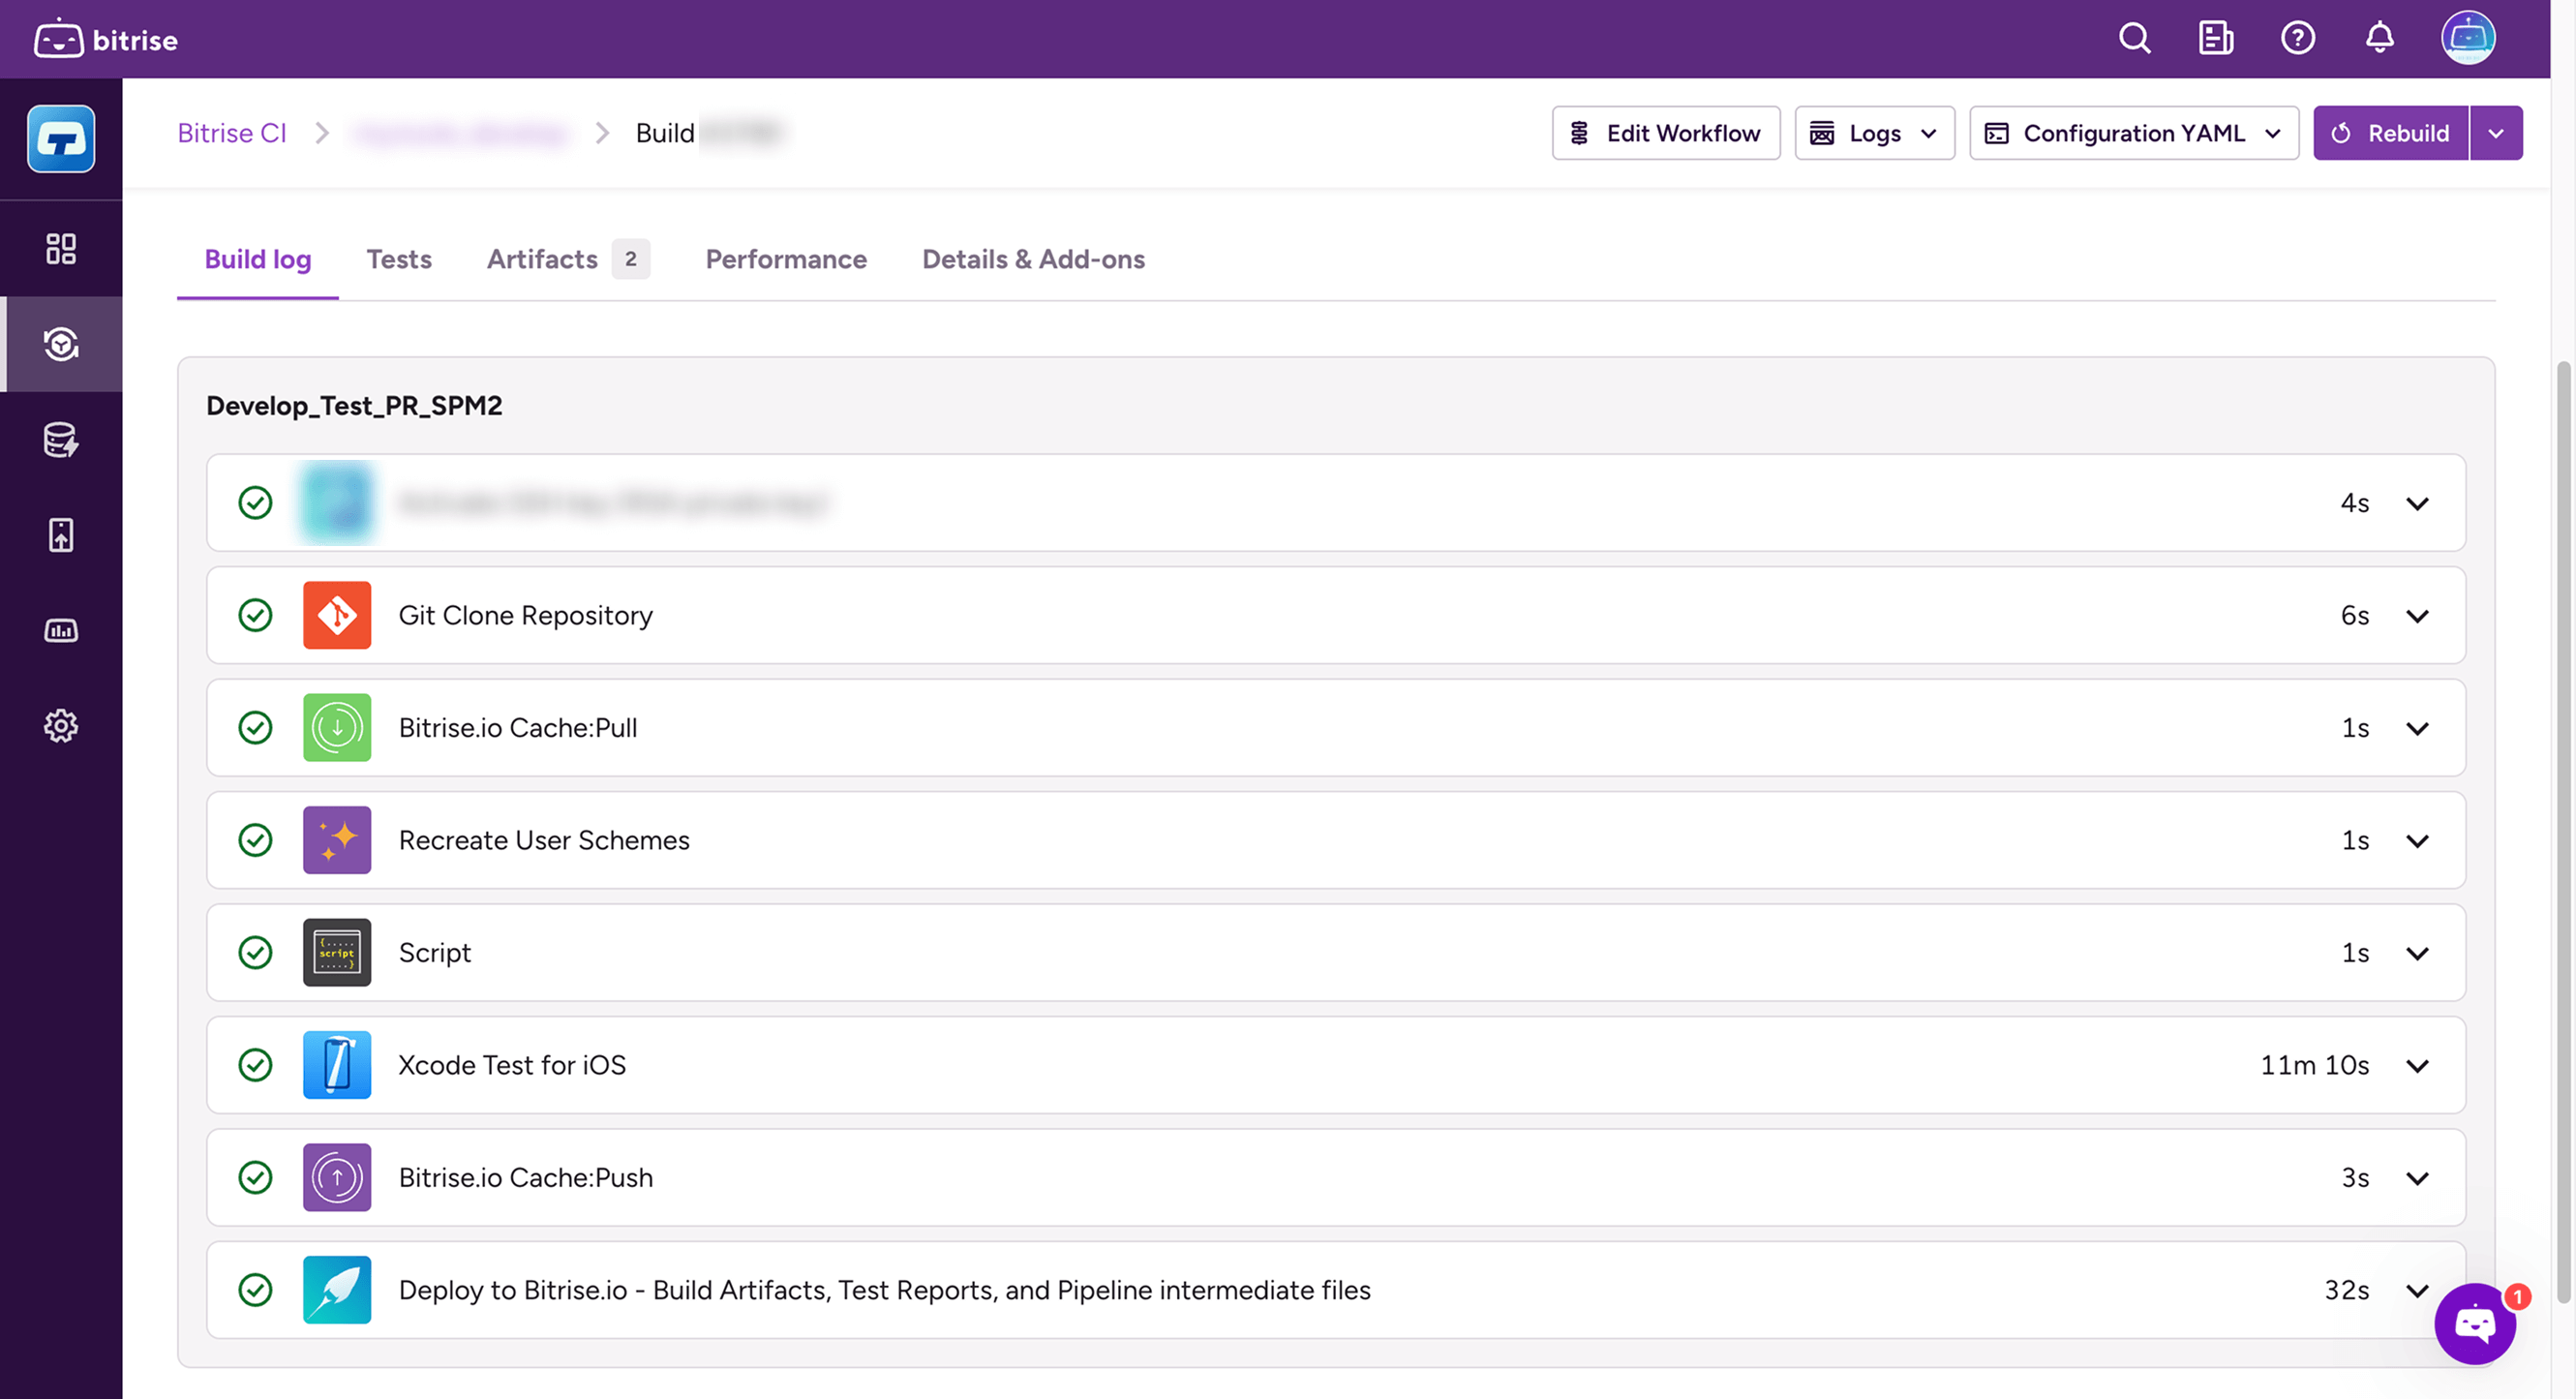 Bitrise Build Result
Additionally, project configuration has been simplified and there is no longer any need to run separate shells for setup or version updates.
In this case, everything was compatible with the Build Tool Plugin, so I changed the configuration, but I also tried nest as a different approach. This allows you to reduce CI time while still managing your existing CLI tools as separate packages.
Replace the package for installing the CLI tool under the tools directory with nest.
Project/
├── Hoge.xcworkspace
├── Hoge.xcodeproj
├── Test/
│   └── ...
├── ...
└── tools
    └── nextfile.yaml // ここを置き換える
When you run nest bootstrap nestfile.yaml, you can see that the binary is installed in tools/.nest/bin, so set it to be executed in the Build Phase.
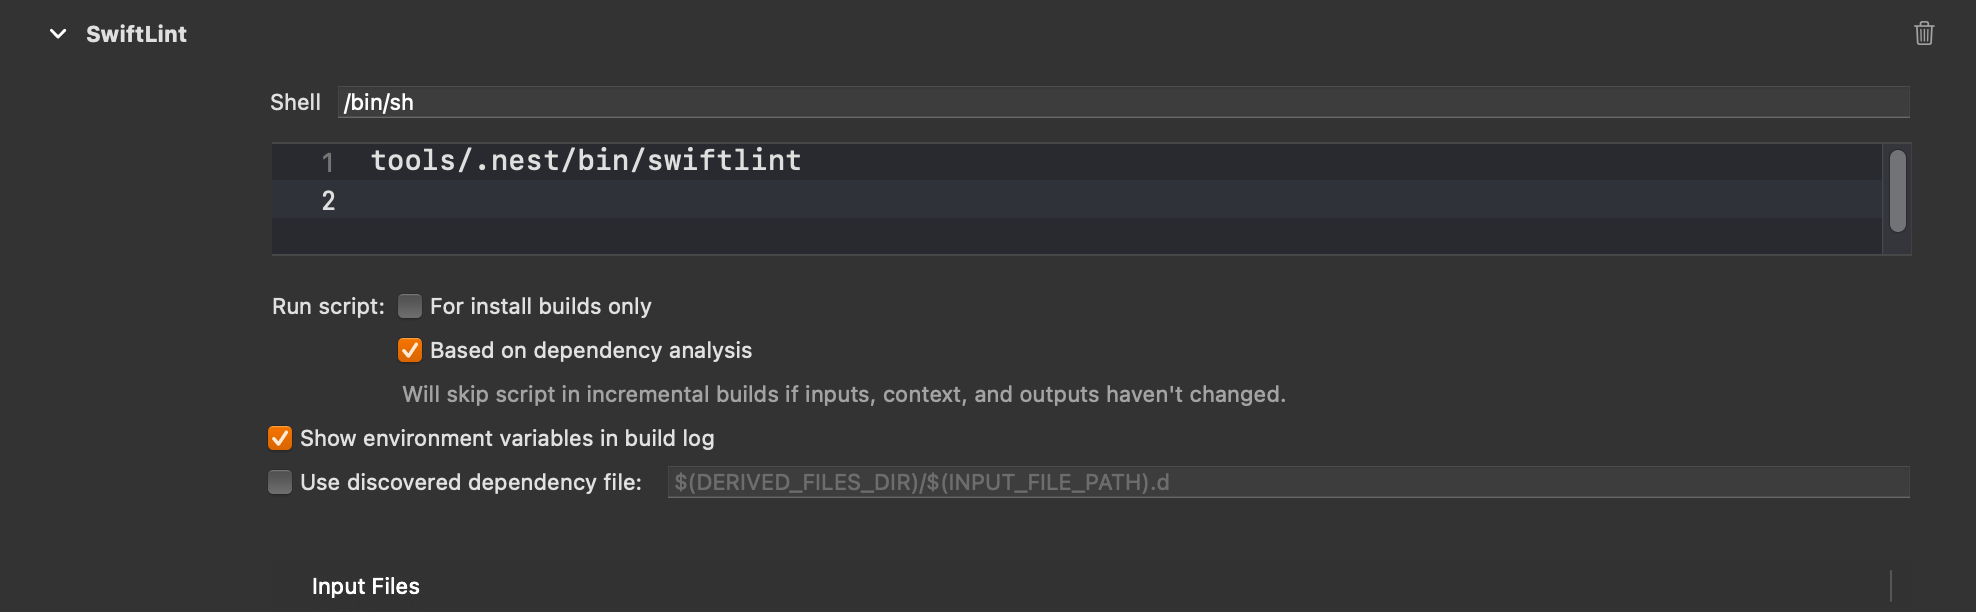 Configuring swiftlint in the build phase
This may be useful if the Build Tool Plugin is not supported.
Review the Test
In our project, all tests were packed into one test target, so all tests were always run.
Furthermore, the snapshot tests were very heavy tests that took about an hour to run, so the method that compared them with a reference image was commented out on the CI so that it would not be executed. However, because asynchronous drawing processes such as waiting before comparison are executed, if the process fails, timeouts accumulate and you have to wait for a long time, which is also one of the factors that eats up credits.
Therefore, I separated the snapshot tests that were not running on CI into a separate test target and tried to control the tests that were executed using TestPlan.
First, create a test target for the long-running snapshot: 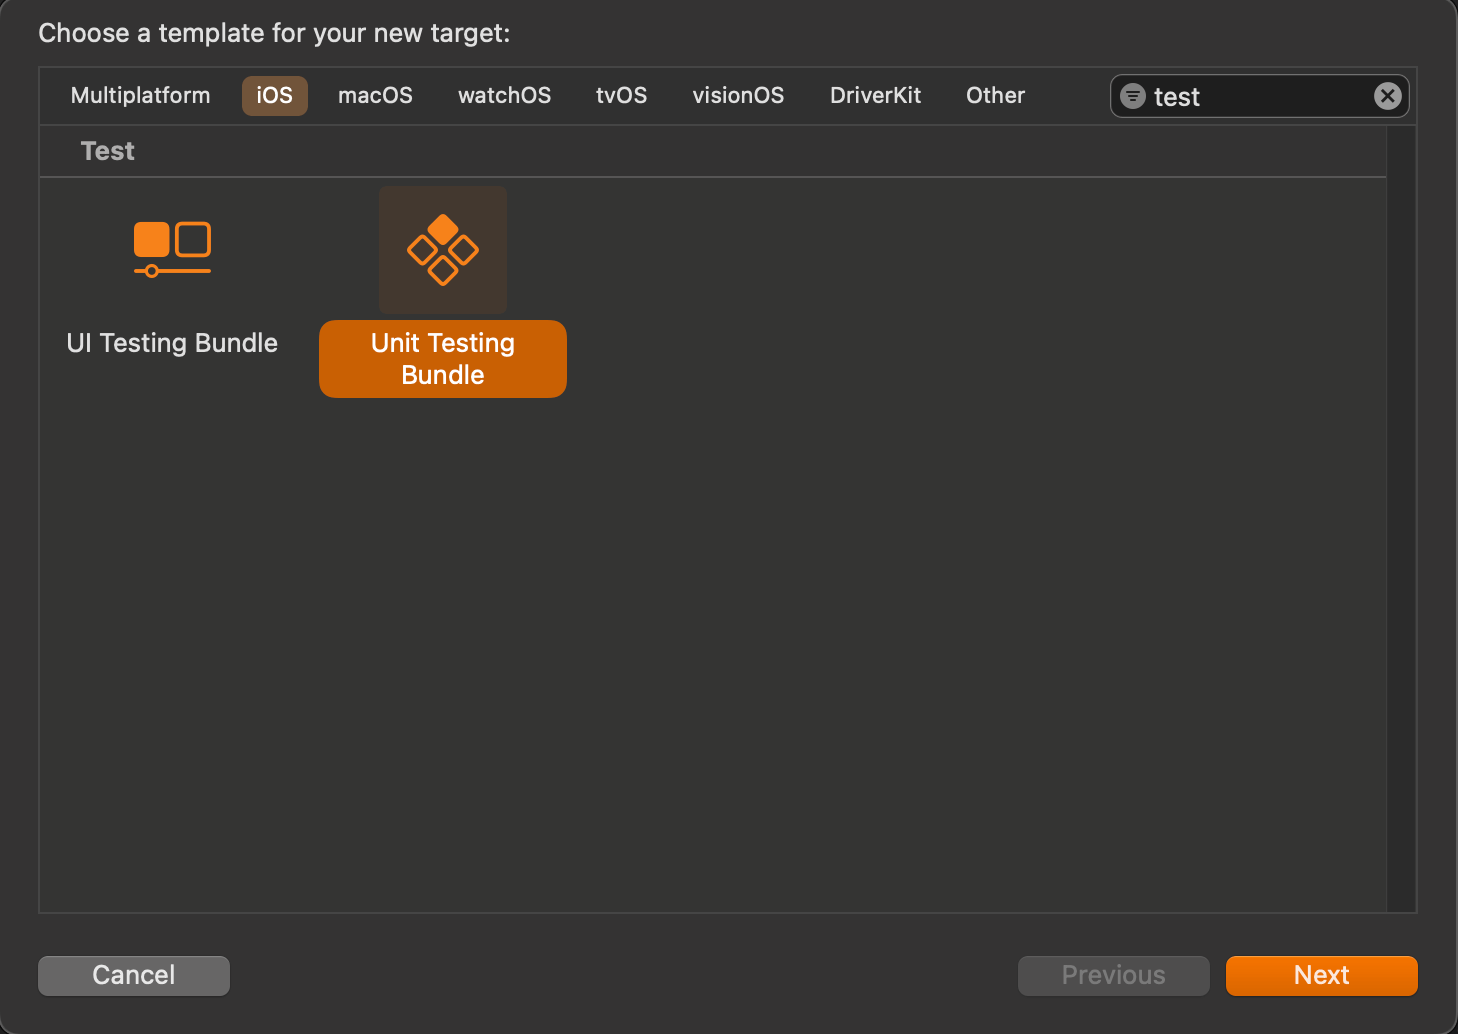 Create a test target
After configuring the targets using the existing test targets as reference, move the snapshot tests to the newly created target via Target Membership in the Compile Sources under Build Phases or in the File inspector for each test file. In this case, if the moved test file has a dependency on a test file in the original test target, it will not be able to be built, so you will need to separate the dependencies each time.
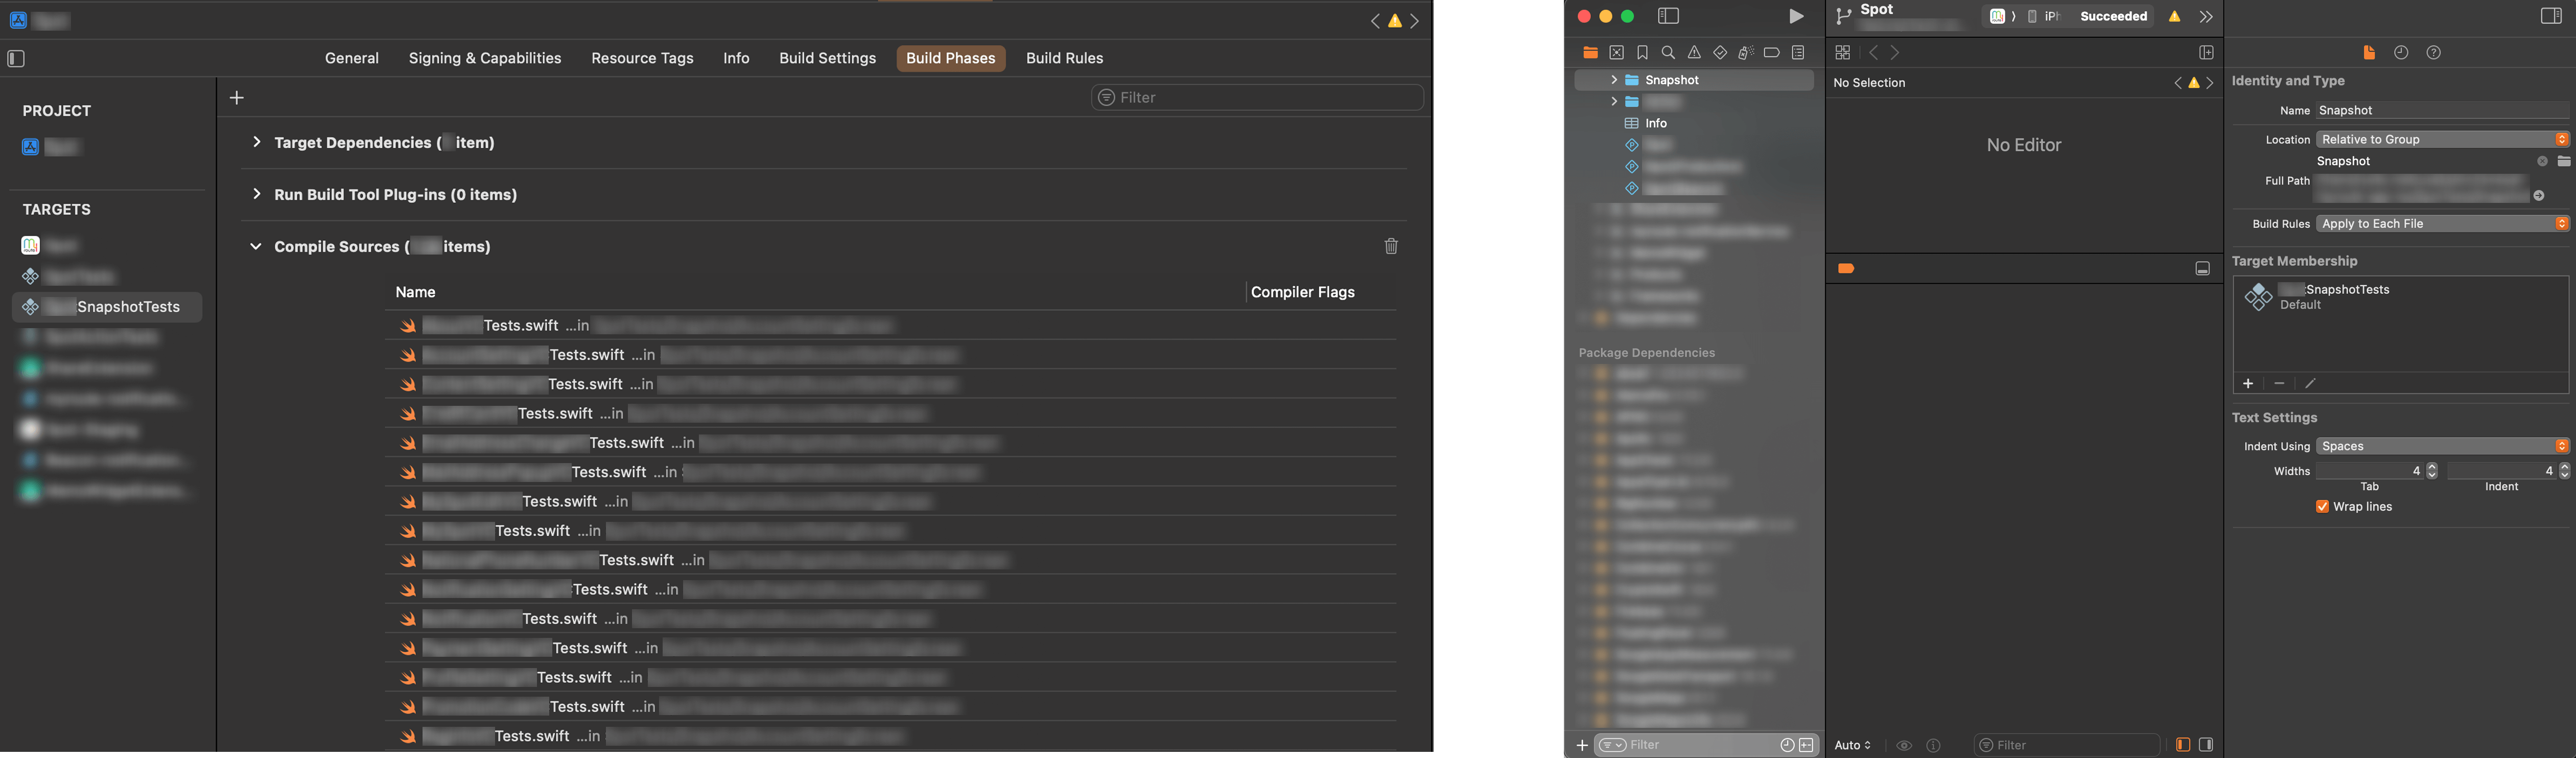 * Change the target *
Next, create a TestPlan. A TestPlan is a collection of tests to be run and their configuration. In this case, the tests you want to run can be specified on a test target basis. For this purpose we have created a separate test target.
TestPlans can be linked to schemas, and in our app we have a one-to-one relationship between schemas and TestPlans. And in the TestPlan for the schema you want to use on CI, make sure you don't run snapshot tests.
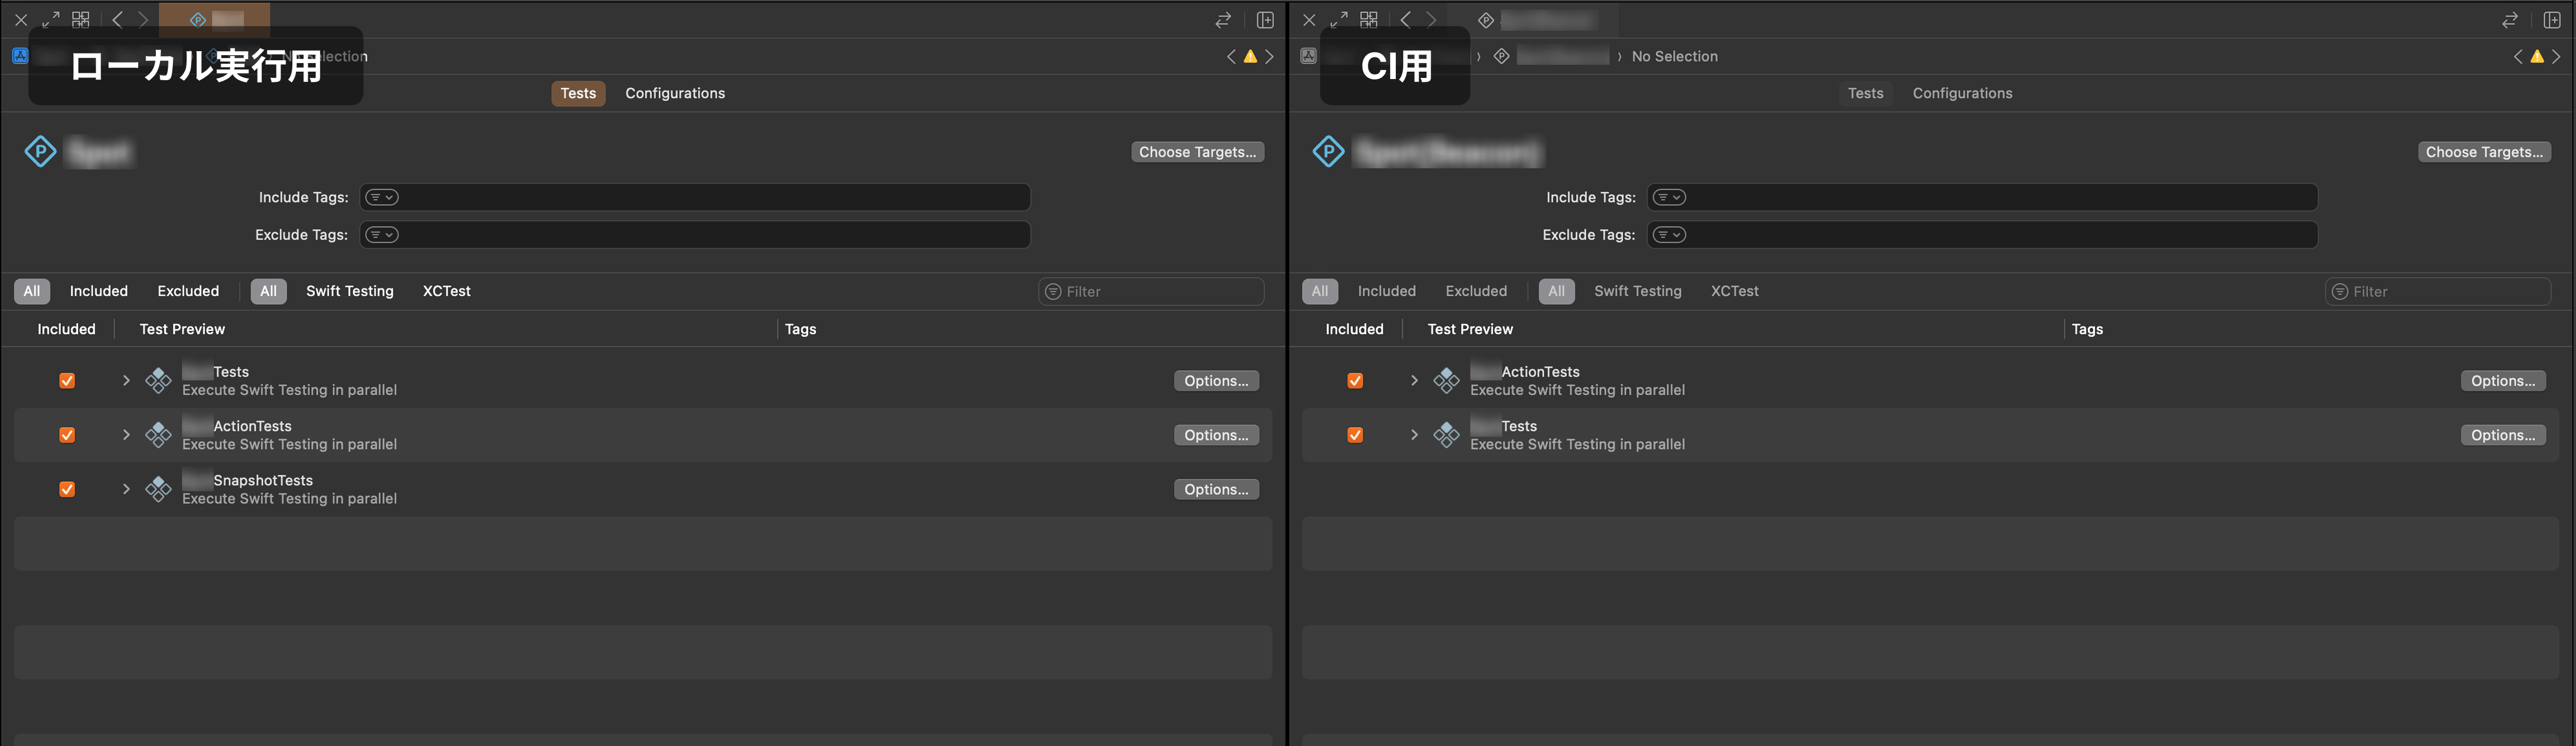 TestPlan settings
When you actually run it, the execution time doesn't change significantly on CI unless there is a failure. However, the local testing experience has improved significantly. Snapshot tests used to be executed even when only the logic was changed, but now they can be prevented from being executed by simply unchecking the box, resulting in a significant reduction in time.
We have decided not to run tests that were not originally run on CI in the first place, but we would like to make it possible to run snapshot tests as well after adjusting the balance with credit usage.
Conclusion
In addition to the steps introduced here, other measures that can shorten build times include fixing code that takes a long time to infer types and deleting unused assets. These efforts reduced the average time per CI run from about 22 minutes to about 12 minutes, resulting in a savings of about 45% in credits.
This time, we focused on reducing the time before and after the build, which is something we can do immediately, but next time we would like to reduce the build time itself even more.
関連記事 | Related Posts
![Cover Image for [iOS][CI/CD] Xcode Cloudでプライベートリポジトリをライブラリとして取り込む](/assets/blog/authors/HiroyaHinomori/xcode-cloud_x_private-repository_top.jpg)

We are hiring!
シニア/フロントエンドエンジニア(React/Typescript)/KINTO中古車開発G/東京・大阪・福岡
KINTO開発部KINTO中古車開発グループについて◉KINTO開発部 :66名 KINTO中古車開発G:9名★ KINTOプロダクトマネジメントG:3名 KINTOバックエンド開発G:16名 契約管理開発G :9名 KINTO開発推進G:8名 KINTOフロントエンド開発G...
【クラウドエンジニア】Cloud Infrastructure G/東京・大阪・福岡
KINTO Tech BlogWantedlyストーリーCloud InfrastructureグループについてAWSを主としたクラウドインフラの設計、構築、運用を主に担当しています。
イベント情報
![[Mirror]不確実な事業環境を突破した、成長企業6社独自のエンジニアリング](/assets/banners/thumb1.png)