Flutterアプリとネイティブ機能の連携 〜Android専用のカメラ解析ライブラリを組み込むために検討したこと〜
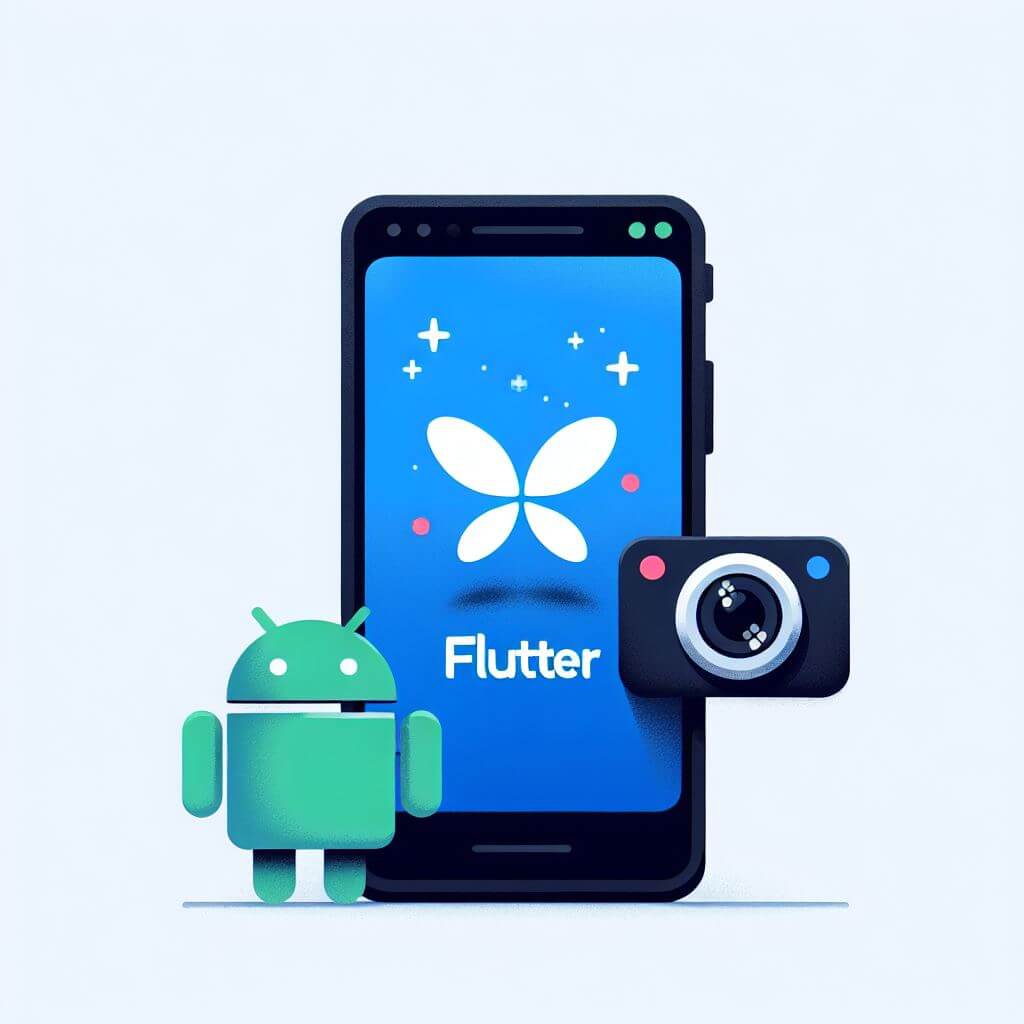
Flutterアプリとネイティブ機能の連携 〜Android専用のカメラ解析ライブラリを組み込むために検討したこと〜
こんにちは。Toyota Woven City Payment 開発グループの大杉です。
私たちのチームでは、 Woven by ToyotaのToyota Woven City で使用される決済システムの開発をしており、バックエンドからWebフロントエンド、そして、モバイルアプリケーションまで決済関連の機能を幅広く担当しています。
これまで、私たちはFlutterを使ってProof of Concept (PoC) 用のモバイルアプリの開発を行なって来ました。今回は、そのPoC用アプリに新たにAndroid/iOSネイティブでしか提供されていないカメラ解析ライブラリを組み込み、新機能を開発した際に直面した課題に対して試行錯誤したことをまとめました。
はじめに
Flutterアプリにネイティブ機能を組み込むことは、単純な開発工数だけでなくメンテナンスのコストも増大するので、開発のハードルが高くなります。
私たちのプロジェクトでは、開発期間とリソースを鑑みてFlutterアプリにネイティブ機能を組み込まず、PoC用アプリとカメラ解析用のネイティブアプリを別々に開発し、それらを連携させることでPoCを実施しました。PoC完了後、Flutterアプリとカメラ解析アプリの統合を検討した際、Flutterのネイティブ連携機能に関して設計指針や実装方法などの情報が断片的であり、特にAndroidの複雑なUI構成に対して体系的な指針が少ないと感じました。
この記事では、Androidにフォーカスを当て、FlutterアプリにネイティブUIを組み込むための設計指針と具体的な実現方法を紹介します。
同じような境遇に直面しているエンジニアの皆さんの参考になれば幸いです。
アプリの概要
実際のPoCで開発したアプリを今回の記事に合わせて簡略化すると、以下のような仕様のアプリとなります。
仕様
- startボタンを押下すると、カメラプレビューが表示される
- カメラプレビューの画像に対してカメラ解析機能が実行され、解析結果が通知される
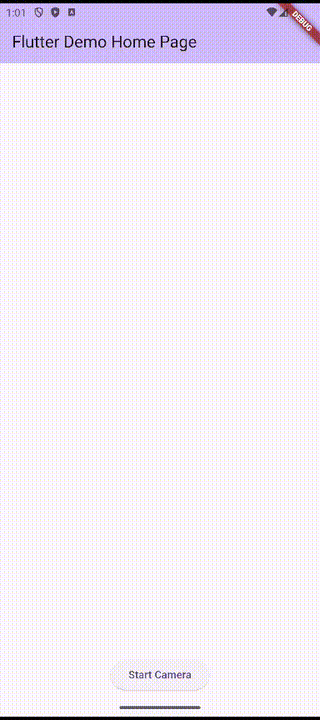
この記事では、このアプリをベースに話を進めていきたいと思います。
FlutterとAndroidネイティブのデータ連携
まず、Flutterからカメラを操作したり、Androidネイティブから解析結果を通知するなど、FlutterとAndroidネイティブ間のデータのやりとりでは、MethodChannelとEventChannelを使用して実装しました。
特に、カメラの起動・停止などの命令についてはMethodChannel、解析結果のイベントの通知についてはEventChannelを使用しています。
シーケンス図に表すと以下のようになります。
次に、AndroidネイティブのカメラプレビューのUIをFlutter側に表示させる方法について話をしたいと思います。
FlutterアプリでAndroidのネイティブUIを表示する方法
FlutterアプリでAndroidネイティブのUIを表示する方法は、大きく分けて3つあります。
-
AndroidネイティブのSurfaceに描画された画像をFlutterのWidget tree内で表示するTexture widget
-
AndroidネイティブUIをFlutterのWidget tree内に組み込み、表示・制御できるPlatformView
-
新たにActivityを起動するIntent
それぞれの特徴と実装方法について説明します。
Texture widget
Texture widgetは、AndroidネイティブのSurfaceに描画された画像をFlutter側のWidget tree内に表示します。つまり、ネイティブのUIの画像をFlutterからGPUに直接描画するものです。
この機能は、カメラプレビューや動画の再生などレイテンシーがあまり問題にならないユースケースには適していますが、リアルタイム性が求められるUIアニメーションなどではネイティブ側で調整する必要があり、FlutterとAndroidネイティブについて習熟している必要があると言えます。
また、Texture widget自体にはタッチイベントなどのユーザーインタラクションを検知する機能もないため、Flutter側でGestureDetectorなどを使って実装する必要があります。
ただし、要件がマッチしていれば以下の実現方法のように比較的簡単に実装できます。
実装方法
まずは、TextureRegistryというものを取得します。
Flutterアプリの場合は、TextureRegistryの実装であるFlutterEngine.FlutterRendererを取得できます。
Flutterプラグインの場合は、FlutterPluginBindingから取得できます。
// Flutterアプリの場合
val textureRegistry = this.flutterEngine.renderer

// Flutterプラグインの場合
val textureRegistry = this.flutterPluginBinding.textureRegistry
次に、textureRegistryからSurfaceTextureであるtextureEntryを生成し、
CameraXのプレビューインスタンスに対してSurfaceを提供するSurfaceProviderを設定します。これで準備は完了です。このSurfaceが、前述した描画バッファとなります。
val textureEntry = textureRegistry.createSurfaceTexture()
val surfaceProvider = Preview.SurfaceProvider { request ->
    val texture = textureEntry?.surfaceTexture()
    texture?.setDefaultBufferSize(
        request.resolution.width,
        request.resolution.height
    )

    val surface = Surface(texture)
    request.provideSurface(surface, cameraExecutor) { }
}

val preview = Preview.Builder().build().apply {
    setSurfaceProvider(surfaceProvider)
}

// 記事冒頭のカメラを解析する要件を満たすには、
// cameraProviderを用意し、Previewと解析処理をここでカメラに設定することで実現できます。
try {
    camera = cameraProvider?.bindToLifecycle(
        this,
        CameraSelector.DEFAULT_BACK_CAMERA,
        preview,
        analysis, // ここにカメラ映像の解析処理を設定
    )
} catch(e: Exception) {
    Log.e(TAG, "Exception!!!", e)
}
その後、Surfaceと関連づけられたTextureEntryのIDをMethodChannelの戻り値としてFlutter側に返してあげるだけです。
fun onMethodCall(call: MethodCall, result: MethodChannel.Result) {
    when(call.method) {
        "startCamera" -> {
            result.success(textureEntry.id())
        }
        "stopCamera" -> {
            stopCamera()
        }
        else -> result.notImplemented()
    }
}
ネイティブのSurfaceTextureをFlutter側で描画するには、MethodChannelから取得したtextureIdをTexture widgetに設定するだけで、カメラプレビューがFlutterアプリ上に表示されます。
static const platform =
      MethodChannel('com.example.camera_preview_texture/method');

int? _textureId;

Future<void> onPressed() async {
  try {
    final result = await platform.invokeMethod<int>('startCamera');
    if (result != null) {
      setState(() {
        _textureId = result;
      });
    }
  } on PlatformException catch (e) {
    print(e.message);
  }
}

Widget build(BuildContext context) {
  if (_textureId == null) {
    return const SizedBox();
  }

  return SizedBox.fromSize(
    size: MediaQuery.of(context).size,
    child: Texture(
      textureId: _textureId!,
    ),
  );
}
このTexture widgetを使用した実装については、mobile_scannerの実装が非常に参考になります。
PlatformView
PlatformViewは、AndroidネイティブUIをFlutterのWidget tree内に組み込み、表示・制御できるようにしたものです。
PlatformViewには、Virtual Display (VD), Hybrid Composition (HC), TextureLayerHybridComposition (TLHC)という描画モードがあります[1]。
PlatformViewのAPIを利用すると、基本的にはTLHCが選択されますが、AndroidネイティブのUIツリーにSurfaceViewが含まれる場合はVDまたはHCにフォールバックします[2]。
なお、Texture widgetでは対応できなかったFlutterとAndroidネイティブのフレームレートの同期が改善され、ユーザーのインタラクションを制御でき、カメラプレビューや動画以外のUIも表示できます。
実装方法
このPlatformViewを使ったサンプルコードでは、カメラプレビュー画面をJetpack Composeで実装しています。
FlutterアプリでJetpack Composeを使用するには、以下の依存関係や設定をapp/build.gradleに追加する必要があります。
android {

    ~
    ~

    buildFeatures {
        compose true
    }

    composeOptions {
        kotlinCompilerExtensionVersion = "1.4.8"
    }
}

dependencies {
    implementation("androidx.activity:activity-compose:1.9.3")
    implementation(platform("androidx.compose:compose-bom:2024.04.01"))
    implementation("androidx.compose.material3:material3")
}
それでは、具体的な実装の説明に移ります。
PlatformViewを実装するには次の3つのステップが必要です。
PlatformViewを継承したNativeViewを実装するPlatformViewFactoryを継承したNativeViewFactoryを実装するFlutterEngineにPlatformViewFactoryを登録する
まずは、1. NativeViewの実装です。大まかな実装は公式を参照してください。
公式との差分として、ここではJetpack Composeを使用しており、Jetpack ComposeであるCameraPreviewをComposeViewを使用してAndroidネイティブのViewのツリーに埋め込んでいます。
class NativeView(context: Context, id: Int, creationParams: Map<String?, Any?>?, methodChannel: MethodChannel, eventChannel: EventChannel) : PlatformView {
    private var nativeView: ComposeView? = null

    override fun getView(): View {
        return nativeView!!
    }

    override fun dispose() {}

    init {
        nativeView = ComposeView(context).apply {
            setContent {
                CameraPreview(methodChannel, eventChannel)
            }
        }
    }
}
Jetpack Composeの実装では、ViewであるCameraXのPreviewViewをAndroidViewを使用してComposeにしています。
余談ですが、AndroidViewはFragmentに対しても使用できます。
@Composable
fun CameraPreview(methodChannel: MethodChannel, eventChannel: EventChannel) {
    val context = LocalContext.current

    val preview = Preview.Builder().build()
    val previewView = remember {
        PreviewView(context)
    }

    suspend fun startCamera(context: Context) {
        val cameraProvider = context.getCameraProvider()
        cameraProvider.unbindAll()

        // 記事冒頭のカメラを解析する要件を満たすには、
        // cameraProviderを用意し、Previewと解析処理をここでカメラに設定することで実現できます。
        cameraProvider.bindToLifecycle(
          LocalLifecycleOwner.current,
          CameraSelector.Builder().requireLensFacing(CameraSelector.LENS_FACING_BACK).build(),
          preview,
          analysis, // ここにカメラ映像の解析処理を設定
        )

        preview.surfaceProvider = previewView.surfaceProvider
    }

    suspend fun stopCamera(context: Context) {
        val cameraProvider = context.getCameraProvider()
        cameraProvider.unbindAll()
    }

    LaunchedEffect(Unit) {
        fun onMethodCall(call: MethodCall, result: MethodChannel.Result) {
            when(call.method) {
                "startCamera" -> {
                    runBlocking {
                        CoroutineScope(Dispatchers.Default).launch {
                            withContext(Dispatchers.Main) {
                                startCamera(context)
                            }
                        }
                    }
                    result.success("ok")
                }
                "stopCamera" -> {
                    runBlocking {
                        CoroutineScope(Dispatchers.Default).launch {
                            withContext(Dispatchers.Main) {
                                stopCamera(context)
                            }
                        }
                    }
                }
                else -> result.notImplemented()
            }
        }

        methodChannel.setMethodCallHandler(::onMethodCall)
    }

    AndroidView(factory = { previewView }, modifier = Modifier.fillMaxSize())
}
次に、2. NativeViewFactoryの実装と3. FlutterEngineへの登録は以下の通りです。
class MainActivity: FlutterFragmentActivity() {

  ~
  ~

  override fun configureFlutterEngine(flutterEngine: FlutterEngine) {
    super.configureFlutterEngine(flutterEngine)

    val methodChannel = MethodChannel(
        flutterEngine.dartExecutor.binaryMessenger,
        METHOD_CHANNEL
    )

    val eventChannel = EventChannel(
        flutterEngine.dartExecutor.binaryMessenger,
        EVENT_CHANNEL
    )

    flutterEngine
        .platformViewsController
        .registry
        .registerViewFactory(VIEW_TYPE, NativeViewFactory(methodChannel, eventChannel))
    }
}

class NativeViewFactory(
    private val methodChannel: MethodChannel,
    private val eventChannel: EventChannel
) : PlatformViewFactory(StandardMessageCodec.INSTANCE) {
    override fun create(context: Context, viewId: Int, args: Any?): PlatformView {
        val creationParams = args as Map<String?, Any?>?
        return NativeView(
            context,
            viewId,
            creationParams,
            methodChannel,
            eventChannel
        )
    }
}
最後に、Flutter側の実装です。
PlatformViewsService.initSurfaceAndroidView()は、TLHC / HCのいずれかを使用するためのAPIです。
PlatformViewsService.initAndroidView()を使用すればTLHC / VDのいずれかを使用でき、PlatformViewsService.initExpensiveAndroidView()を使用すると強制的にHCとなります。
class CameraPreviewView extends StatelessWidget {
final String viewType = 'camera_preview_compose';
final Map<String, dynamic> creationParams = <String, dynamic>{};
CameraPreviewView({super.key});
Widget build(BuildContext context) {
return PlatformViewLink(
viewType: viewType,
surfaceFactory: (context, controller) {
return AndroidViewSurface(
controller: controller as AndroidViewController,
hitTestBehavior: PlatformViewHitTestBehavior.opaque,
gestureRecognizers: const <Factory<OneSequenceGestureRecognizer>>{},
);
},
onCreatePlatformView: (params) {
return PlatformViewsService.initSurfaceAndroidView(
id: params.id,
viewType: viewType,
layoutDirection: TextDirection.ltr,
creationParams: creationParams,
creationParamsCodec: const StandardMessageCodec(),
onFocus: () {
params.onFocusChanged(true);
},
)
..addOnPlatformViewCreatedListener(params.onPlatformViewCreated)
..create();
},
);
}
}
このようにPlatformViewを使用することで、FlutterアプリにAndroidネイティブのUIを組み込むことができます。
Intent
Intentは、FlutterではなくAndroidの機能で、Flutterが動作するMainActivityとは別のActivityを起動することできます。
これを使用すると、アプリ内の別の画面に遷移させたり、外部のアプリを起動させることができ、Activity間でデータのやりとりもできます。
前述した2つの方法 (Texture widgetとPlatformView)にはパフォーマンスの課題があることが報告されています[3]。
これらの課題を解決するためには、FlutterとAndroidネイティブへの深い造詣が求められるため、場合によってはAndroidアプリを別で作成してしまった方が開発コストを抑えられるかもしれません。
ただし、その場合は別の観点での課題があります。
-
チームにFlutterエンジニアしかいない場合は、Android開発のキャッチアップが必要となる
-
外部アプリとして開発した場合は、アプリ間のインターフェースに何らかのセキュリティ対策やライフサイクルを考慮した実装をする必要がある
たとえば、以下のような対応が求められます。
- Activity間でやりとりするデータに対してバリデーションをする
- 特定のアプリ以外からは呼び出されないようにする
- 呼び出されたアプリは、呼び出し元アプリがkillされてしまっている場合でも正しく動作することを保証する
それでは、FlutterでIntentを使用する方法を見ていきたいと思います。まずは、Flutterアプリから別のActivityを呼び出す方法についてです。
呼び出し元のActivity(Flutterアプリが動作するMainActivity)
override fun onMethodCall(call: MethodCall, result: MethodChannel.Result) {
    if (call.method!!.contentEquals("startCamera")) {
      val dummyData = call.argument<String>("dummy_data") ?: return result.error(
        "ERROR",
        "data is invalid",
        null
      )

      // 画面遷移の場合
      val intent = Intent(this, SubActivity::class.java)

      // 外部アプリの場合
      val packageName = "com.example.camera_preview_intent"
      val intent = activity.packageManager.getLaunchIntentForPackage(packageName) ?: return result.error(
        "ERROR",
        "unexpected error",
        null
      )
      intent.setClassName(packageName, ".SubActivity")

      // 送信データの格納
      intent.putExtra("EXTRA_DUMMY_DATA", dummyData)

      intent.setFlags(Intent.FLAG_ACTIVITY_SINGLE_TOP)
      activity.startActivityForResult(intent, REQUEST_CODE)
    }
}

override fun onListen(arguments: Any?, sink: EventChannel.EventSink?) {
    eventSink = sink
}

override fun onCancel(arguments: Any?) {
    eventSink = null
}

override fun onActivityResult(requestCode: Int, resultCode: Int, data: Intent?): Boolean {
    if (requestCode == REQUEST_CODE && resultCode == Activity.RESULT_OK && data != null) {
        val result = data.getStringExtra("RESULT_DATA") ?: "",
        eventSink?.success(result)

        return true
    }

    return false
}
続いて、Flutterアプリから呼び出されたActivityの実装です。以下のように、特定の処理が完了したらIntentを使用してデータを返却できます。
呼び出し先のActivity
val intent = Intent()
intent.putExtra("RESULT_DATA", resultData)
activity.setResult(Activity.RESULT_OK, intent)

finish()
このようにIntentを使用することでFlutterとAndroidネイティブ側の複雑なUI制御を考慮しないで済み、さらには、FlutterとAndroidネイティブのActivity間でデータのやりとりができます。
ただし、その場合はセキュリティやデータの整合性については考慮する必要があります。
まとめ
この記事では、Flutterアプリにネイティブ機能を組み込む方法について、Androidにフォーカスして説明しました。
- FlutterとAndroidネイティブ間のデータ連携は、
MethodChannelとEventChannelを用いて実現しました - FlutterへAndroidネイティブのUIを組み込む方法は以下
Texturewidget- カメラプレビューや動画表示に適しており、比較的簡単に実装できる
- ユーザーインタラクション制御の実装が必要で、パフォーマンスの課題もある
PlatformView- ネイティブUIをFlutterのWidget treeに組み込んでくれ、ユーザーインタラクション制御も実現できる
- View, Fragment, Jetpack Composeが組み込み可能
- パフォーマンスの課題もある
- ネイティブUIをFlutterのWidget treeに組み込んでくれ、ユーザーインタラクション制御も実現できる
Intent- 画面を遷移や別アプリを起動してAndroidのUIを直接表示でき、データのやりとりもできる
- セキュリティやデータのやり取りに注意が必要
以上、FlutterアプリにAndroidネイティブ機能を組み込む際はそれぞれの方法にメリットとデメリットがあるため、プロジェクトの要件に応じて適切な選択をすることが求められます。
備考
サムネイルのドロイド君は、Googleが作成および提供している作品から複製または変更したものであり、クリエイティブ・コモンズ表示 3.0 ライセンスに記載された条件に従って使用しています。
関連記事 | Related Posts

Flutterアプリとネイティブ機能の連携 〜Android専用のカメラ解析ライブラリを組み込むために検討したこと〜

バックエンドエンジニアたちが複数のFlutterアプリを並行開発していく中で見つけたベストプラクティス
KotlinエンジニアがFlutterに入門して1ヶ月でWebアプリケーションを作った話
Flutter開発効率化:GitHub ActionsとFirebase Hostingを用いたWebプレビュー自動化の方法をstep-by-stepでご紹介

MediaPipe Instant Motion Trackingを用いた、AndroidにおけるARエフェクトの実現
The Best Practices Found by Backend Engineers While Developing Multiple Flutter Applications at Once
We are hiring!
【オープンポジション】「気になる!」方はまずはこちらからご応募ください。/東京・名古屋・大阪・福岡
業務内容国内外のKINTOサービスや、トヨタグループの金融、モビリティサービスの内製開発組織である同社にて、ご経験・ご志向性に応じて配属を決定し、ご活躍いただきます。
PjM(新規システムの構想検討とプロジェクト推進)/ プロジェクト推進G/東京・名古屋
業務内容トヨタグループ内でデジタル領域における業務改善やシステム化を推進していただくポジションです。現場に深く入り込み、実務と企画の両面から支援を行います。