テスト仕様書に基づいてAppium 自動化ソースコードを作成する方法

初めに
KINTOテクノロジーズのQAグループに所属しているパンヌウェイ(PannNuWai)です。QAグループでアプリチームのテスト自動化担当としてKINTOかんたん申し込みアプリのテスト自動化環境の構築と整備をしていたり、テスト仕様書とテストスクリプトを書いています。
前回は、Appiumを利用したDarkMode自動化テストに関する技術ブログを記載しました。
Appiumによる自動化テストに携わったのは3年になり、自分のチームでは自動化テストソースコード前にテスト仕様書作成の順番で行なっております。
だからAppiumのJavaソースコード書く時とても役に立ているテスト仕様書作成方法についてお話ししたいと思います。
テスト仕様書作成前になぜこの仕様書作成方法が必須ですかの質問について回答させて頂きます。
テスト仕様書作成のメリット
- 自動化テストソースコード書く場合時間削減できる
- 自動化テスト者以外の方にも分かり安い
- 画面ごと、ソースコードクラスと操作機能によって分別してるので読みやすい
本記事ではKINTOかんたん申し込みアプリのログインシナリオ仕様書をサンプルテスト仕様書として説明します。
ログインステップ
こちらにKINTOかんたん申し込みアプリログインの各ステップについて教えます。
ステップ 1

ステップ 2

ステップ 3

ログインに関するテストデータを収集する
ログインテスト仕様書作成の初期ステップとして、テスト環境、テストアカウント、パスワード、テスト実行後に自動出力されているレポート名、テスト実行ファイルなどのテストデータを収集する必要があります。それでは、iOSのログインシナリオ仕様書から始めましょう。
| データ名 | データ情報 |
|---|---|
| 環境 | Stg4 |
| テストアカウント | ******@gmail.com |
| パスワード | ******** |
| レポート名 | iOS用 iOS.poc.login android用 android.poc.login |
| 実行ソースファイル | iOS用 iOS.poc.login.xml android用 android.poc.login.xml |
iOS用のログインシナリオ仕様書
| 確認機能 | 画面 | 操作 | 確認ポイント | 実行ファイル(xml) | ソースファイル | メソッド |
|---|---|---|---|---|---|---|
| ログインする | メイン画面 | マイページロゴを押下する | ログインボタンが押下できる | iOS.poc.login.xml | iOS.MainPage | clickMyPagingLogo |
| マイページ画面 | 『お申し込み内容』を押下する 『ログインはこちら!』を押下する |
iOS.MyPagingPage | clickApplyTab clickLoginHereButton |
|||
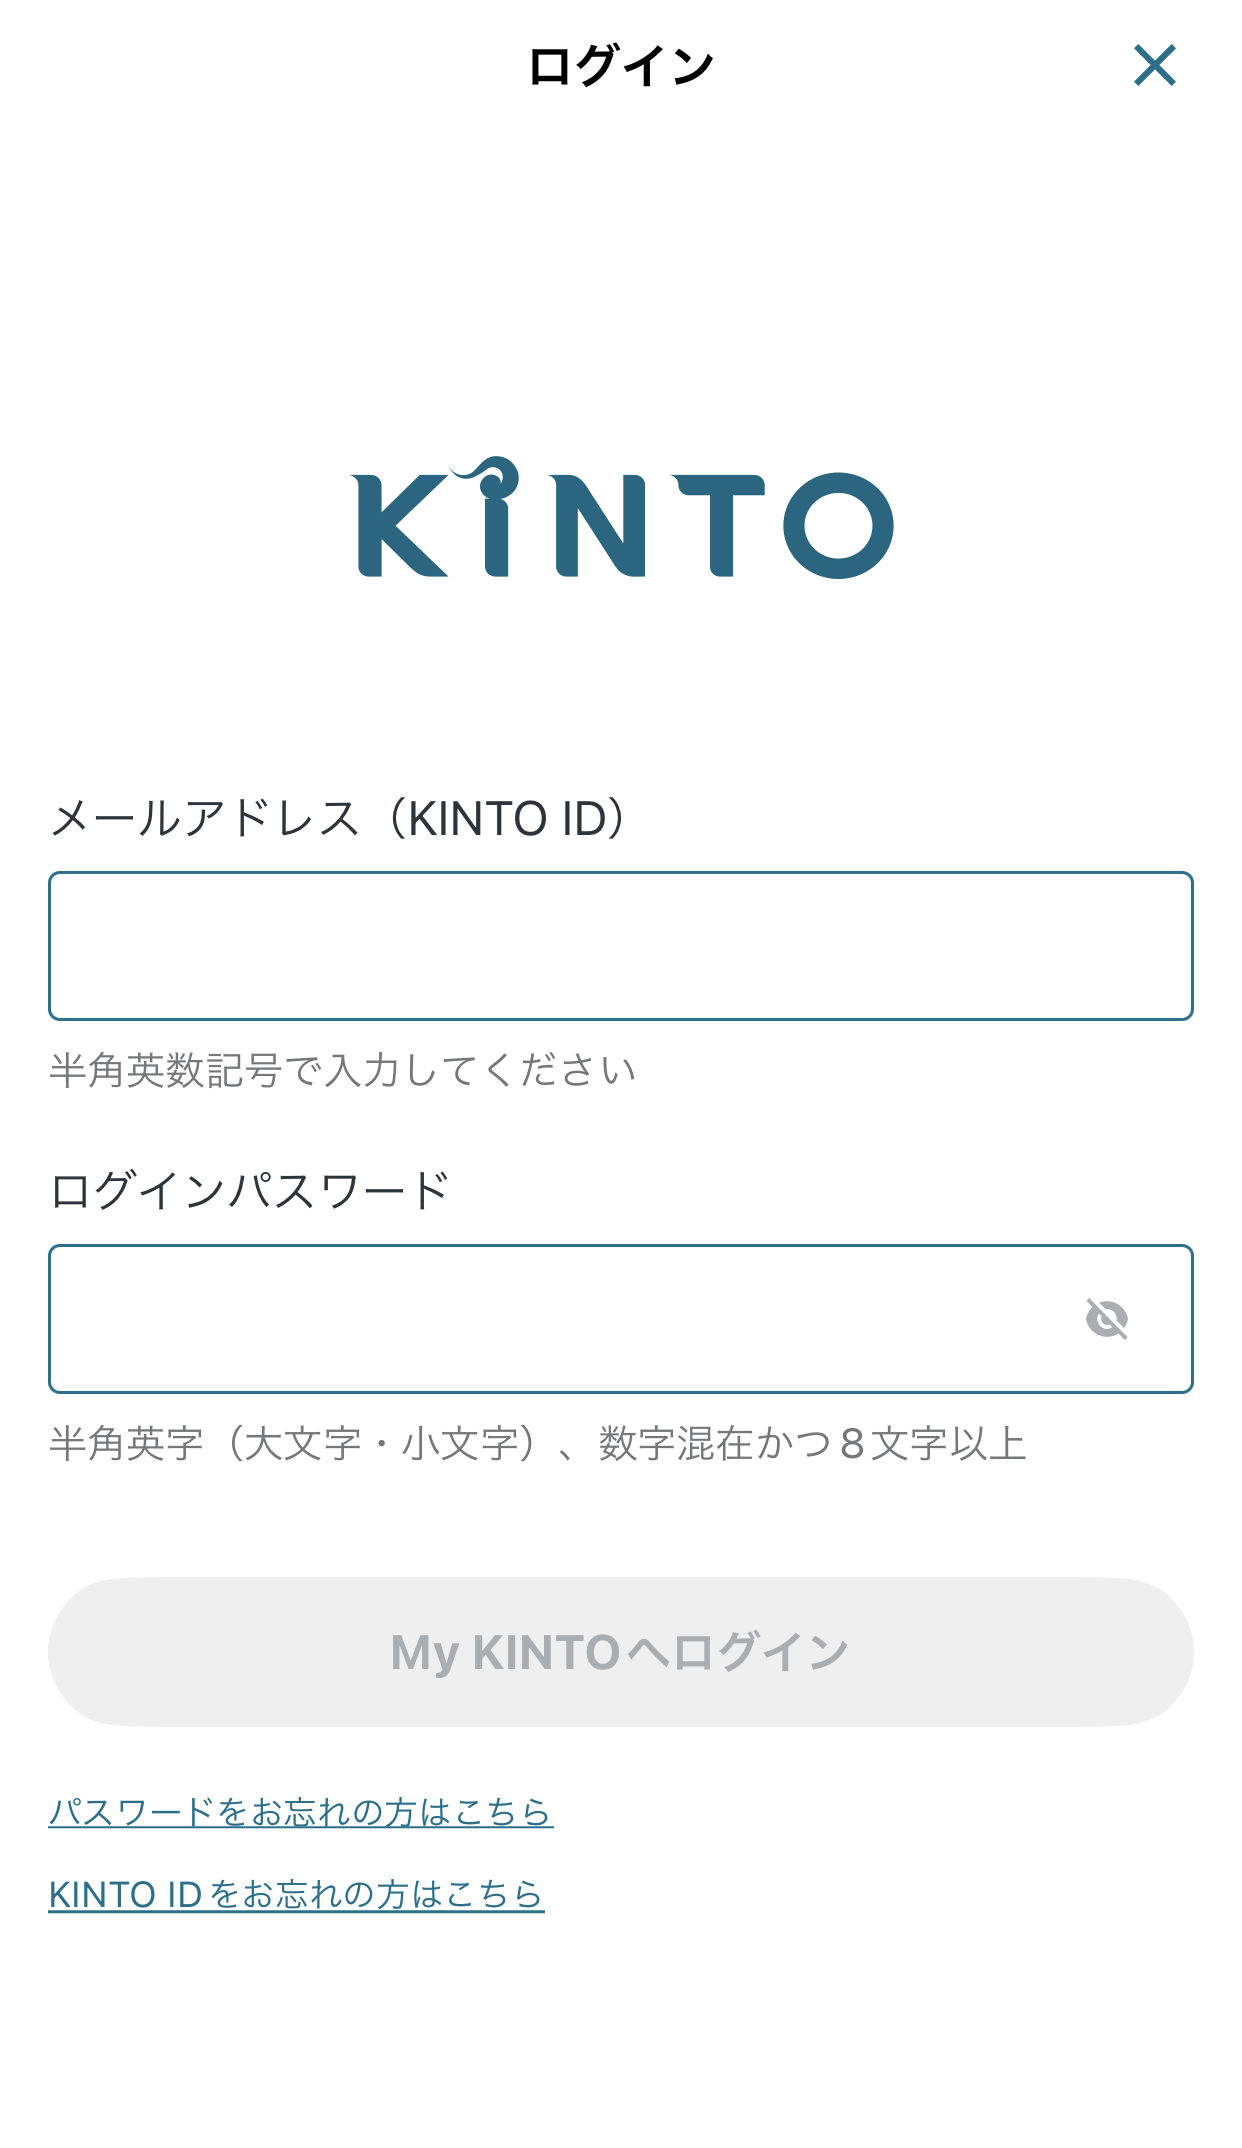
| ログイン画面 | 『メールアドレス(KINTO ID)』に上記のテストアカウントを記入する 『ログインパスワード』に上記のパスワードを記入する 『My KINTOへログイン』を押下する |
iOS.LoginPage | fillMailAddress fillPassword clickToMyKintoLoginButton |
これからシナリオ仕様書の各画面によってJavaのクラスを作成しましょう。まずは、メイン画面(MainPage.java)のマイページロゴを押下します。
MainPage.java
public class MainPage extends Base {
    public static final String MY_PAGING_LOGO =
        "//XCUIElementTypeButton[@name=\"マイページ\"]";

    /**
     * メイン画面の『マイページ』ロゴのクリックするテストメソッド
     *
     * このメソッドはXPathを使用してメインページ上の"マイページ"ロゴを特定し、
     * クリックアクションを実行する
     *
     */
    @Test(groups = "MainPage")
    public void clickMyPagingLogo() {
        driver.findElementByXPath(MY_PAGING_LOGO).click();
    }
}
ステップ 2 としてマイページ画面の『お申し込み内容』を押下した後『ログインはこちら』をクリックします。
MyPagingPage.java
public class MyPagingPage extends Base {
    public static final String APPLY_TAB =
        "//XCUIElementTypeButton[@name=\"お申し込み内容\"]";
    public static final String LOGIN_HERE_BUTTON =
        "//XCUIElementTypeButton[@name="My KINTOへログイン\"]";

    /**
     * マイページ画面の『お申し込み内容』をクリックするテストメソッド
     *
     * このメソッドはXPathを使用してマイページ画面の『お申し込み内容』を特定し、
     * クリックアクションを実行する
     *
     */
    @Test(groups = "MyPagingPage", dependsOnGroups = "MainPage")
    public void clickApplyTab() {
        driver.findElementByXPath(APPLY_TAB).click();
    }

    /**
    * マイページ画面の『ログインはこちら』をクリックするテストメソッド
    *
    * このメソッドはXPathを使用してマイページ画面の『ログインはこちら』を特定し、
    * クリックアクションを実行する
    *
    */
    @Test(groups = "MyPagingPage", dependsOnMethods = "clickApplyTab")
    public void clickLoginHereButton() {
        driver.findElementByXPath(LOGIN_HERE_BUTTON).click();
    }
}
次は ステップ 3 として『ログイン画面』にメールアドレスとパスワードを記入しながらログインボタンを押下します。
LoginPage.java
public class LoginPage extends Base {
    public static final String EMAIL_TEXT_FIELD =
        "//XCUIElementTypeApplication[@name=\"KINTO かんたん申し込み \"]/XCUIElementTypeOther[2]/XCUIElementTypeTextField";
    public static final String PASSWORD_TEXT_FIELD =
        "//XCUIElementTypeApplication[@name=\"KINTO かんたん申し込み \"]/XCUIElementTypeOther[3]/XCUIElementTypeSecureTextField";
    public static final String ENTER_KEY =
        "//XCUIElementTypeButton[@name=\"Return\"]";
    public static final String TO_MY_KINTO_LOGIN_BUTTON =
        "//XCUIElementTypeButton[@name=\"My KINTOへログイン\"]";

    /**
    * ログイン画面の『メールアドレス(KINTO ID)』にテストアカウントを記入するテストメソッド
    *
    * このメソッドはXPathを使用してログイン画面の『メールアドレス』で
    * xmlファイルのテストアカウント(Parameter)を記入する
    *
    */
    @Parameters("email")
    @Test(groups= "LoginPage", dependsOnGroups = "MyPagingPage")
    public void fillMailAddress(String email) {
        driver.findElementByXPath(EMAIL_TEXT_FIELD).click();
        driver.getKeyboard().sendKeys(email);
    }

  /**
    * ログイン画面の『ログインパスワード』にパスワードを記入するテストメソッド
    *
    * このメソッドはXPathを使用してログイン画面の『ログインパスワード』で
    * xmlファイルのパスワード(Parameter)を記入する
    *
    */
    @Parameters("password")
    @Test(groups= "LoginPage", dependsOnGroups = "MyPagingPage")
    public void fillPassword(String password) {
        driver.findElementByXPath(PASSWORD_TEXT_FIELD).click();
        driver.getKeyboard().sendKeys(password);
        driver.findElementByXPath(ENTER_KEY).click();
    }

    /**
    * ログイン画面の『My KINTOへログイン』を押下するテストメソッド
    *
    * このメソッドはXPathを使用してログイン画面の『My KINTOへログイン』を特定し、
    * クリックアクションを実行する
    *
    */
    @Test(groups= "LoginPage", dependsOnGroups = "MyPagingPage")
    public void clickToMyKintoLoginButton() {
        driver.findElementByXPath(TO_MY_KINTO_LOGIN_BUTTON).click();
    }
}
下記のxmlファイルは自動化テストのテスト実施ファイルです。テスト仕様書に基づいて各機能を順番に書いています。
<?xml version="1.0" encoding="UTF-8"?>
<!DOCTYPE suite SYSTEM "http://testng.org/testng-1.0.dtd">
<suite name="iOS.poc.login">
    <test verbose="2" name="iOS.poc.login">
        <classes>
            <class name="iOS.MainPage">
                <methods>
                    <include name="clickMyPagingLogo"/>
                </methods>
            </class>
            <class name="iOS.MyPagingPage">
                <methods>
                    <include name="clickApplyTab"/>
                    <include name="clickLoginHereButton"/>
                </methods>
            </class>
            <class name="iOS.LoginPage">
                <methods>
                    <parameter name="email" value="******.gmail.com"/>
                    <parameter name="password" value="*********"/>
                    <include name="fillMailAddress"/>
                    <include name="fillPassword"/>
                    <include name="clickToMyKintoLoginButton"/>
                </methods>
            </class>
        </classes>
    </test>
</suite>
まとめ
本記事では、AppiumのJavaソースコード向けのテスト仕様書作成方法を説明しましたが、Appiumだけではなく他の自動化テストソースコード作成にも参考になるように期待しています。
関連記事 | Related Posts
We are hiring!
【QAエンジニア(リーダークラス)】QAG/東京・大阪・福岡
QAグループについて QAグループでは、自社サービスである『KINTO』サービスサイトをはじめ、提供する各種サービスにおいて、リリース前の品質保証、およびサービス品質の向上に向けたQA業務を行なっております。QAグループはまだ成⾧途中の組織ですが、テスト管理ツールの導入や自動化の一部導入など、QAプロセスの最適化に向けて、積極的な取り組みを行っています。
【63】シニア/フロントエンドエンジニア(React/Typescript)/KINTO中古車開発G/東京・大阪・福岡
KINTO開発部KINTO中古車開発グループについて◉KINTO開発部 :66名 KINTO中古車開発G:9名★ KINTOプロダクトマネジメントG:3名 KINTOバックエンド開発G:16名 契約管理開発G :9名 KINTO開発推進G:8名 KINTOフロントエンド開発G...


![[Mirror]不確実な事業環境を突破した、成長企業6社独自のエンジニアリング](/assets/banners/thumb1.png)

