How I Learned to Work with AI by Programming with GitHub Copilot (Mobile Engineer Edition)

Introduction
The combination of VSCode and Copilot is an absolute blast. It's so much fun that I almost forget I have a day job. I’m writing this article because I simply have to share how incredibly enjoyable this development experience has been.
This article is the entry for day 25 in the KINTO Technologies Advent Calendar 2024🎅🎄
What I'll Talk About today
The AI world has been on fire since last year, and this year was no exception: there's been no shortage of buzz! At KTC, we've been diving headfirst into AI, looking for smart ways to boost our development productivity.
In this post, I'll shine a spotlight on what you can actually do when you pair VSCode with Copilot. Now, maybe you're thinking, “AI? Meh. It just spits out vague code and I can write better stuff faster myself.” I get it.
That was my take too, until I saw the new Copilot Chat and Edits features unveiled at GitHub Universe. Suddenly, coding with AI started to look… kind of fun? So today, I'll share some tips that have been genuinely useful when teaming up with Copilot Chat/Edits in real-world dev work.
Why Flutter?
When doing mobile development, it's common to use the standard IDE for each OS, whether it’s iOS or Android. However, since this article focuses on programming with GitHub Copilot, we'll be working under the assumption that development is done using VSCode. With that in mind, Flutter stands out as a major mobile framework that officially supports VSCode.
I also got a lot out of attending FlutterKaigi recently, so for this project, I decided to use Flutter for collaborating with AI. I even contributed to the FlutterKaigi app. Just a tiny issue, but still 😀
What can it actually do?
Many of the features announced at GitHub Universe are still in preview, so what's available is limited. But even just using the already released Copilot Chat and Edits has made working with AI more enjoyable and clearly improved the developer experience.
When you hear “coding with AI,” you might picture building apps without writing any code, or having code generated automatically. And sure, auto-generating code is possible, but that's really just one small part of what AI can do. Also, generating complex, fully functional code with a single prompt? Not exactly easy. Writing the right prompt is half the battle.
In this article, we'll share tips for using Copilot Chat/Edits to do everyday coding tasks (like writing test code, formatting and breaking up code, and refactoring) all in collaboration with AI to help improve code quality.
Now, here are some tips.
Code Summary
 |
 |
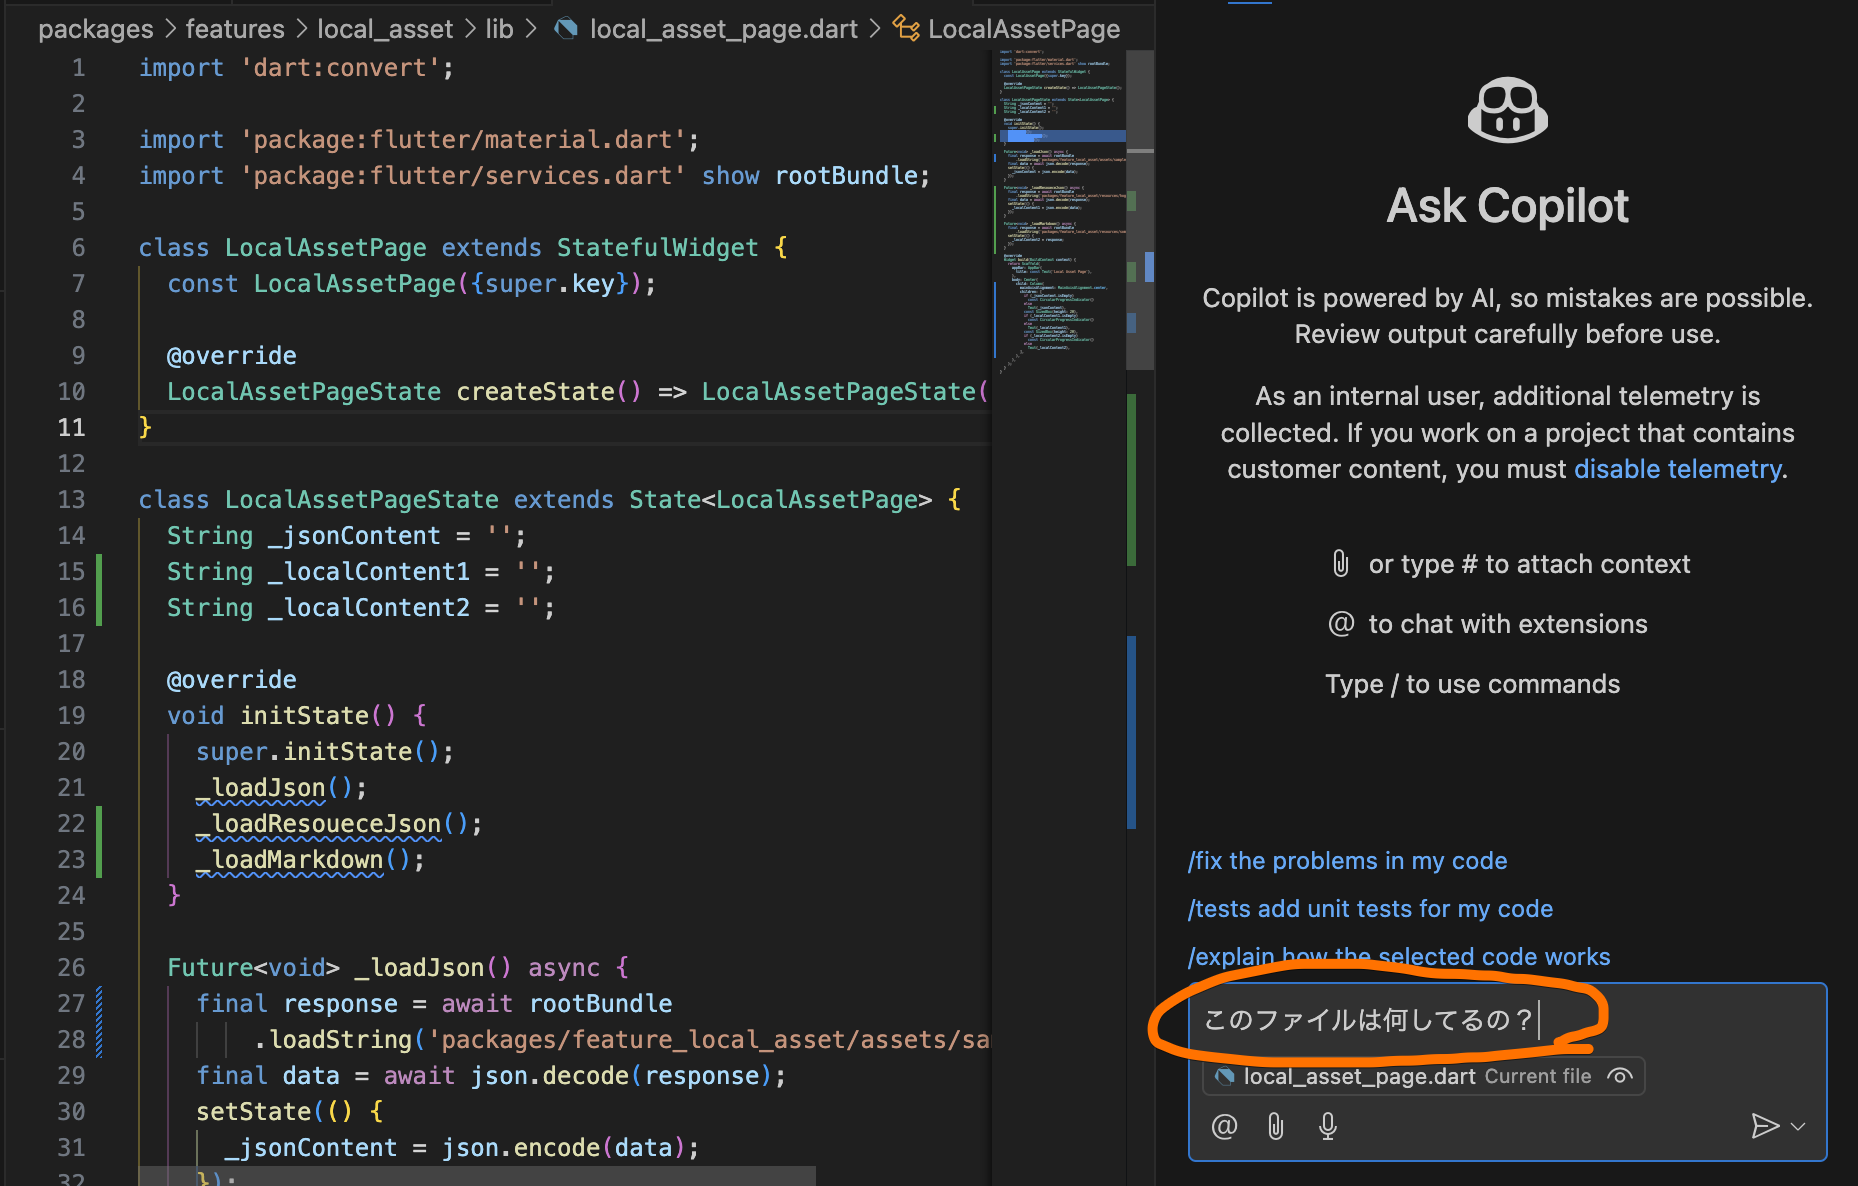
Copilot Chat makes it easy to generate code summaries. This can speed up code comprehension during onboarding.
Add comments
| BEFORE | AFTER |
|---|---|
  |
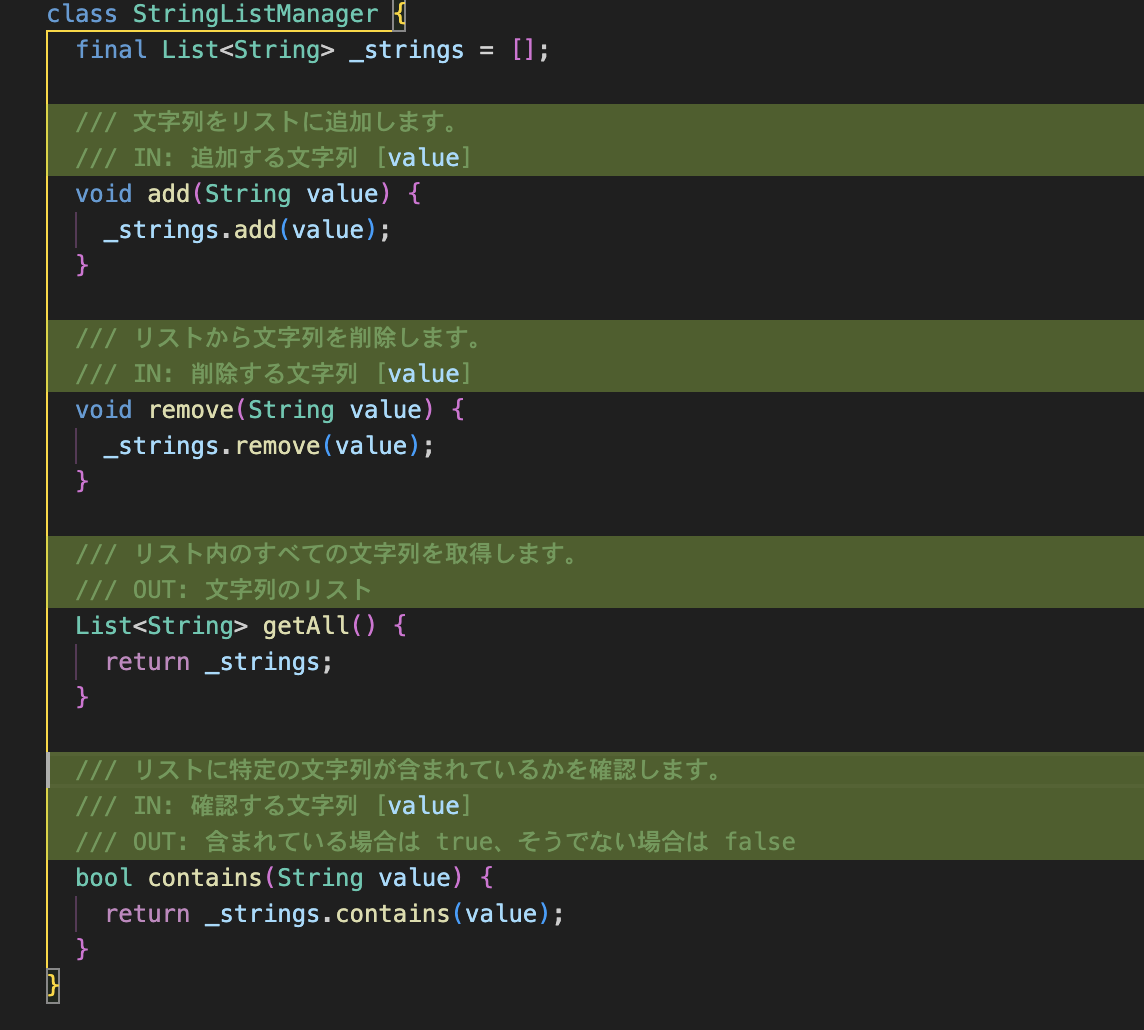 |
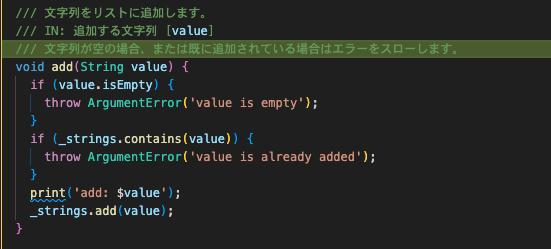
If you want to add comments to your code, Copilot Edits can insert them directly into your file. This helps deepen your understanding of the code. Copilot can also update existing comments, making sure they stay accurate. For example, if you add validation to the add method in the class above, you can give an instruction like the one below, and Copilot will update the comment accordingly.
| BEFORE | AFTER |
|---|---|
  |
 |
Creating Test Code
 |
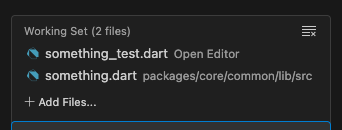 |
You can add files to reference (besides the current one) above the text input field in Copilot Edits. So, when asking it to write test code, just create a test file, keep it open, and add the target file to the reference list. Copilot will then generate the test code for you.
Code Formatting & Splitting
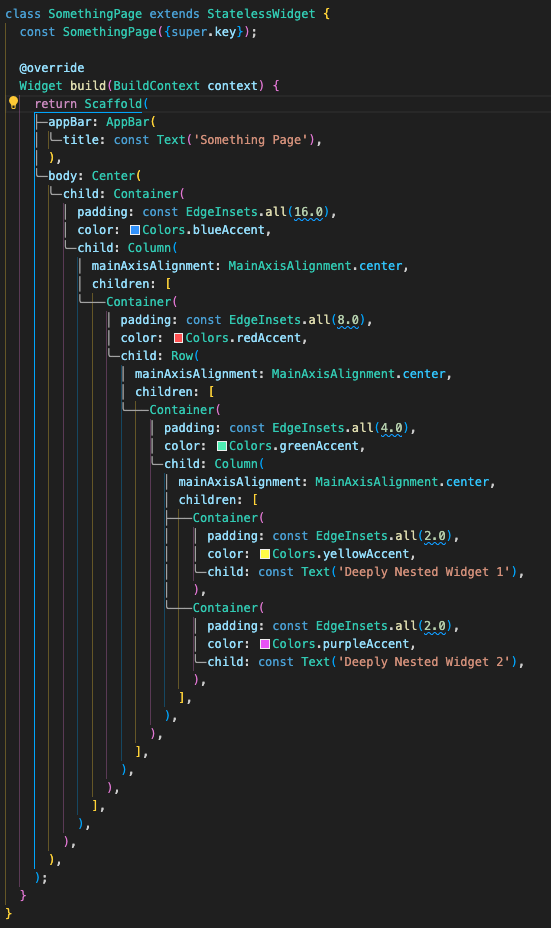
When building UIs with declarative languages like Flutter, deeply nested code tends to become a common issue.
 |
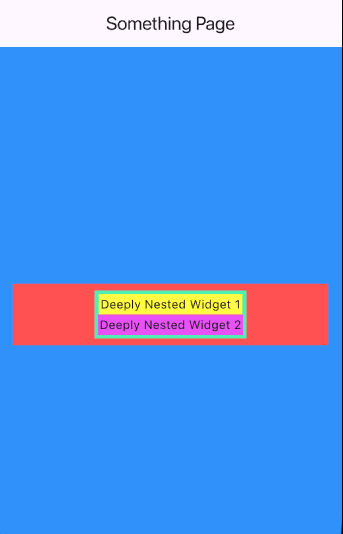 |
Code before formatting
class SomethingPage extends StatelessWidget {
const SomethingPage({super.key});
Widget build(BuildContext context) {
return Scaffold(
appBar: AppBar(
title: const Text('Something Page'),
),
body: Center(
child: Container(
padding: const EdgeInsets.all(16.0),
color: Colors.blueAccent,
child: Column(
mainAxisAlignment: MainAxisAlignment.center,
children: [
Container(
padding: const EdgeInsets.all(8.0),
color: Colors.redAccent,
child: Row(
mainAxisAlignment: MainAxisAlignment.center,
children: [
Container(
padding: const EdgeInsets.all(4.0),
color: Colors.greenAccent,
child: Column(
mainAxisAlignment: MainAxisAlignment.center,
children: [
Container(
padding: const EdgeInsets.all(2.0),
color: Colors.yellowAccent,
child: const Text('Deeply Nested Widget 1'),
),
Container(
padding: const EdgeInsets.all(2.0),
color: Colors.purpleAccent,
child: const Text('Deeply Nested Widget 2'),
),
],
),
),
],
),
),
],
),
),
),
);
}
}
Copilot Edits can help with this too. It splits and formats the code into cleaner, more readable chunks.
Formatted code
class SomethingPage extends StatelessWidget {
const SomethingPage({super.key});
Widget build(BuildContext context) {
return Scaffold(
appBar: AppBar(
title: const Text('Something Page'),
),
body: Center(
child: Container(
padding: const EdgeInsets.all(16.0),
color: Colors.blueAccent,
child: const NestedContainer(),
),
),
);
}
}
class NestedContainer extends StatelessWidget {
const NestedContainer({super.key});
Widget build(BuildContext context) {
return Column(
mainAxisAlignment: MainAxisAlignment.center,
children: const [
InnerContainer(),
],
);
}
}
class InnerContainer extends StatelessWidget {
const InnerContainer({super.key});
Widget build(BuildContext context) {
return Container(
padding: const EdgeInsets.all(8.0),
color: Colors.redAccent,
child: Row(
mainAxisAlignment: MainAxisAlignment.center,
children: const [
DeeplyNestedContainer(),
],
),
);
}
}
class DeeplyNestedContainer extends StatelessWidget {
const DeeplyNestedContainer({super.key});
Widget build(BuildContext context) {
return Container(
padding: const EdgeInsets.all(4.0),
color: Colors.greenAccent,
child: Column(
mainAxisAlignment: MainAxisAlignment.center,
children: const [
DeeplyNestedWidget1(),
DeeplyNestedWidget2(),
],
),
);
}
}
class DeeplyNestedWidget1 extends StatelessWidget {
const DeeplyNestedWidget1({super.key});
Widget build(BuildContext context) {
return Container(
padding: const EdgeInsets.all(2.0),
color: Colors.yellowAccent,
child: const Text('Deeply Nested Widget 1'),
);
}
}
class DeeplyNestedWidget2 extends StatelessWidget {
const DeeplyNestedWidget2({super.key});
Widget build(BuildContext context) {
return Container(
padding: const EdgeInsets.all(2.0),
color: Colors.purpleAccent,
child: const Text('Deeply Nested Widget 2'),
);
}
}
Refactor
Even those legacy methods tangled up with complex dependencies, something that you often see in older code, can be refactored using Copilot Edits based on SOLID principles.
Classes with methods with complex dependencies
class SomethingLogic {
  Future<void> performComplexOperation() async {
    // Fetch data from remote server
    final response = await http.get(Uri.parse('https://example.com/data'));
    if (response.statusCode != 200) {
      throw Exception('Failed to load data');
    }
    final data = jsonDecode(response.body);

    // Save data to local database
    final database = openDatabase(
      join(await getDatabasesPath(), 'app_database.db'),
      onCreate: (db, version) {
        return db.execute(
          'CREATE TABLE data(id INTEGER PRIMARY KEY, value TEXT)',
        );
      },
      version: 1,
    );
    final db = await database;
    await db.insert(
      'data',
      {'id': data['id'], 'value': data['value']},
      conflictAlgorithm: ConflictAlgorithm.replace,
    );

    // Save data to shared preferences
    final prefs = await SharedPreferences.getInstance();
    await prefs.setString('data', jsonEncode(data));

    // Perform some complex logic
    if (data['value'] == 'special') {
      // ...existing code...
      print('Special value found!');
      // ...existing code...
    } else {
      // ...existing code...
      print('Regular value found.');
      // ...existing code...
    }
  }
}
Code refactored using SOLID principles
class DataFetcher {
  final http.Client client;

  DataFetcher(this.client);

  Future<Map<String, dynamic>> fetchData(String url) async {
    final response = await client.get(Uri.parse(url));
    if (response.statusCode != 200) {
      throw Exception('Failed to load data');
    }
    return jsonDecode(response.body);
  }
}

class DatabaseHelper {
  Future<Database> getDatabase() async {
    return openDatabase(
      join(await getDatabasesPath(), 'app_database.db'),
      onCreate: (db, version) {
        return db.execute(
          'CREATE TABLE data(id INTEGER PRIMARY KEY, value TEXT)',
        );
      },
      version: 1,
    );
  }

  Future<void> saveData(Database db, Map<String, dynamic> data) async {
    await db.insert(
      'data',
      {'id': data['id'], 'value': data['value']},
      conflictAlgorithm: ConflictAlgorithm.replace,
    );
  }
}

class SharedPreferencesHelper {
  Future<void> saveData(Map<String, dynamic> data) async {
    final prefs = await SharedPreferences.getInstance();
    await prefs.setString('data', jsonEncode(data));
  }
}

class SomethingLogic {
  final DataFetcher dataFetcher;
  final DatabaseHelper databaseHelper;
  final SharedPreferencesHelper sharedPreferencesHelper;

  SomethingLogic(this.dataFetcher, this.databaseHelper, this.sharedPreferencesHelper);

  Future<void> performComplexOperation() async {
    final data = await dataFetcher.fetchData('https://example.com/data');
    final db = await databaseHelper.getDatabase();
    await databaseHelper.saveData(db, data);
    await sharedPreferencesHelper.saveData(data);

    if (data['value'] == 'special') {
      // ...existing code...
      print('Special value found!');
      // ...existing code...
    } else {
      // ...existing code...
      print('Regular value found.');
      // ...existing code...
    }
  }
}
Doing this level of refactor manually would take quite a bit of time, but with Copilot Edits, you can get it done much faster. The code is now much easier to read, so you can build on that and refactor it further based on your own experience.
Others
Besides that, the basic Suggestions feature is surprisingly powerful. Normally, when I run into implementation issues, I end up switching back and forth between the browser and the IDE, but now, most problems can be solved just by consulting Copilot. That means fewer distractions and better focus during development. This might seem minor, but it makes a big difference.
Tips for Giving Instructions
Working with AI has led to a lot of new discoveries, but I've come to realize that giving clear instructions is one of the most important parts. Many engineers I know still find AI hard to use,but once you get used to giving it specific instructions, collaborating with AI can actually be pretty fun.
Here are a few instruction tips I've picked up:
- Keep it simple
- Be specific
- Mention which file
- Say what to do
- Say how to do it
- Don't give multiple instructions at once
I especially feel that it's important for the person giving instructions to have a solid grasp of programming principles and design concepts.
Summary
In this post, I introduced some of the things you can do by combining VSCode and Copilot. With Copilot Chat and Edits, tasks like summarizing code, writing comments, generating test code, formatting, splitting, and refactoring become significantly easier; all through a few simple prompts. I hope that at least some of that came across.
In the engineering world, opinions on AI are still divided, and many of the engineers around me are still hesitant to embrace it.
But it's clear that the world is steadily moving toward AI, and it's only going to keep evolving and expanding what it can do. Feels like we've entered an era where engineers need to seriously think about how we'll use AI going forward.
If this article got you even a little curious about collaborating with AI, I'd be glad.
関連記事 | Related Posts
How I Learned to Work with AI by Programming with GitHub Copilot (Mobile Engineer Edition)

GitHub Copilot と Cursor エディタ、両方課金してメリット・デメリットを比較してみた

Flutter開発効率化:GitHub ActionsとFirebase Hostingを用いたWebプレビュー自動化の方法をstep-by-stepでご紹介

2025年QAG入社メンバー奮闘記
SwiftUIをCompose Multiplatformで使用する
myroute Android AppでのJetpack Compose
We are hiring!
シニア/フロントエンドエンジニア(React/Typescript)/KINTO中古車開発G/東京・大阪・福岡
KINTO開発部KINTO中古車開発グループについて◉KINTO開発部 :66名 KINTO中古車開発G:9名★ KINTOプロダクトマネジメントG:3名 KINTOバックエンド開発G:16名 契約管理開発G :9名 KINTO開発推進G:8名 KINTOフロントエンド開発G...
【UI/UXデザイナー】クリエイティブ室/東京・大阪・福岡
クリエイティブGについてKINTOやトヨタが抱えている課題やサービスの状況に応じて、色々なプロジェクトが発生しそれにクリエイティブ力で応えるグループです。所属しているメンバーはそれぞれ異なる技術や経験を持っているので、クリエイティブの側面からサービスの改善案を出し、周りを巻き込みながらプロジェクトを進めています。