Let’s Start a New Development Approach, "TDD × AI," in the AI Era
In 2025, as AI continues to evolve rapidly, being able to effectively use AI has become a key skill for engineers.
However, to do so, it is essential to understand prompts appropriately (how to give instructions), requiring experience and knowledge.
As the first step in coding with AI, I will introduce you to development utilizing TDD (test-driven development) and AI, which is the theme of this article.
Benefits of TDD × AI
✅Drastically reduced implementation cost! Engineers “only need to write tests”
Other than writing tests, they do not need to give complex instructions or prompts. After that, AI automatically generates code.
✅Development speed skyrockets! Dramatic reduction in detailed back-and-forth communication AI can instantly generate code at each step of TDD, significantly accelerating development efficiency and improving consistency across the codebase.
✅ Exceptional code quality! AI output can be controlled with proper testing Proper testing ensures control over AI generative code. The result is code with fewer bugs.
What is TDD?
Here is a brief explanation of TDD (Test-Driven Development), which is a fundamental premise.

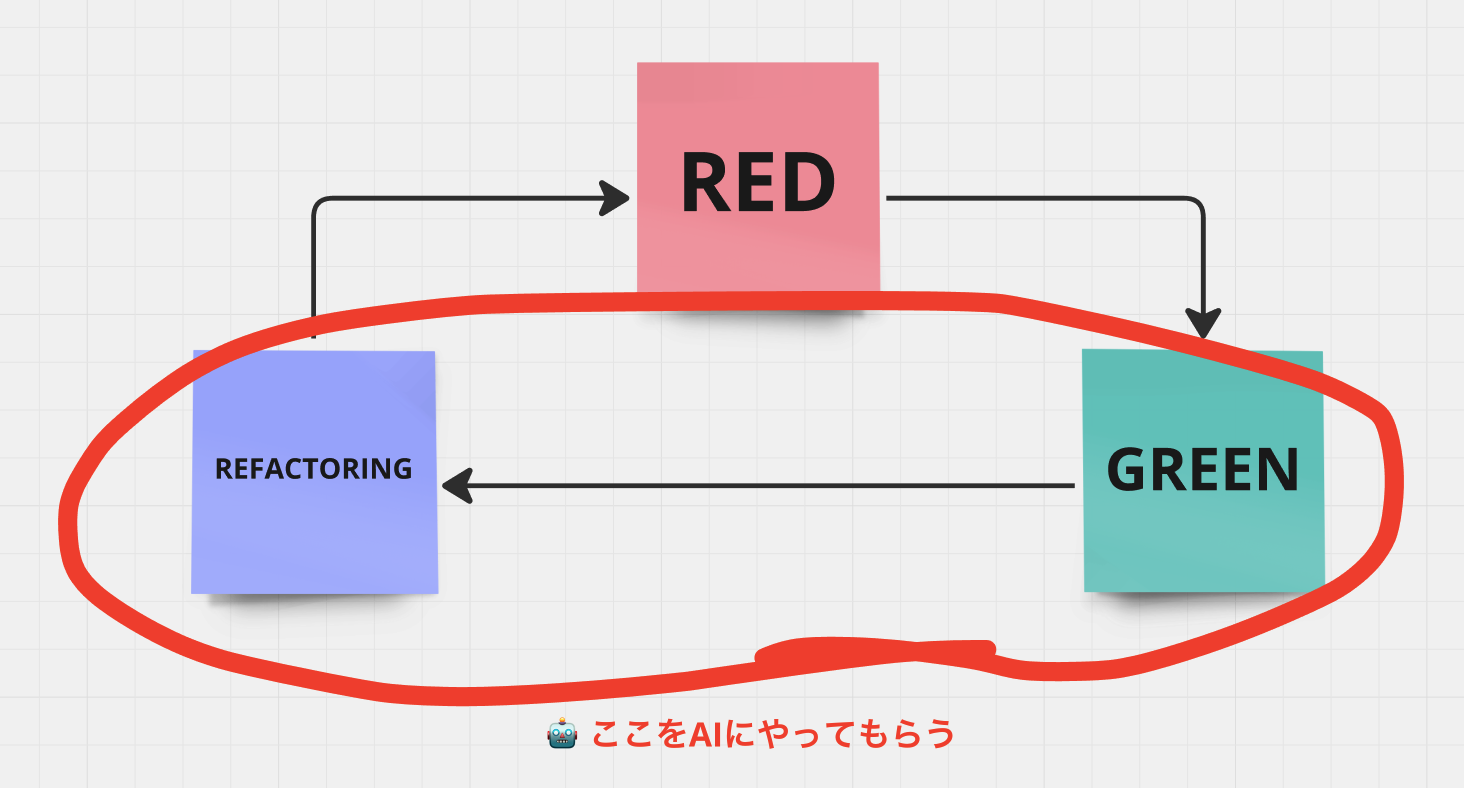
"TDD (Test-Driven Development)" is a methodology proposed by Kent Beck in his book👆 over 20 years ago. By repeating the simple cycle shown in the diagram above — first, write a test, then implement code to pass the test, and finally, refactor — you can produce high-quality, maintainable code. Since testing serves as the starting point for implementation, development can proceed while ensuring a testable structure.
Practice TDD
:::message This is performed using the Agent mode of GitHub Copilot in VSCode. ::: https://code.visualstudio.com/docs/copilot/copilot-edits#_use-agent-mode-preview
With this method, an engineer writes tests and generative AI handles implementation and refactoring, enabling efficient, high-quality development.
This time, I will explain the flow of TDD × AI using password validation as an example.
Let's start with character count validation.
Step 1: Creating a Character Count Validation Test
Prepare a target password validation class and test files. You can leave both files empty at this stage.
Once the files are created, you might be tempted to immediately write the password validation class. But since we’re using TDD, we’ll start by writing tests.
@Test("パスワードの文字数が8文字以上16文字以下でバリデーションが成功すること")
func testPasswordLengthValidation() async throws {
    let sut = PasswordValidator()
    let validPasswordShort = "Valid123"
    let validPasswordLong = "ValidPassword123"
    let invalidPasswordShort = "Short01"
    let invalidPasswordLong = "ThisPasswordIsWay"

    #expect(sut.validate(validPasswordShort) == true)
    #expect(sut.validate(validPasswordLong) == true)
    #expect(sut.validate(invalidPasswordShort) == false)
    #expect(sut.validate(invalidPasswordLong) == false)
}
Since the PasswordValidator class and validate method aren't implemented yet, you’ll naturally get an error
Next, input a prompt to the AI and ask it to implement.
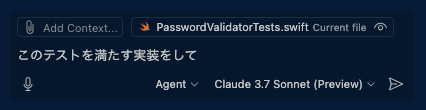
Then, after a few tens of seconds, the AI generates an implementation.
struct PasswordValidator {
    // パスワードの長さの制約を定数として定義
    private let minimumPasswordLength = 8
    private let maximumPasswordLength = 16

    /// パスワードが有効かどうかを検証します
    /// - Parameter password: 検証するパスワード
    /// - Returns: パスワードが有効な場合はtrue、そうでない場合はfalse
    func validate(_ password: String) -> Bool {
        let passwordLength = password.count
        return passwordLength >= minimumPasswordLength && passwordLength <= maximumPasswordLength
    }
}
Next, let's add a feature to validate the mix of numbers, letters, and symbols.
Step 2: Adding Validation of Numbers, Letters, and Symbols
@Test("パスワードの文字列の中に数字、文字、記号が含まれている場合にバリデーションが成功すること")
func testPasswordCharacterValidation() async throws {
    let sut = PasswordValidator()
    let validPassword = "ValidPassword12!"
    let invalidPasswordNoNumber = "InvalidPassword!"
    let invalidPasswordNoCharacter = "1234567890!"
    let invalidPasswordNoSymbol = "InvalidPassword1"

    #expect(sut.validate(validPassword) == true)
    #expect(sut.validate(invalidPasswordNoNumber) == false)
    #expect(sut.validate(invalidPasswordNoCharacter) == false)
    #expect(sut.validate(invalidPasswordNoSymbol) == false)
}
At this stage, an error will occur, but don't worry about it; just provide the test case to the AI and let it generate the implementation..
struct PasswordValidator {
    // パスワードの長さの制約を定数として定義
    private let minimumPasswordLength = 8
    private let maximumPasswordLength = 16

    /// パスワードが有効かどうかを検証します
    /// - Parameter password: 検証するパスワード
    /// - Returns: パスワードが有効な場合はtrue、そうでない場合はfalse
    func validate(_ password: String) -> Bool {
        let passwordLength = password.count
        guard passwordLength >= minimumPasswordLength && passwordLength <= maximumPasswordLength
        else {
            return false
        }

        let hasNumber = password.rangeOfCharacter(from: .decimalDigits) != nil
        let hasLetter = password.rangeOfCharacter(from: .letters) != nil
        let hasSymbol =
            password.rangeOfCharacter(from: .symbols) != nil
            || password.rangeOfCharacter(from: .punctuationCharacters) != nil

        return hasNumber && hasLetter && hasSymbol
    }
}
Up to this point, we completed the implementation in under 10 minutes.
In traditional coding, you need to explicitly define various conditions and specifications in the prompt, but with this method, you simply ask AI to implement something that meets the test conditions. Since all the implementation details have been written in the test, there is almost no need for complex prompt instructions.
To Further Streamline Communication with AI
If you write implementation rules and constraints in advance in "copilot-instructions.md," there's no need to provide detailed instructions to the AI each time.
日本語で返答してください。

### コーディングルール

- テストはswift-testingを使用してください。
- 実装には基本的にマジックナンバーは使わないこと
- DRYの原則に則って実装してください
- KISSの原則に則って実装してください
- YAGNIの原則に則って実装してください
To Become an Engineer Who Thrives in the Age of AI
AI is not omnipotent. But that’s no reason to give up! It is important to calmly determine what "AI is good at" and what "humans should handle." With “TDD × AI,” let's understand the coding habits of AI and reach new levels of speed and quality in development!🚀
関連記事 | Related Posts

We are hiring!
生成AIエンジニア・生成AIスペシャリスト/AIファーストG/東京・名古屋・大阪・福岡
募集背景KINTOテクノロジーズでは、2023年6月に内製の生成AIチャットツールを導入して以来、全社的に生成AIの業務活用を推進してきました。現在は、単発のPoCや個別最適に留まらず、複数部門・複数チームにまたがる課題を、再現性のある形で解決していくことが求められています。
ビジネスデベロップメントスペシャリスト(シニア) / ビジネスディベロップメントG/東京
ビジネスディベロップメントGについてビジネスディベロップメントGは、トヨタグループが世界で展開するモビリティサービスを“仕組み”と“テクノロジー”の力で成長させていくチームです。モビリティサービスの中核を担う車のFull Service Leaseや、それ以外のサービスにおけるグローバルプロジェクトに関わります。