Next.jsでテックブログを作った話

Happy Christmas🎄
こんにちは!KINTO ONE 開発Gの渡邊です。
普段はフロントエンドエンジニアとしてNext.jsやTypeScriptを用いてプロダクト開発を行なっています。
また、テックブログ運営チームとしてテックブログの開発・実装も担当しました。
アドベントカレンダーの最終日の今回は、テックブログのデザイン選定やフロントエンド開発についてご紹介いたします。
テックブログチームの立ち上げ
テックブログ運営チームは元々、社内のアウトプットカルチャーを育むことを目的に、リーダーの中西さんを中心に有志4名が集まり発足しました。
残タスクの見える化を意識して運用体制やブログの仕様について話し合ったので、とにかく高速で物事が決まっていったのを思い出します。
その中で私は、ブログ全体のデザインとフロントエンド実装を担当しました。
週次のミーティングでは、議論から生まれたアイデアをプロトタイプに反映し、チームに共有していました。
プロトタイプがあるとチームのモチベーションも上がるので、実装担当として目に見える進捗を意識して開発に臨みました。
Next.js でテックブログ開発
フロントエンドのフレームワーク(ライブラリ)はNext.jsを採用しています。
Next.jsを採用した理由は自分自身一番馴染みがあり、ブログ記事をMarkdownファイルとしてストックし、Static Site Generatorで静的サイトを生成すれば良さそうだなと構想段階から考えていたからです。
作成したプロジェクトからビルド時に静的コンテンツを生成し、成果物をホスティングしています。
また、Next.jsはGitHub上に様々なライブラリを組み合わせたexamplesを公開しています。
この中の一つにblog-starterがあり、ブログの雛形を用意されていたので、着手しやすかったのもNext.jsを採用した理由です。
以上を踏まえて、テックブログを作り上げるために必要なステップを以下の3つに分類し、開発を行いました。
- デザイン選定
- 画面実装(記事一覧ページ・記事詳細ページ)
- Markdownツールの準備
デザイン選定
デザイン担当を引き受けたが、ブログデザインのノウハウが全くなかったので他社事例のリサーチから始めました。
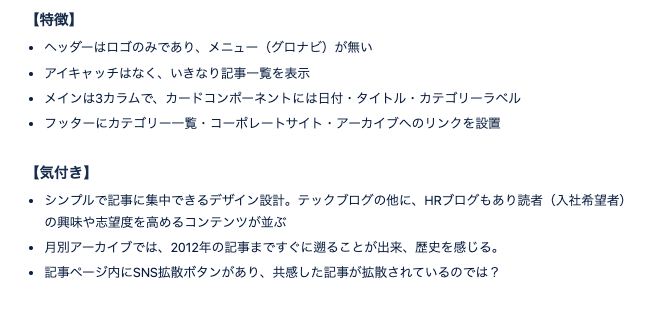
他者事例から得た特徴や気付きを元に、テックブログに必要なUI要素や情報整理をチームで行いました。

特徴・気付きをまとめたドキュメント
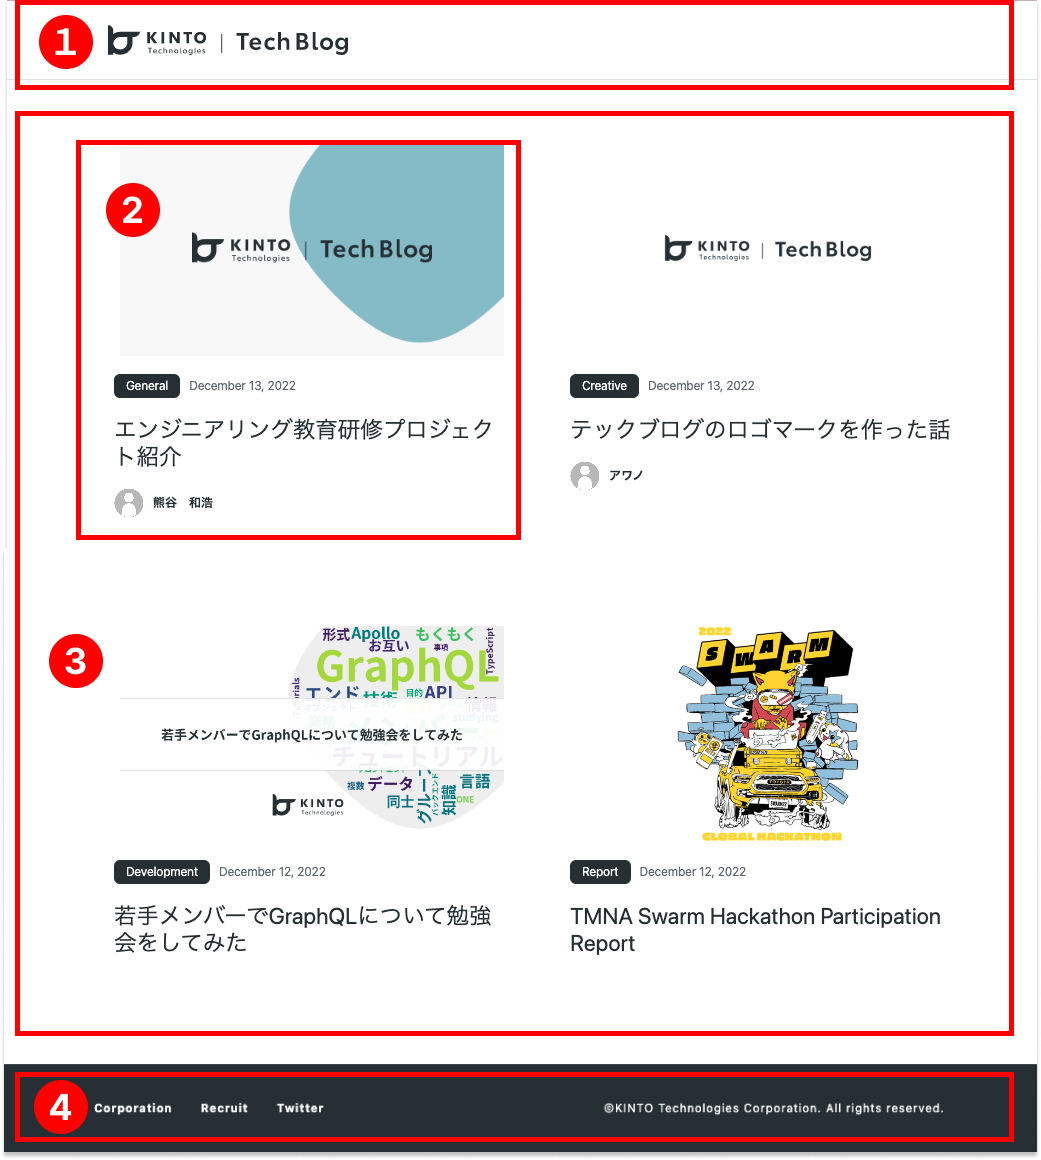
デザインリサーチを進める中で、シンプルかつ分かりやすいデザインを目標にして、考慮するべき4つのコンポーネント(ヘッダー・カード・リスト・フッター)に着目しました。
また、実装を担当することも決まっていたので、コーディングがしやすく拡張性の高いデザインを意識して作成しました。

コンポーネント分類
ある程度デザインが出来上がったタイミングでサイトデザインを管理している部署に確認いただき、アドバイスを頂けました。
画面実装
画面のテンプレートはblog-starterで用意されていたので、スタイルのコーディングに集中するべく、CSSフレームワークとしてTailwind CSSを採用しました。
Tailwind CSSの特徴は、標準のクラス名がシンプルかつどのようなスタイルを表しているかを認識しやすいように定義されているので、直感的にスタイルを変更でき、開発コスト削減にも繋がっています(ユーティリティファースト)。
何人かの社内のフロントエンドエンジニアがテックブログの機能拡張やバグ改修で関わってくれてますが、学習コストが少なくスムーズに実装してもらっているのでチーム開発に向いているなと思います。
レスポンシブ対応を同じclassName内で書けるのも魅力的です。
<div className="md:px-6 lg:px-10 md:py-10 md:hover:shadow-xl">
  <div className="mb-6">
    <CoverImage slug={slug} title={title} src={coverImage} />
  </div>
  <div className="flex items-center mb-4 md:mb-6">
    <div className="background-color h-7 flex items-center rounded-lg p-2 md:p-4 mr-3">
      <span className="text-white text-xs md:text-base">{category}</span>
    </div>
    <div className="text-gray-500 text-sm md:text-base transition">
      <DateFormatter dateString={date} />
    </div>
  </div>
  <h3 className="text-xl sm:text-2xl md:text-2xl lg:text-3xl mb-2 md:mb-6 leading-snug text-color">
    <Link href={`/posts/${slug}`}>
      <a className="hover:underline">{title}</a>
    </Link>
  </h3>
</div>
Markdownツールの準備
テックブログでは、Markdownパーザーとしてzenn-markdown-htmlとzenn-markdown-cssを採用しています。
blog-starterで用意されているデフォルトのMarkdown記法ではバリエーションに欠けるかつカスタマイズのハードルが高いのが採用理由です。それぞれのパーサーの役割は以下の通りです。
- zenn-markdown-html
- Zenn独自の記法を含むMarkdownをHTMLに変換(markdownToHtml)するためのパッケージ
- zenn-content-css
- zenn-markdown-htmlでMarkdownから変換されたHTMLに適用するためのCSS
- CSSを適用したいコンポーネントやブロックに
className=zncを指定
多種多様な埋め込みコンテンツ等も用意されているので、リッチなブログが作成できます。(TweetのURLを記載するだけで簡単にコンテンツ表示)
今後トライしたい機能
シンプルで分かりやすいを目標にスモールスタートしたテックブログですが、将来的に実装したい機能のアイデアもまとめておきます。
リリース後に社内外から「こんな機能つけてみたらどう?」という意見を多くいただき、日々注目を集めていて嬉しく思います。
実際にRSS機能を追加したりとアップデートに勤しんでいます。
- タグやカテゴリーを付与して、記事検索機能や絞り込み機能を実装
- 多言語対応出来るようにローカライズ機能を実装
- コンテンツ管理をMicro CMSやクラウドサーバーに載せ、ローカル管理をやめる
まとめ
限られたリソースの中でしたが、フロントエンドの新しい技術に触れることが出来、楽しく開発が出来ました。
また、修正Pull RequestやIssuesを立ててくれる仲間が増えてきて、徐々に社内のブログカルチャーが出来てきたかなとも思います。
まだまだ改良の余地があるテックブログですが、技術のキャッチアップを忘れず、引き続き頑張っていきたいです。
最後に
今年のアドベントカレンダーを通して、少しでも弊社の取り組みや社員の働き方を知っていただけたら嬉しいです!
そして、KINTOテクノロジーズでは、一緒に働ける仲間を募集しています。詳しくはこちらから
最後まで読んでいただきありがとうございました!
参考
関連記事 | Related Posts
We are hiring!
【63】シニア/フロントエンドエンジニア(React/Typescript)/KINTO中古車開発G/東京・大阪・福岡
KINTO開発部KINTO中古車開発グループについて◉KINTO開発部 :66名 KINTO中古車開発G:9名★ KINTOプロダクトマネジメントG:3名 KINTOバックエンド開発G:16名 契約管理開発G :9名 KINTO開発推進G:8名 KINTOフロントエンド開発G...
【UI/UXデザイナー】クリエイティブ室/東京・大阪・福岡
クリエイティブGについてKINTOやトヨタが抱えている課題やサービスの状況に応じて、色々なプロジェクトが発生しそれにクリエイティブ力で応えるグループです。所属しているメンバーはそれぞれ異なる技術や経験を持っているので、クリエイティブの側面からサービスの改善案を出し、周りを巻き込みながらプロジェクトを進めています。


