SvelteKitをAWSにデプロイ - Svelte不定期連載-06
こんにちは(こんばんは)、Svelte不定期連載その6です。
過去の記事はこちら
- SvelteKit + Svelte を1年間くらい使ってみた知見など※SvelteKit メジャーリリース対応済み
- Svelteと他JSフレームワークとの比較
- SvelteでStorybookを使ってみる
- AstroでSvelte使ってみた
- SvelteTips
今回はSvelteKitのSSRデプロイについて書いていこうと思います。
モジュールはこちらです。
@sveltejs/adapter-node
SSRのデプロイにはadapterが必要で、今回はNodeのadapterを利用します。
このadapterは公式のGitHubにも載っています。
Express
Node.jsのウェブフレームワークです。他にはfastifyなどもありますが、どれを使うかは自由です。
環境設定
まずはSvelte内の設定を行います。SvelteKitはデフォルトでSSRになっているので、そこは特に設定する必要がありません。一方デプロイの際にbuildするためにadapterというのを利用する必要があります。公式サイトにも記載してありますが、対象のsvelteプロジェクトから
yarn add -D @sveltejs/adapter-node
でインストールし、svelte.config.js に以下のコードを追加してください。
import adapter from '@sveltejs/adapter-node';

const config = {
	kit: {
		adapter: adapter()
	}
};

export default config;
これでプロジェクトをyarn buildでビルドすると、ビルドしたファイルがデフォルトの出力先である /buildに入り、その中にindex.js と handler.jsというファイルが作成されますが、
もしビルドしたファイルでそのままサーバーを利用したい場合は、build/index.jsを動作させるための、node build を実行すれば、サーバーが始動されて、動作確認ができます。(node xxxxのxxxxはビルドしたファイルの出力先なので、デフォルトがbuildです)
次はルートディレクトリにExpressの設定ファイルを入れます。(事前にexpressをインストールしてください)
import { handler } from './build/handler.js';
import express from 'express';

const app = express();

// 例えば今回作ったSvelteKitアプリと関係ない、aws用のヘルスチェックパスを作る
app.get('/health', (_, res) => {
  var param = { value: 'success' };
	res.header('Content-Type', 'application/json; charset=utf-8');
	res.send(param);
});

// ビルドで作ったSvelteはこちらでハンドリングされます
app.use(handler);

app.listen(3000, () => {
	console.log('listening on port 3000');
});
上記の設定を完了したら、node server.js でExpressサーバーを立ち上げ、http://localhost:3000
でSvelteKitのアプリを確認できます。
アプリをAWSにデプロイしてみる
ここからはAWSにデプロイしていきます。AWSでは要件に応じて様々な構成で実現できます。この記事ではEC2のみを利用し最低限ネットからアプリにアクセスできるて手順を紹介します。実際はセキュリティやパフォーマンスの理由で、Cloudfront/ALB/VPCなどの組み合わせも検討してください。
AWSサービスを利用すると、料金がかかってしまうので、なるべくコストなどを確認し、利用しない時は該当サービスを停止したほうをお勧めします。
EC2
今回作ったSvelteKitアプリをホストするためのクラウドサーバーサービスです。
EC2インスタンスの作成
まずはEC2のセットアップから始めたいと思います。
EC2のインスタンスを作成するために、EC2の管理画面に入り、右上にある「インスタンスを起動」をクリックします。
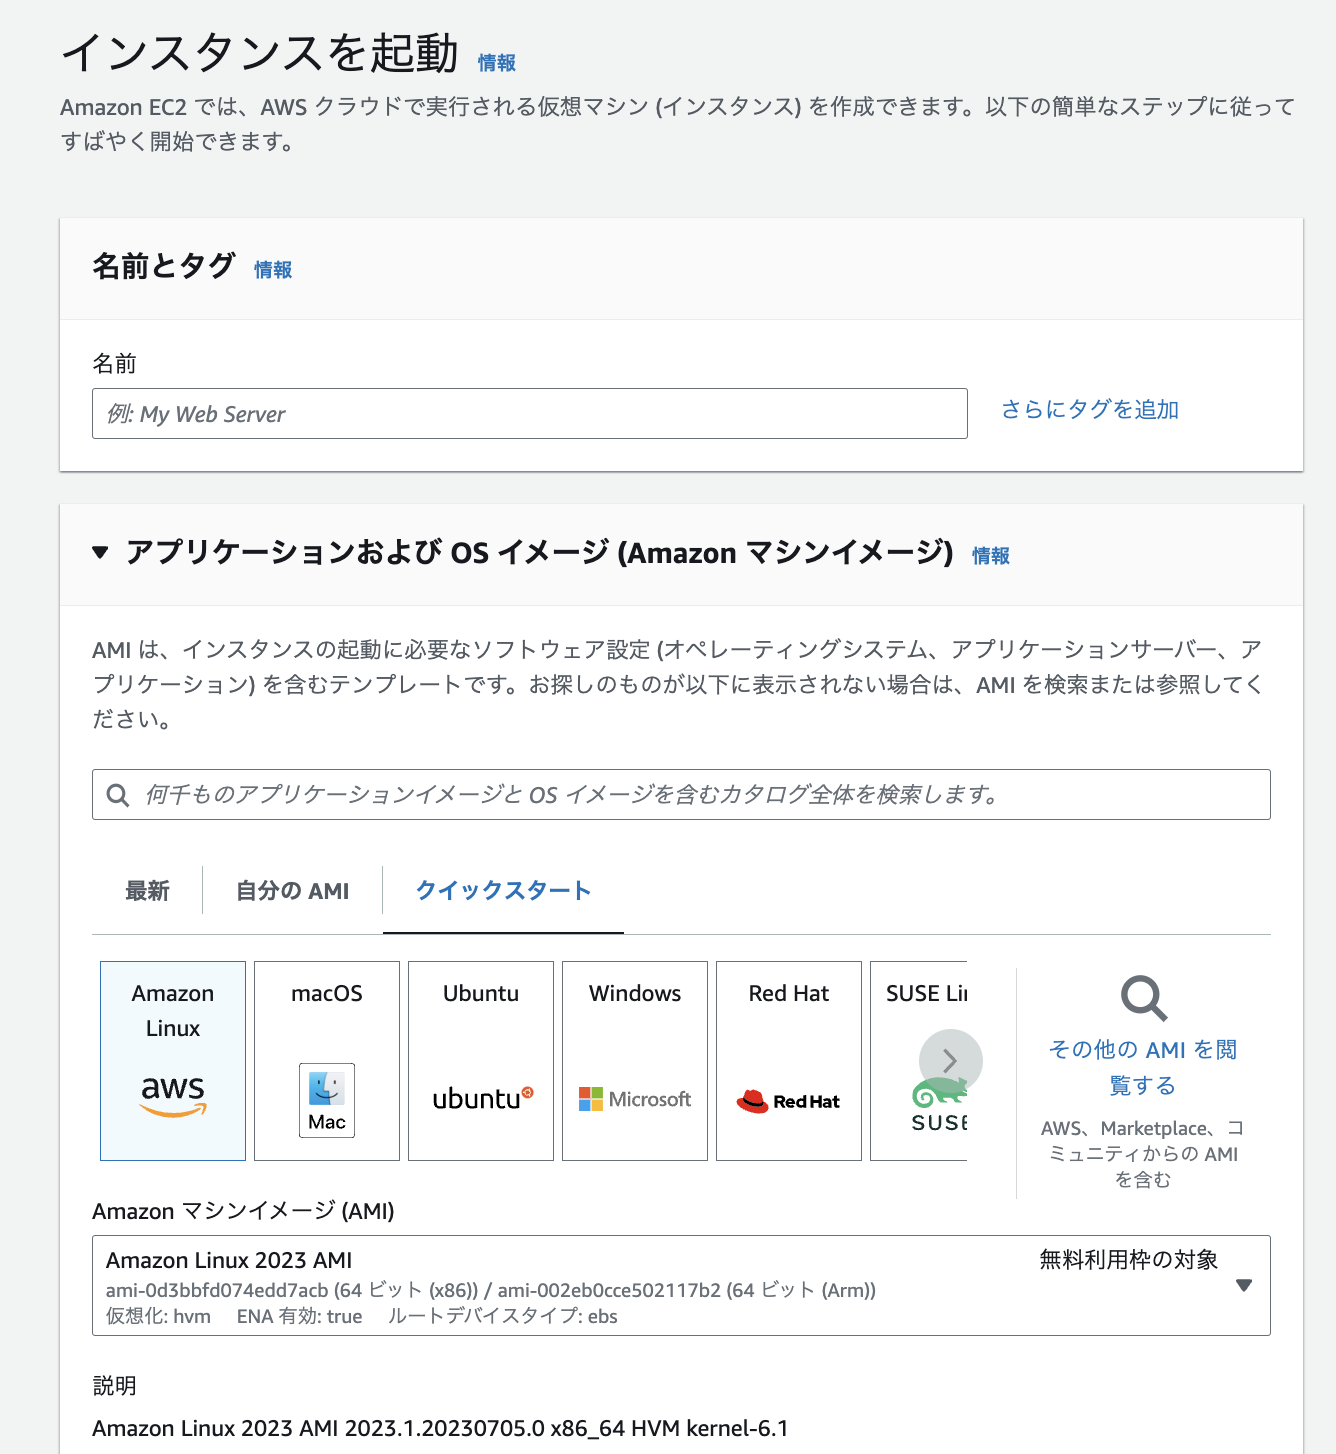
そしたら上記のような画面に遷移されますが、下記の項目の設定を行い、「インスタンスを起動」をクリックします。
- 名前:自分にとってわかりやすい名前をつけます
- OSイメージ:自分の好みに合わせればいいですが、この記事ではAmazon Linuxを利用し、後ほど利用するコマンドもAmazon Linuxをベースにします
- インスタントタイプ:t2.micro (それ以外だと有料になります)
- キーペア:この記事はSSHクライアントでEC2にアクセスするので設定します
- ネットワーク設定:この記事はSSHクライアントによる接続と最低限ウェブで確認したいのでHTTPアクセスを許可します
EC2インスタンスに接続
EC2を作成すると、一覧画面に戻りますが、そこには今回作成されたEC2インスタンスが出てくるはずなので、次はインスタンスに接続し、中で残りの設定を行います。
一覧画面からインスタンスを選択し、「接続」ボタンをクリックします。そうすると、4つの接続方法が選べますが、今回はSSHを利用します。
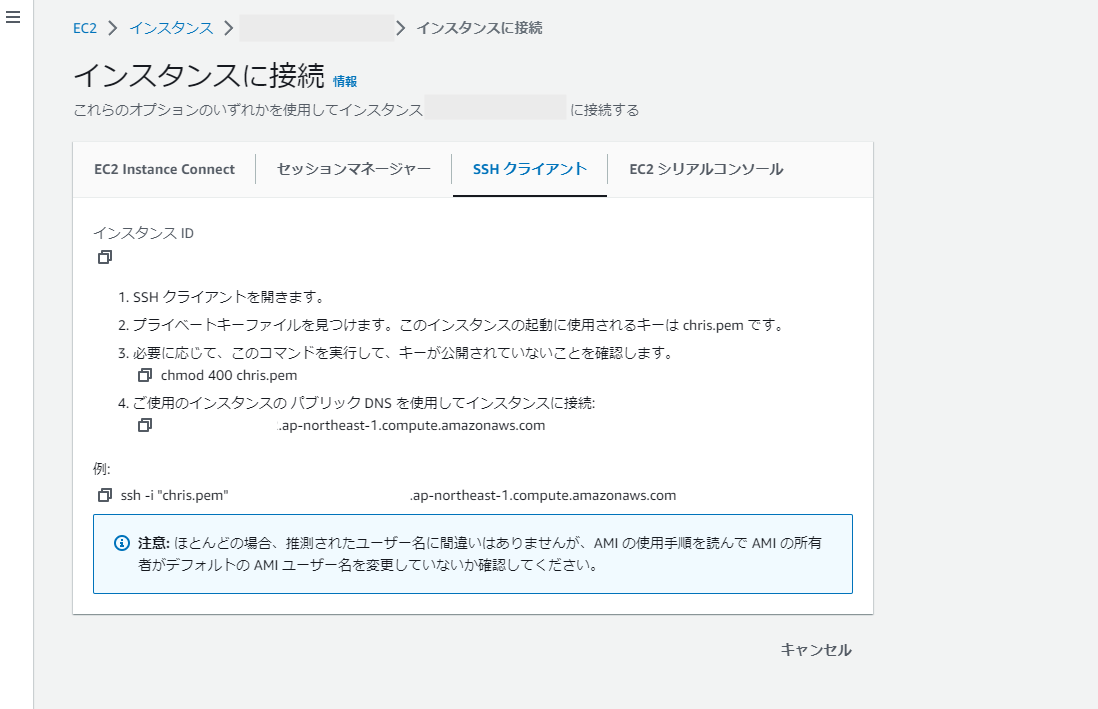
先ほどインスタンス起動の画面で、キーペアを作成され、ローカルにダウンロードされたと思いますが、画面に書いてある指示通りにそのキーを利用し、接続します。接続が成功したら様々なものをインストールします。
Node.jsのセットアップ
まずはNode.jsをインストールしますが、Node Version Manager(nvm)からインストールしたほうが様々なnodejsバージョンをインストールでき、切り替えも便利です。
curl -o- https://raw.githubusercontent.com/nvm-sh/nvm/v0.39.3/install.sh | bash
インストール後はターミナルからメッセージが来ると思いますが、
nvmコマンドが実行できるようにパスを通す必要があるので、
以下のコードをコピーして、コマンドラインに貼り付けて実行します。
export NVM_DIR="$HOME/.nvm"
[ -s "$NVM_DIR/nvm.sh" ] && \. "$NVM_DIR/nvm.sh"
[ -s "$NVM_DIR/bash_completion" ] && \. "$NVM_DIR/bash_completion"

// nvmコマンドが動くかどうかの確認
nvm --version
-> 0.34.0
そしてnvmでnodejsをインストール
// 18系のnode.jsをインストール
nvm install 18

// インストールしたnodeとnpmバージョンを確認
node -v
-> 18.16.1
npm -v
-> 9.5.1

// yarnをインストール(npmを利用したい方はこれをスキップ)
npm install -g yarn
yarn -v
-> 1.22.19
これでNode.js周りのセットアップは完了しました。
SvelteKitアプリの配置
次は作ったアプリをインスタンスの中に入れたいと思います。自分のローカルからEC2に移す方法もありますが、今回はGitHubに上げているリポジトリからcloneします。
まずはcloneできるようにGitHub CLIをインストールします。Linuxでのインストール方法は公式ドキュメントにも記載されています。
// 公式ドキュメントに記載されたコマンド(変わる可能性があるため、必ず公式ドキュメントも確認してください)
type -p yum-config-manager >/dev/null || sudo yum install yum-utils
sudo yum-config-manager --add-repo https://cli.github.com/packages/rpm/gh-cli.repo
sudo yum install gh

// バージョン確認
gh --version
-> 2.31.0
次は自分のアカウントでログインし、リポジトリをcloneします。
// GitHubへのログイン
gh auth login

// cloneしたいリポジトリのurlを入れてください
gh repo clone https://github.com/xxxxxx/yyyyyyy
これでアプリは無事インスタンスにcloneできました。
Nginxのセットアップ
続いてははNginxサーバーをインストールし、configファイルを修正します。
// インストール
sudo yum install nginx

// nginxフォルダーに移動
cd /etc/nginx

// vimでnginxのconfigファイルを開く
sudo vim nginx.conf
configファイルにserverという枠がありますが、
以下のようにプロキシパスを設定します。
この構文はnginxに対して/にアクセスした場合、EC2内で立ち上げたsveltekitサーバーにアクセスするように指示するものです。
server {
	location / {
		proxy_pass http://localhost:3000;
	}
}
Nodeサーバーの立ち上げとWebからのアクセス
最後はローカルでの確認と同じように、ビルドして、nodeサーバーを立ち上げます。
yarn install
yarn build
node server.js
そして作ったEC2インスタンスが提供しているDNS名からアクセスしてみます。(情報はEC2の一覧ページから確認できます)
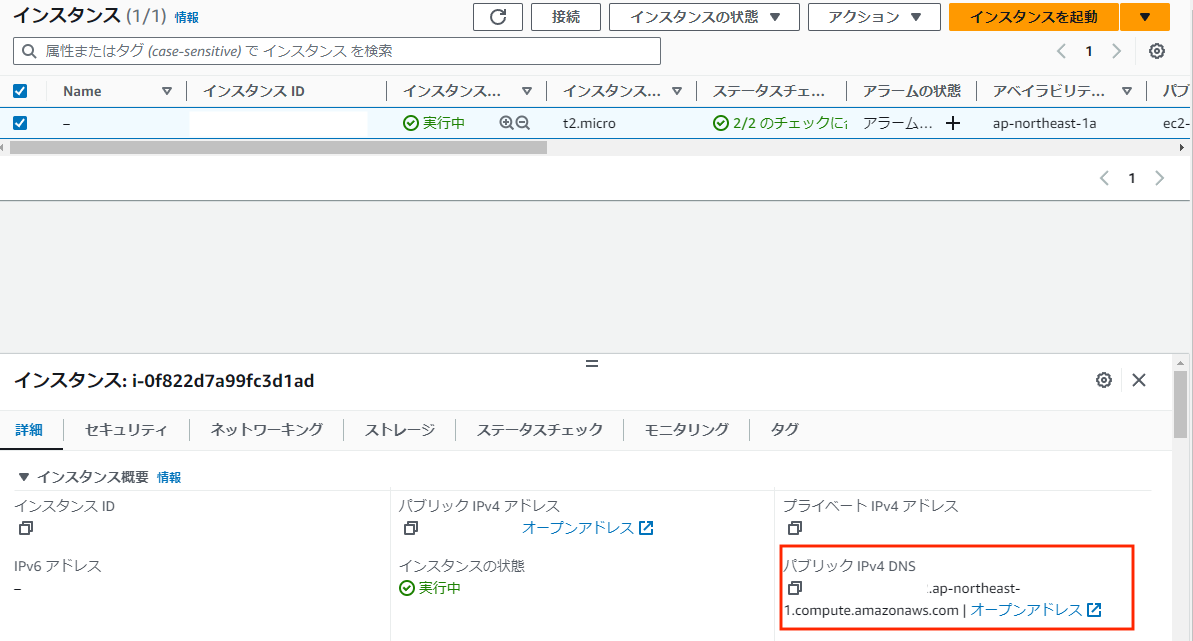
以下のように表示ができました!
しかし、これでEC2インスタンスとの接続を中止すると、Nodeサーバーも停止になってしまいます。
そこで pm2 というライブラリーを使ってNodeサーバーの永続化にします。
yarn global add pm2

pm2 -v
-> 5.3.0

pm2 start server.js

// 今pm2で立ち上げているnodeサーバーの状況と停止したいサーバーidを確認
pm2 status

// 今pm2で立ち上げているnodeサーバーを停止します
pm2 stop [id]
これでEC2との接続を止めても、引き続きウェブから閲覧できます!
以上、SvelteKitのSSRアプリをAWSにデプロイする方法でした。
関連記事 | Related Posts
We are hiring!
【クラウドエンジニア】Cloud Infrastructure G/東京・大阪・福岡
KINTO Tech BlogWantedlyストーリーCloud InfrastructureグループについてAWSを主としたクラウドインフラの設計、構築、運用を主に担当しています。
【カスタマーサクセスエンジニア】プラットフォームG/東京・大阪・福岡
プラットフォームグループについてAWS を中心とするインフラ上で稼働するアプリケーション運用改善のサポートを担当しています。