Transform Android UI with AGSL: Custom Shaders Made Easy
Introduction
Hello! I'm Yao Xie from the Mobile Application Development Group at KINTO Technologies, where I develop the Android app of KINTO Kantan Moushikomi (KINTO Easy Application). In this article, I'd like to share how we can use AGSL (Android Graphics Shading Language) to enhance custom UI components and perform advanced image processing in Android apps.
What is AGSL
AGSL (Android Graphics Shading Language) is a GPU-based shading language designed for Android. Built on Skia Shading Language (SKSL), it offers Android-specific optimizations for creating advanced graphics effects. Fully integrated with the Android rendering pipeline, AGSL enables efficient and seamless implementation of complex visual effects.
From GLSL to SKSL to AGSL
Graphics shading languages have evolved significantly to meet the increasing demand for high-quality graphics in modern applications. Here's a brief overview:
- GLSL (OpenGL Shading Language):
- The original shading language used with OpenGL for rendering 2D and 3D graphics. It allows developers to write custom shaders that run on the GPU.
- SKSL (Skia Shading Language):
- Introduced as part of the Skia graphics library, which is used for rendering 2D graphics on various platforms, including Android.
- AGSL (Android Graphics Shading Language):
- A shading language specifically designed for Android, building upon the capabilities of SKSL and tailored to integrate seamlessly with the Android rendering pipeline.
Key Differences Between GLSL, SKSL, and AGSL
AGSL is optimized for mobile devices, providing better performance and lower power consumption compared to GLSL. Its integration with the Android rendering pipeline allows for more efficient graphics rendering.
- GLSL:
- C-like syntax for OpenGL.
- Cross-platform but limited on Android due to OpenGL ES variations.
- SKSL:
- Similar to GLSL, optimized for Skia's 2D graphics.
- Primarily used internally within Skia, making it less accessible for direct Android development.
- AGSL:
- Based on SKSL with Android-specific enhancements.
- Fully integrated with Android's graphics pipeline for optimal performance.
How does AGSL work?
Below is a hierarchical diagram (from top to bottom) that illustrates where the AGSL shader string fits within Android's graphics rendering system and the data flow process (this diagram is a conceptual representation and not an exact system architecture)

Get started
Step 1: Define a Gradient Shader
Create a shader file with a smooth gradient effect applied only to the text using AGSL. The composable input ensures the gradient respects the text's alpha mask.
@Language("AGSL")
val gradientTextShader = """
  uniform float2 resolution; // Text size
  uniform float time;        // Time for animation
  uniform shader composable; // Input composable (text mask)

  half4 main(float2 coord) {
      // Normalize coordinates to [0, 1]
      float2 uv = coord / resolution;

      // Hardcoded gradient colors
      half4 startColor = half4(1.0, 0.65, 0.15, 1.0); // Orange
      half4 endColor = half4(0.26, 0.65, 0.96, 1.0);  // Blue

      // Linear gradient from startColor to endColor
      half4 gradientColor = mix(startColor, endColor, uv.x);

      // Optional: Add a subtle animation (gradient shifting)
      float shift = 0.5 + 0.5 * sin(time * 2.0);
      gradientColor = mix(startColor, endColor, uv.x + shift * 0.1);

      // Use the alpha from the input composable mask
      half4 textAlpha = composable.eval(coord);

      // Combine the gradient color with the composable alpha
      return gradientColor * textAlpha.a;
  }
""".trimIndent()
Step 2: Create a Modifier for the Shader
Define a custom Modifier that applies the gradient shader to text. The shader leverages a dynamic time parameter to animate the gradient.
fun Modifier.gradientTextEffect(): Modifier = composed {
    val shader = remember { RuntimeShader(gradientTextShader) }
    var time by remember { mutableStateOf(0f) }

    // Increment animation time
    LaunchedEffect(Unit) {
        while (true) {
            time += 0.016f // Simulate 60 FPS
            delay(16)
        }
    }

    this.graphicsLayer {
        shader.setFloatUniform("resolution", size.width, size.height)
        shader.setFloatUniform("time", time)

        renderEffect = RenderEffect
            .createRuntimeShaderEffect(shader, "composable")
            .asComposeRenderEffect()
    }
}
Step 3: Apply the Shader to a Text Component
Use the Modifier.gradientTextEffect() in your UI to apply the gradient effect.
@Composable
fun GradientTextDemo() {
    Box(
        modifier = Modifier
            .fillMaxSize()
            .padding(16.dp),
        contentAlignment = Alignment.Center
    ) {
        Text(
            text = "Gradient Text",
            fontSize = 36.sp,
            fontWeight = FontWeight.Bold,
            color = Color.White,
            modifier = Modifier.gradientTextEffect()
        )
    }
}
Result:
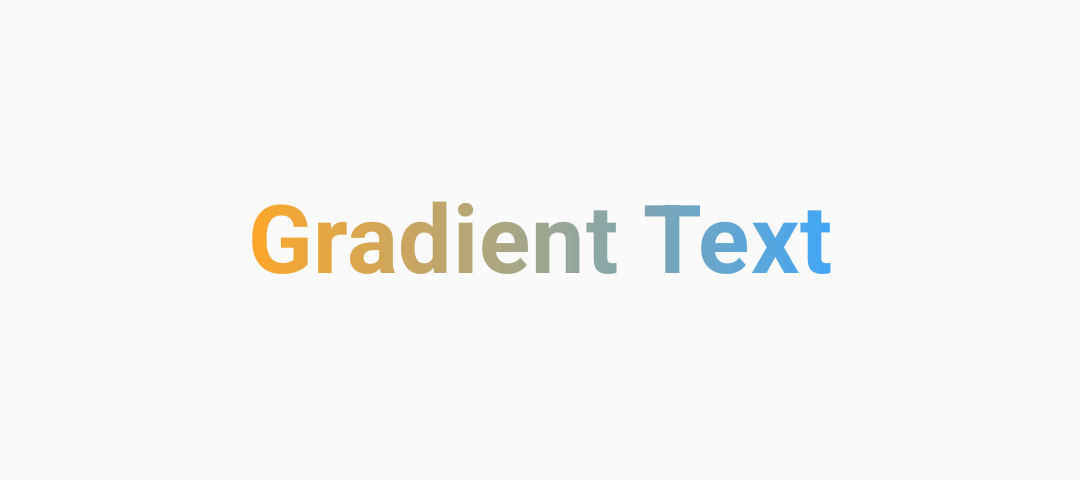
Is That All? What Else Can AGSL Do?
AGSL's capabilities extend far beyond the basics, empowering developers to craft dynamic, visually appealing, and high-performance app experiences. Let’s explore additional ways AGSL can elevate your app with real-world examples.
1. Enhance UI Components
AGSL allows you to create captivating UI elements that engage users and reinforce your app’s purpose.
- Animated Borders: Create marquee or pulsating effects around cards, buttons, or images.
- Custom Gradients: Implement animated, GPU-accelerated gradients that flow dynamically.
- Dynamic Glow Effects: Add glowing highlights or halos to buttons and sliders.
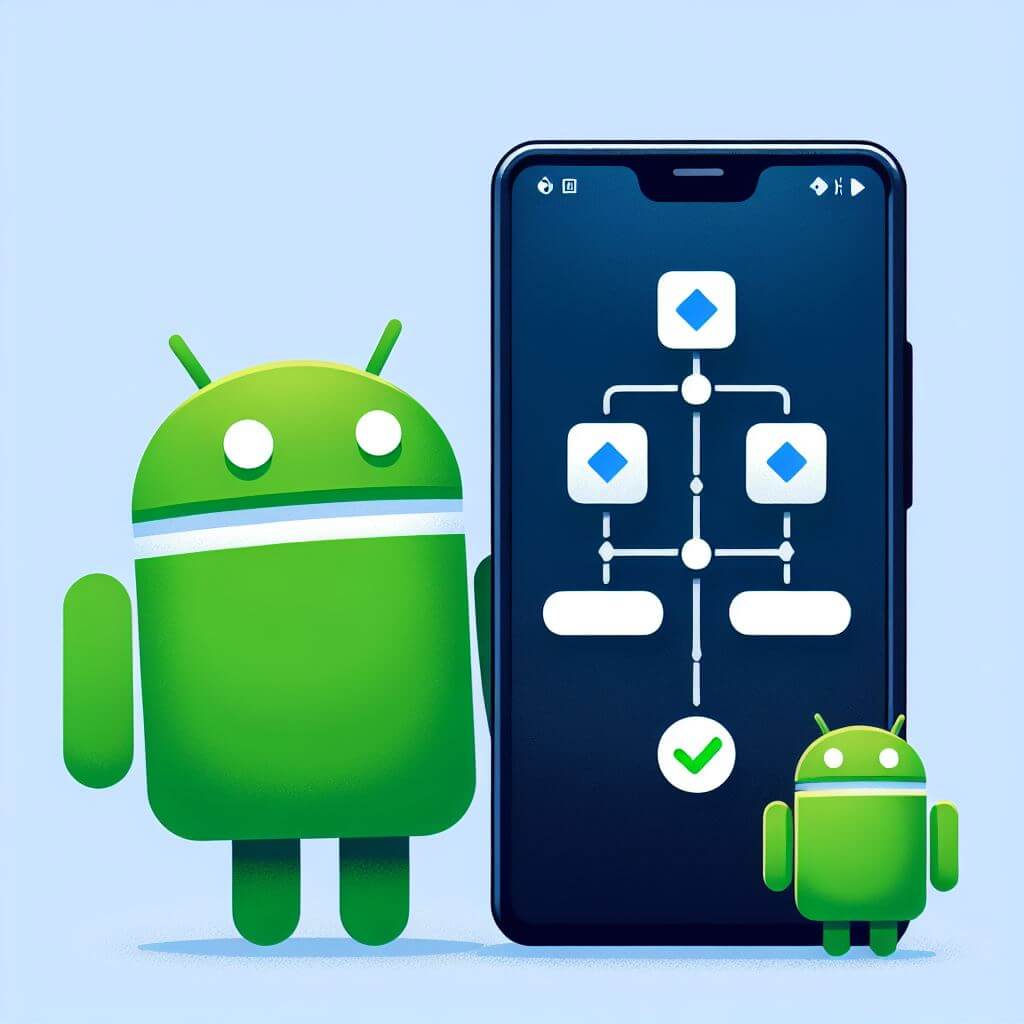
Example: Driving Skill Training App
Imagine you’re building a Driving Skill Training App. The goal is to make the interface visually engaging to encourage users to interact with key elements, like a "Start Training" button. Here’s how AGSL can help on providing Dynamic Glow Effect:
AGSL Shader Code:
@Language("AGSL")
val glowButtonShader = """
  // Shader for a glowing rounded rectangle button

  uniform shader button;              // Input texture or color for the button
  uniform float2 size;                // Button size
  uniform float cornerRadius;         // Corner radius of the button
  uniform float glowRadius;           // Radius of the glow effect
  uniform float glowIntensity;        // Intensity of the glow
  layout(color) uniform half4 glowColor; // Color of the glow

  // Signed Distance Function (SDF) for a rounded rectangle
  float calculateRoundedRectSDF(vec2 position, vec2 rectSize, float radius) {
      vec2 adjustedPosition = abs(position) - rectSize + radius; // Adjust for rounded corners
      return min(max(adjustedPosition.x, adjustedPosition.y), 0.0)
             + length(max(adjustedPosition, 0.0)) - radius;
  }

  // Function to calculate glow intensity based on distance
  float calculateGlow(float distance, float radius, float intensity) {
      return pow(radius / distance, intensity); // Glow falls off as distance increases
  }

  half4 main(float2 coord) {
      // Normalize coordinates and aspect ratio
      float aspectRatio = size.y / size.x;
      float2 normalizedPosition = coord.xy / size;
      normalizedPosition.y *= aspectRatio;

      // Define normalized rectangle size and center
      float2 normalizedRect = float2(1.0, aspectRatio);
      float2 normalizedRectCenter = normalizedRect / 2.0;
      normalizedPosition -= normalizedRectCenter;

      // Calculate normalized corner radius and distance
      float normalizedRadius = aspectRatio / 2.0;
      float distanceToRect = calculateRoundedRectSDF(normalizedPosition, normalizedRectCenter, normalizedRadius);

      // Get the button's color
      half4 buttonColor = button.eval(coord);

      // Inside the rounded rectangle, return the button's original color
      if (distanceToRect < 0.0) {
        return buttonColor;
      }

      // Outside the rectangle, calculate glow effect
      float glow = calculateGlow(distanceToRect, glowRadius, glowIntensity);
      half4 glowEffect = glow * glowColor;

      // Apply tone mapping to the glow for a natural look
      glowEffect = 1.0 - exp(-glowEffect);

      return glowEffect;
  }
""".trimIndent()
Result:
The button can feature a glowing halo that pulsates, drawing attention and mimicking the feel of car lights.
2. Perform Advanced Image Processing
AGSL excels in real-time image manipulation, enabling effects that are both dynamic and interactive.
AGSL empowers developers to create high-performance, GPU-accelerated image processing effects.
- Custom Filters: Implement artistic effects like sepia, pixelation, or vignette.
- Dynamic Blur: Apply real-time blur effects like motion blur or depth-of-field effects.
- Color Adjustments: Adjust brightness, contrast, or saturation dynamically in the UI.
Example: Ripple Effect for an Image
Imagine an image of the moon in your app. You want to add a ripple effect to simulate the moon’s reflection on water, making the interface more interactive and visually interesting.
AGSL Shader Code:
@Language("AGSL")
val rippleShader = """
    // Uniform variables: inputs provided from the outside
    uniform float2 size;       // The size of the canvas in pixels (width, height)
    uniform float time;        // The elapsed time for animating the ripple effect
    uniform shader composable; // The shader applied to the composable content being rendered

    // Main function: calculates the final color at a given fragment (pixel) coordinate
    half4 main(float2 fragCoord) {
        // Scale factor based on the canvas width for normalization
        float scale = 1 / size.x;

        // Normalize fragment coordinates
        float2 scaledCoord = fragCoord * scale;

        // Calculate the center of the canvas in normalized coordinates
        float2 center = size * 0.5 * scale;

        // Calculate the distance from the current fragment to the center
        float dist = distance(scaledCoord, center);

        // Calculate the direction vector from the center to the fragment
        float2 dir = scaledCoord - center;

        // Apply a sinusoidal wave based on the distance and time
        float sin = sin(dist * 70 - time * 6.28);

        // Offset coordinates by applying the wave effect in the direction of the fragment
        float2 offset = dir * sin;

        // Calculate the texture coordinates with the ripple effect applied
        float2 textCoord = scaledCoord + offset / 30;

        // Sample the composable shader using the adjusted texture coordinates
        return composable.eval(textCoord / scale);
    }
""".trimIndent()
Result:
With minimal performance cost, this shader adds depth and elegance to your app's imagery.
3. Enable Procedural Graphics
Procedural graphics are perfect for crafting visually engaging interfaces without relying on static assets.
- Pattern Generation: Create procedural textures like stripes, grids, or noise.
- Shape Animations: Design morphing shapes or moving patterns.
- 3D-Like Effects: Simulate depth and perspective without actual 3D rendering.
Example: Animated Loading Screen
Loading screens are often mundane, but AGSL can turn them into dynamic works of art. For instance, you can create a shining, animated sphere that captivates users while the app loads.
AGSL Shader Code:
@Language("AGSL")
val lightBallShader = """
    uniform float2 size;       // The size of the canvas in pixels (width, height)
    uniform float time;        // The elapsed time for animating the light effect
    uniform shader composable; // Shader for the composable content

    half4 main(float2 fragCoord) {
        // Initialize output color
        float4 o = float4(0.0);

        // Normalize coordinates relative to the canvas center
        float2 u = fragCoord.xy * 2.0 - size.xy;
        float2 s = u / size.y;

        // Loop to calculate the light ball effect
        for (float i = 0.0; i < 180.0; i++) {
            float a = i / 90.0 - 1.0;                       // Calculate a normalized angle
            float sqrtTerm = sqrt(1.0 - a * a);            // Circular boundary constraint
            float2 p = cos(i * 2.4 + time + float2(0.0, 11.0)) * sqrtTerm; // Oscillation term

            // Compute position and adjust with distortion
            float2 c = s + float2(p.x, a) / (p.y + 2.0);

            // Calculate the distance factor (denominator)
            float denom = dot(c, c);

            // Add light intensity with color variation
            float4 cosTerm = cos(i + float4(0.0, 2.0, 4.0, 0.0)) + 1.0;
            o += cosTerm / denom * (1.0 - p.y) / 30000.0;
        }

        // Return final color with an alpha of 1.0
        return half4(o.rgb, 1.0);
    }
""".trimIndent()
Result:
This shader adds a futuristic, polished look to your app’s loading screen, making the wait feel shorter and more engaging.
4. Boost App Performance
AGSL shines in performance-heavy scenarios, offloading rendering tasks to the GPU for smooth, efficient animations.
- Efficient Animations: Handle complex, real-time effects smoothly.
- Battery Optimization: Achieve visually stunning effects with minimal power usage.
Example: Weather Animation on a Map View
Imagine your product manager asks you to create a weather animation overlay on a map view. Traditional methods are performance-intensive, but GSL achieves efficient GPU rendering by minimizing CPU overhead and leveraging Android's optimized rendering pipeline.
AGSL Shader Code for rain:
@Language("AGSL")
val rainShader = """
    uniform float time;        // The elapsed time for animating the rain
    uniform float2 size;       // The size of the canvas in pixels (width, height)
    uniform shader composable; // Shader for the composable content

    // Generate a pseudo-random number based on input
    float random(float st) {
        return fract(sin(st * 12.9898) * 43758.5453123);
    }

    half4 main(float2 fragCoord) {
        // Normalize fragment coordinates to the [0, 1] range
        float2 uv = fragCoord / size;

        // Rain parameters
        float speed = 1.0;             // Speed of raindrops
        float t = time * speed;        // Time-adjusted factor for animation
        float density = 200.0;         // Number of rain "drops" per unit area
        float length = 0.1;            // Length of a raindrop
        float angle = radians(30.0);   // Angle of the rain (in degrees)
        float slope = tan(angle);      // Slope of the rain's trajectory

        // Compute grid position and animated raindrop position
        float gridPosX = floor(uv.x * density);
        float2 pos = -float2(uv.x * density + t * slope, fract(uv.y - t));

        // Calculate the raindrop visibility at this fragment
        float drop = smoothstep(length, 0.0, fract(pos.y + random(gridPosX)));

        // Background and rain colors
        half4 bgColor = half4(0.0, 0.0, 0.0, 0.0);  // Black transparent background
        half4 rainColor = half4(0.8, 0.8, 1.0, 1.0); // Light blue raindrop color

        // Blend the background and raindrop color based on drop visibility
        half4 color = mix(bgColor, rainColor, drop);

        return color; // Output the final color for the fragment
    }
""".trimIndent()
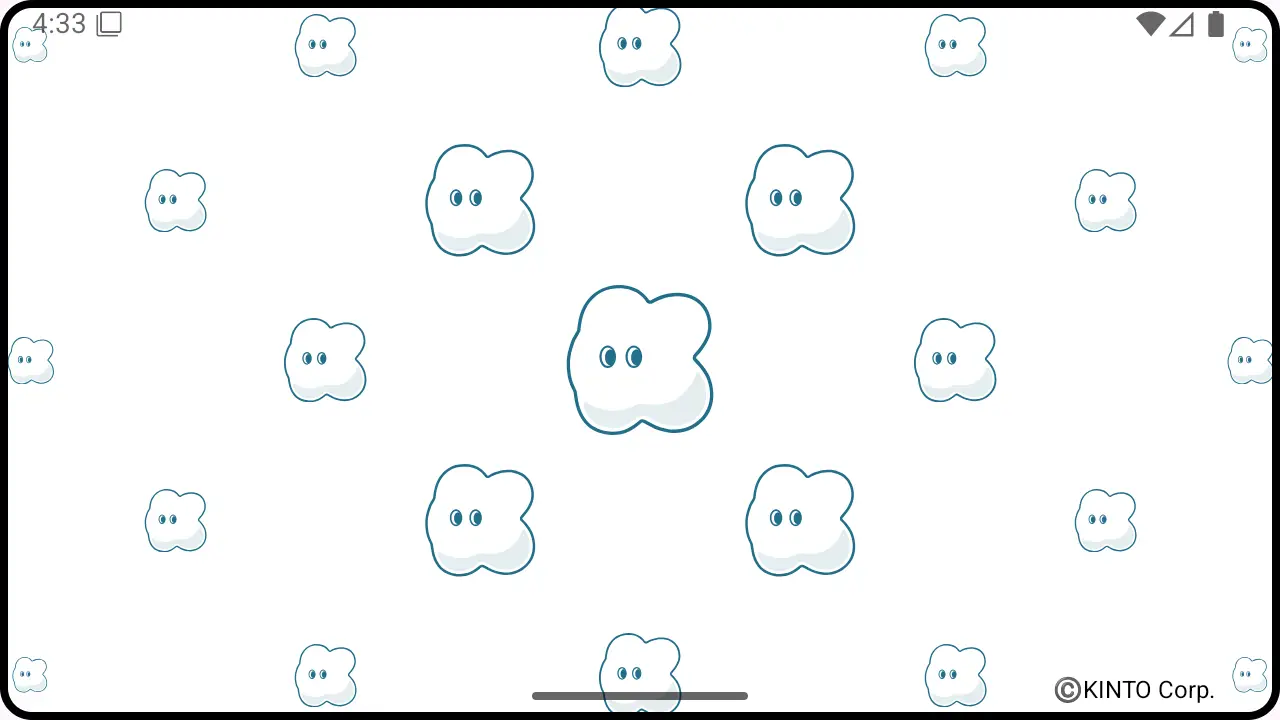
Result:
This shader effectively simulates rain, with support for clouds and snow as well (code for the latter two is excluded here for brevity), while maintaining smooth performance, even on low-end devices.
Conclusion
AGSL is a versatile tool empowering developers to create visually stunning, highly interactive, and performance-optimized effects in Android apps. Whether it’s enhancing UI components, performing advanced image processing, generating procedural graphics, or boosting performance in animation-heavy scenarios, AGSL ensures your app stands out.
With AGSL, the possibilities are limited only by your creativity. Start experimenting and bring your app to life!
関連記事 | Related Posts
Transform Android UI with AGSL: Custom Shaders Made Easy

まだClaude Codeを素のまま使ってますか?― Android開発者がSubAgents & Skillsを試してみた
必須! 既存のAndroidアプリをedge-to-edge対応にするための速習ガイド
Still Using Claude Code Out of the Box? An Android Developer Tries SubAgents & Skills
Android View から Jetpack Compose への移行の第一歩
Figma MCPとClaude CodeでAndroidのUI構築を高速化
We are hiring!
生成AIエンジニア/AIファーストG/東京・名古屋・大阪・福岡
AIファーストGについて生成AIの活用を通じて、KINTO及びKINTOテクノロジーズへ事業貢献することをミッションに2024年1月に新設されたプロジェクトチームです。生成AI技術は生まれて日が浅く、その技術を業務活用する仕事には定説がありません。
リードエンジニア/プロジェクト推進G/東京・名古屋
業務内容バックエンド開発を中心に、サービスの企画から設計・開発・運用までプロダクトに関わっていただきます。サービスや会社の成長を考えて、自分やチームが何をすべきか自律的に動き、スピード感を持って開発に取り組むことを期待しています。