Introducing Storybook for the Development of a Universal Design System
Introduction
I'm Chris, Front End Engineer for KINTO Technologies. I am part of the Global Development Division and, as is usual for an multinational team, we communicate primarily in English, whether for casual chats or for technical conversations. My team develops interfaces for local services and back-office systems for various countries. When developing multiple projects at the same time, improving the efficiency of the development work is crucial. Today I would like to talk about the front-end perspective.
Problems to Solve
KINTO services have already been deployed in more than 20 countries worldwide and while business structures, development systems and business practices differ from country to country, one of the challenges we face is achieving consistent UI/UX on a global scale. To solve this problem, we are developing a design system specifically for KINTO services, which is the background to this article.
Since implementing a design usually involves front-end development of HTML/CSS/JS, communication between designers and engineers is essential to ensuring work proceeds smoothly. If multiple designers work on a design without coordination, the style of the design will end up disjointed and developers may need to create unique components for each project. Having many projects in this state presents three major disadvantages for a company.
-
Because each project requires its own development work, costs increase dramatically in proportion to the number of uncoordinated projects
-
If future designs or the person in charge of development changes, the style and the design approach may also change, making maintenance difficult
-
Even for users who aren't aware of the internal development process, uncoordinated design can result in an inconsistent experience and make using the product stressful
Approaches
An Easy Way for Designers and Engineers to Review Designs
One way that designers can tackle the issue mentioned above is to prepare design guidelines that define the approach for the various components and to design UI/UX with these guidelines in mind. However, simply looking at guidelines for things such as color, font or prohibited items will not directly reduce the development time, so it is also important to think about what engineers can do.
On the development side, one approach is developing components in cooperation with the designers that can be reused anywhere and insert them into every project. As a first step, I thought it would be beneficial to have somewhere to review these components all in one place, so I would like to introduce the "Storybook" tool.
Developing Components Using Storybook
Storybook is an open-source tool for developing and documenting components individually. Using this tool makes it possible to see at a glance which components can be reused.
There are installation guides for each JS framework on the official site, but since the Global Development Team uses Vue.js, we followed this guide to set up the environment.
Developing and Managing Components as Story Units
One feature of Storybook is the grouping of similar components as a unit called a "Story." For example, a component that we call a "button" may be used in a variety of different ways on a website (a primary button that prompts user action, a secondary button used for other purposes, a smaller button that is used for only limited purposes, a long button etc.). These various buttons can be grouped together using a file called xxxx.stories.ts
. (If you prefer to use JavaScript, use xxxx.stories.js
.)
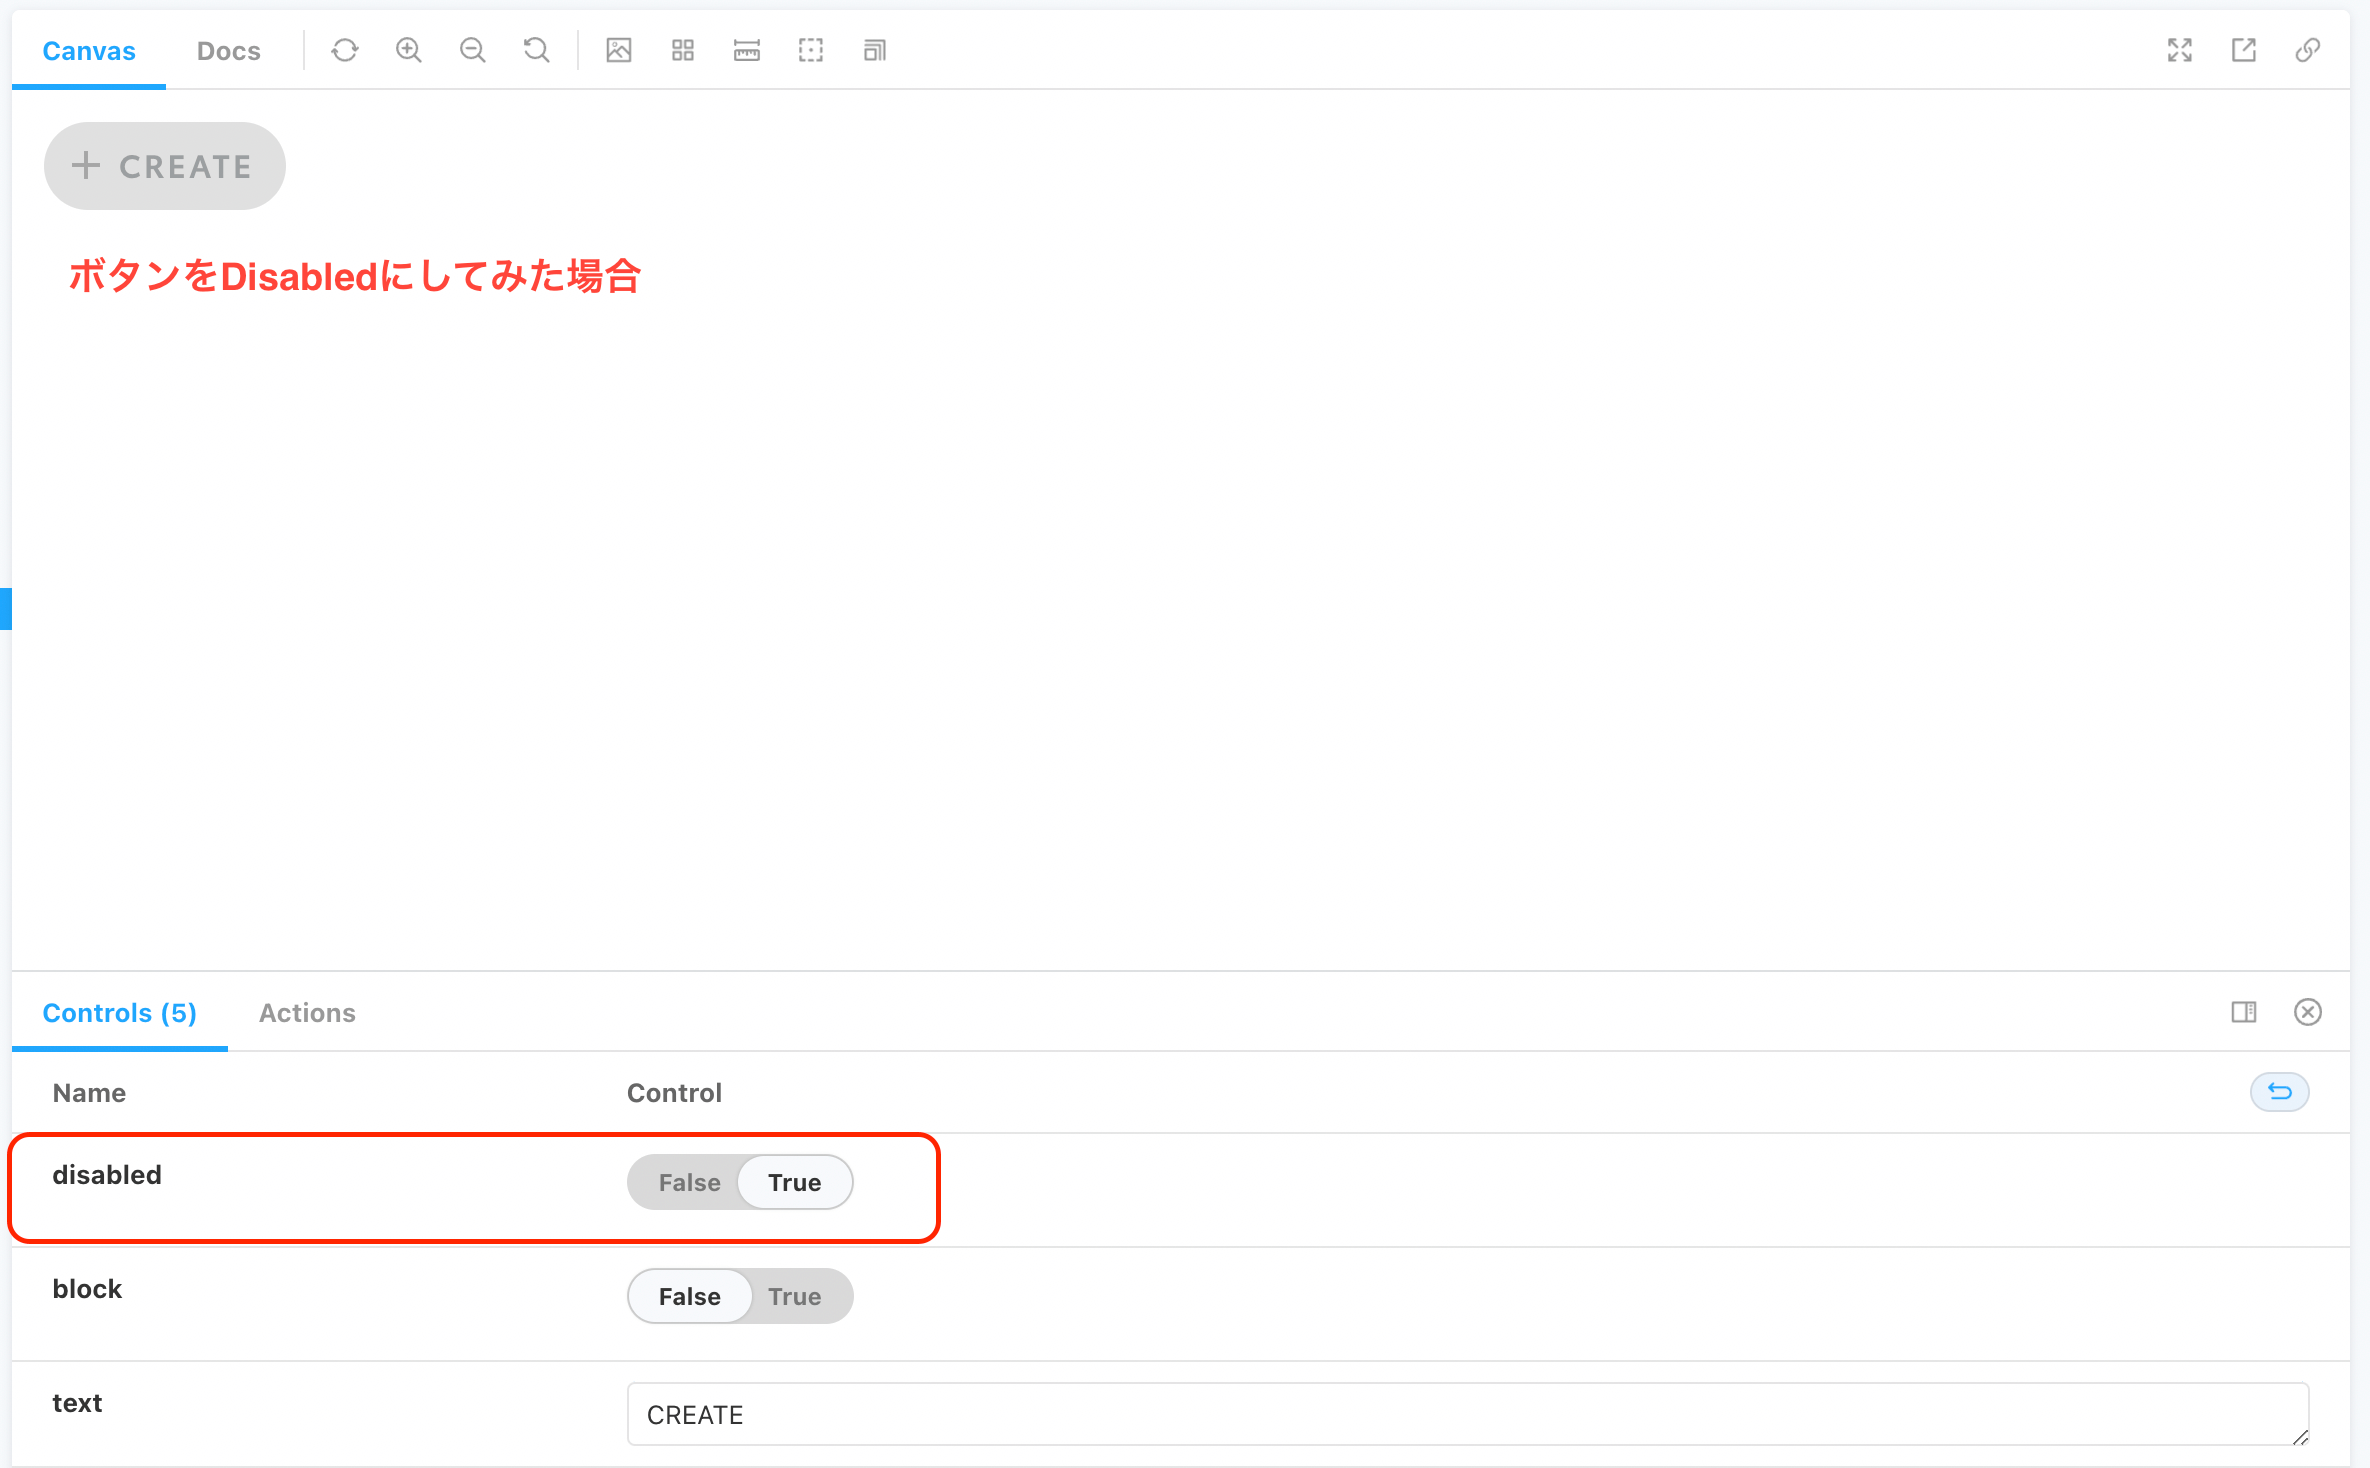
In addition, when actually using a component, Props may be passed on. Accordingly, you can use a feature known as "Controls" to pass on all kinds of Props. For buttons, for instance, we set the "disabled" attribute to prevent them from being clicked, but if we add the corresponding Control to the Story file, the value in the UI changes and we can check to see how the component changes.
Documenting Components
If you follow the guide on the official site to install Storybook, the @storybook/addon-essentials
library is included automatically. As its name suggests, this is a library that contains add-ons that you might need. One of these add-ons is @storybook/addon-docs
, which gives each Story its own documentation. After clicking on each Story, the Docs
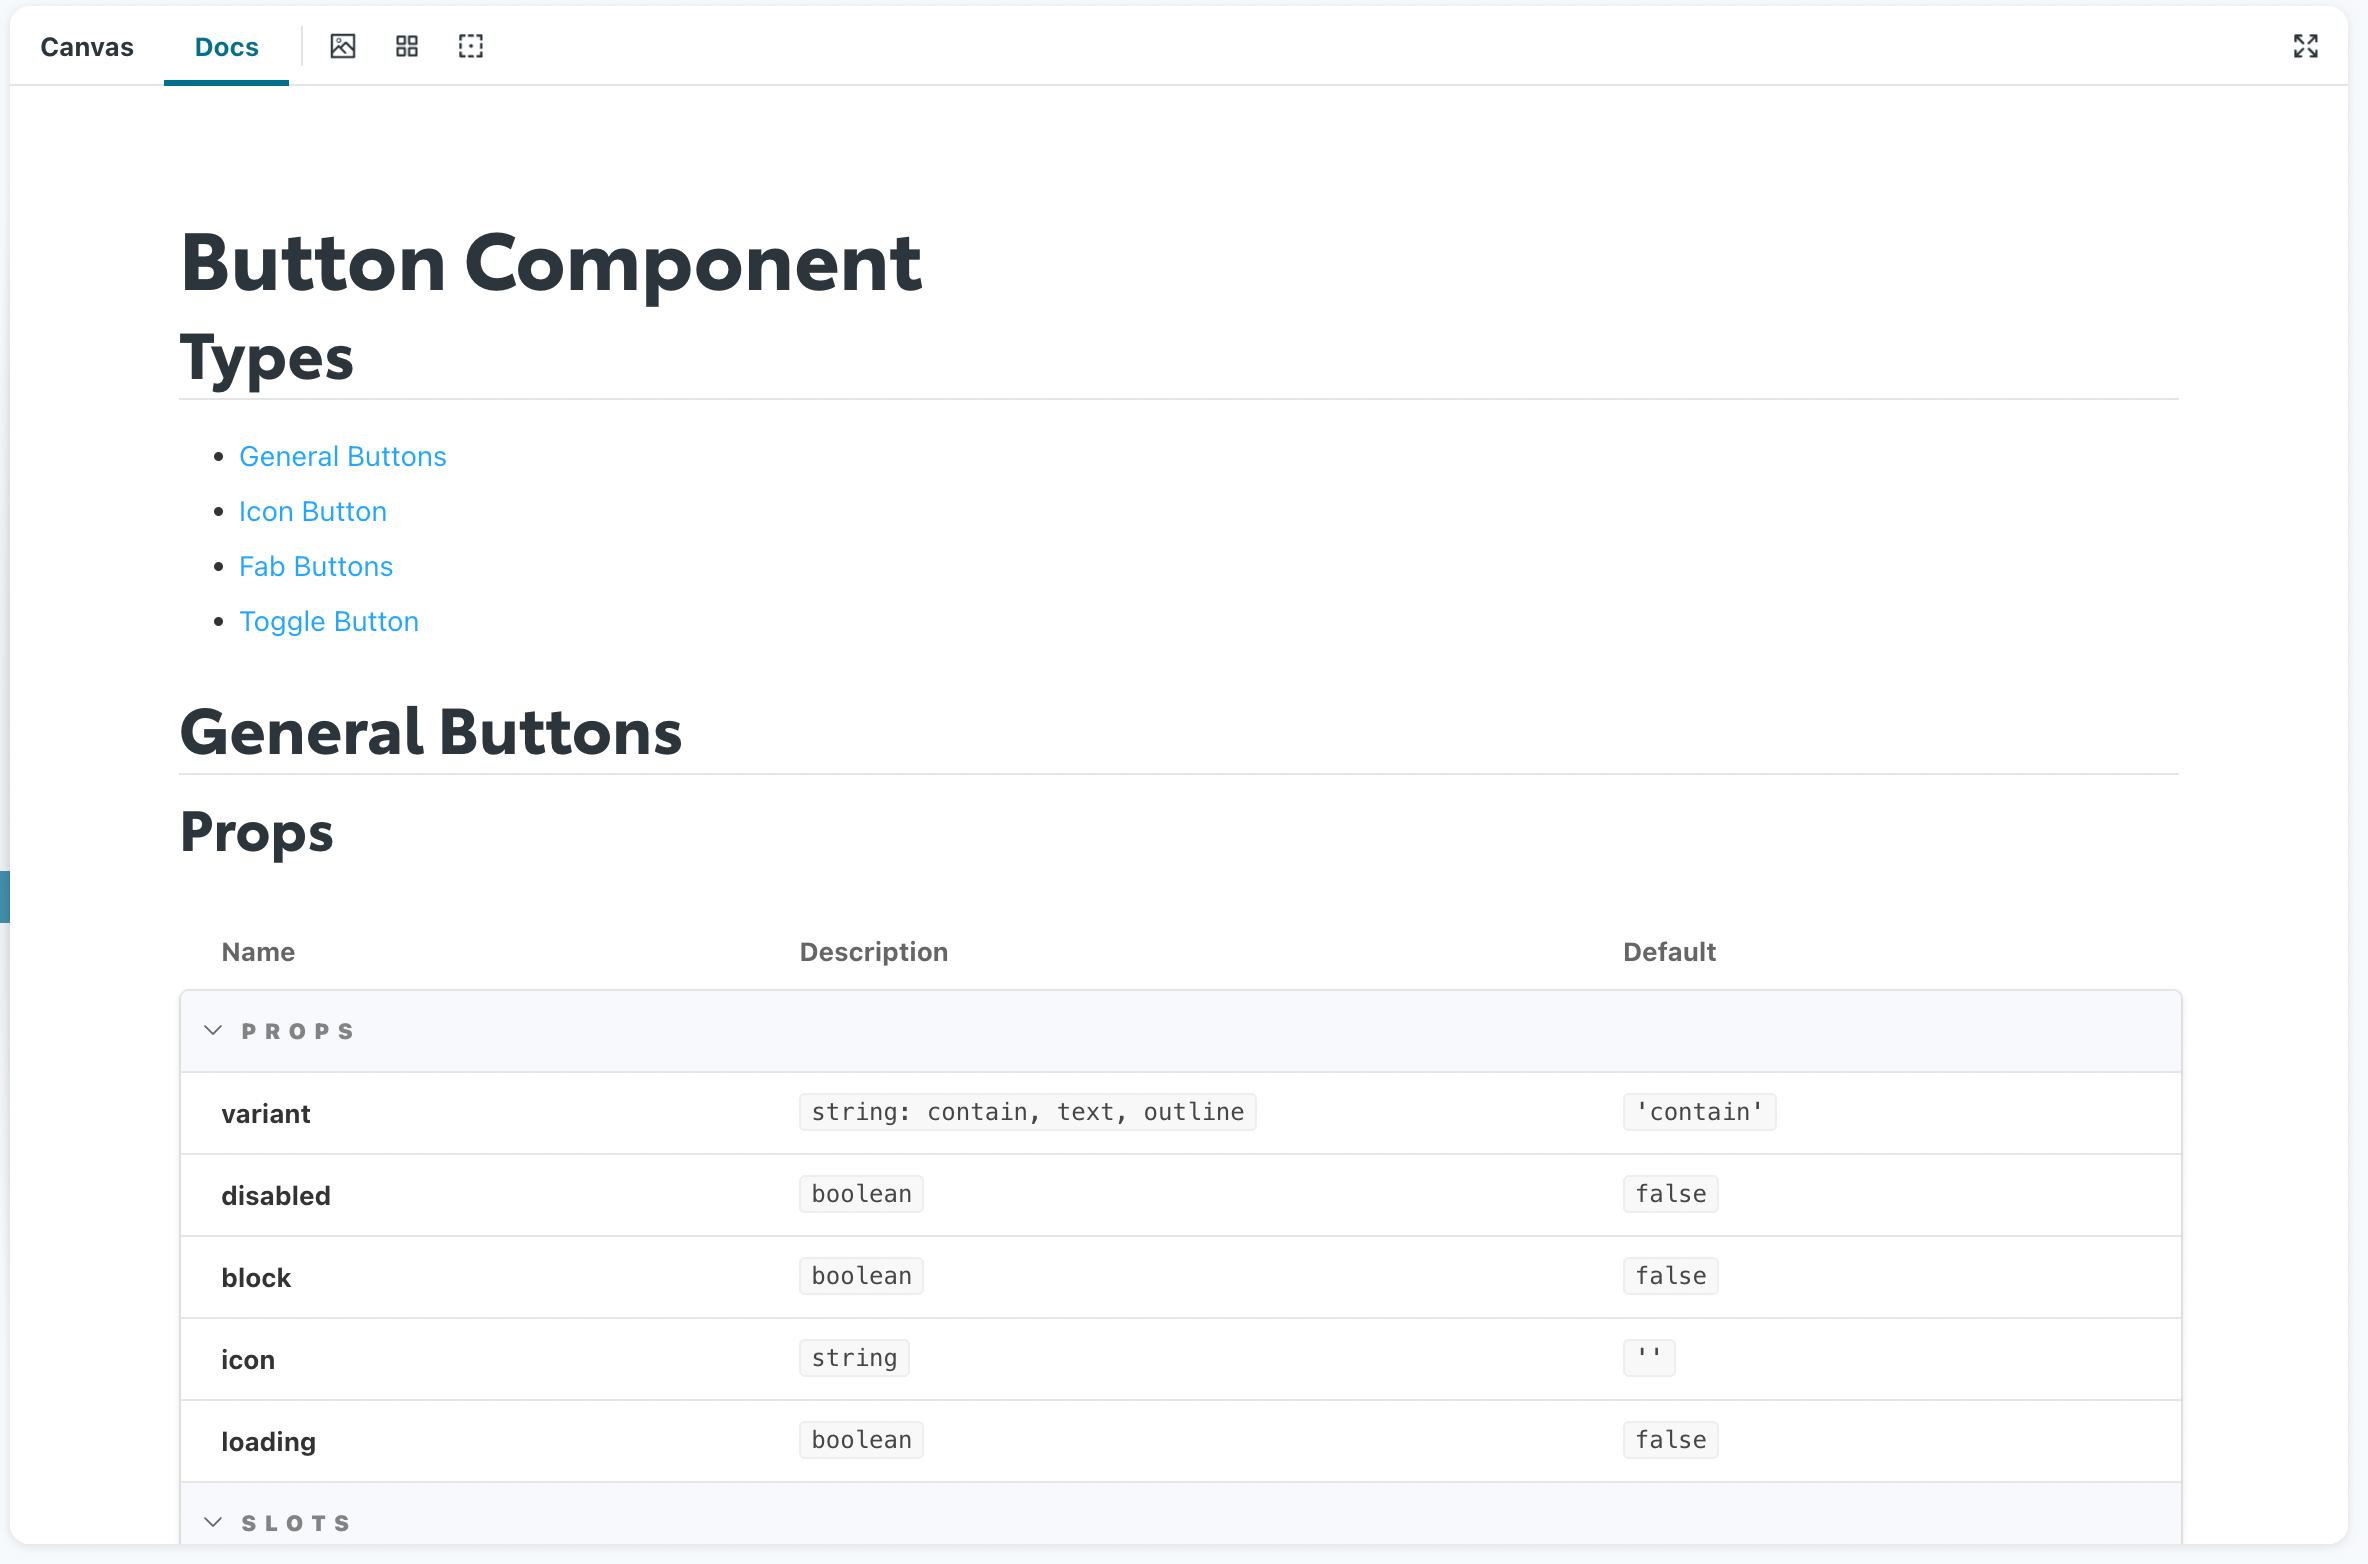
tab should appear in the UI. Storybook automatically creates documentation using information taken from pre-written Story files, but if you would like to create your own documentation, you can set a file created from the Story file as a parameter and this will be reflected in the documentation (in the example below, a markdown file has been set as the parameter).
import ButtonDocument from '@/docs/ButtonDoc.mdx'
export default {
title: 'Components/Buttons',
parameters: {
docs: {
page: ButtonDocument,
},
},
}
Adjusting the Storybook UI to Reflect Company Identity
Although using Storybook to render lots of reusable components and documentation is helpful, if all sites looked like they used Storybook design, it would be difficult to get a sense of a company's identity — so we set to work on the layout as a whole.
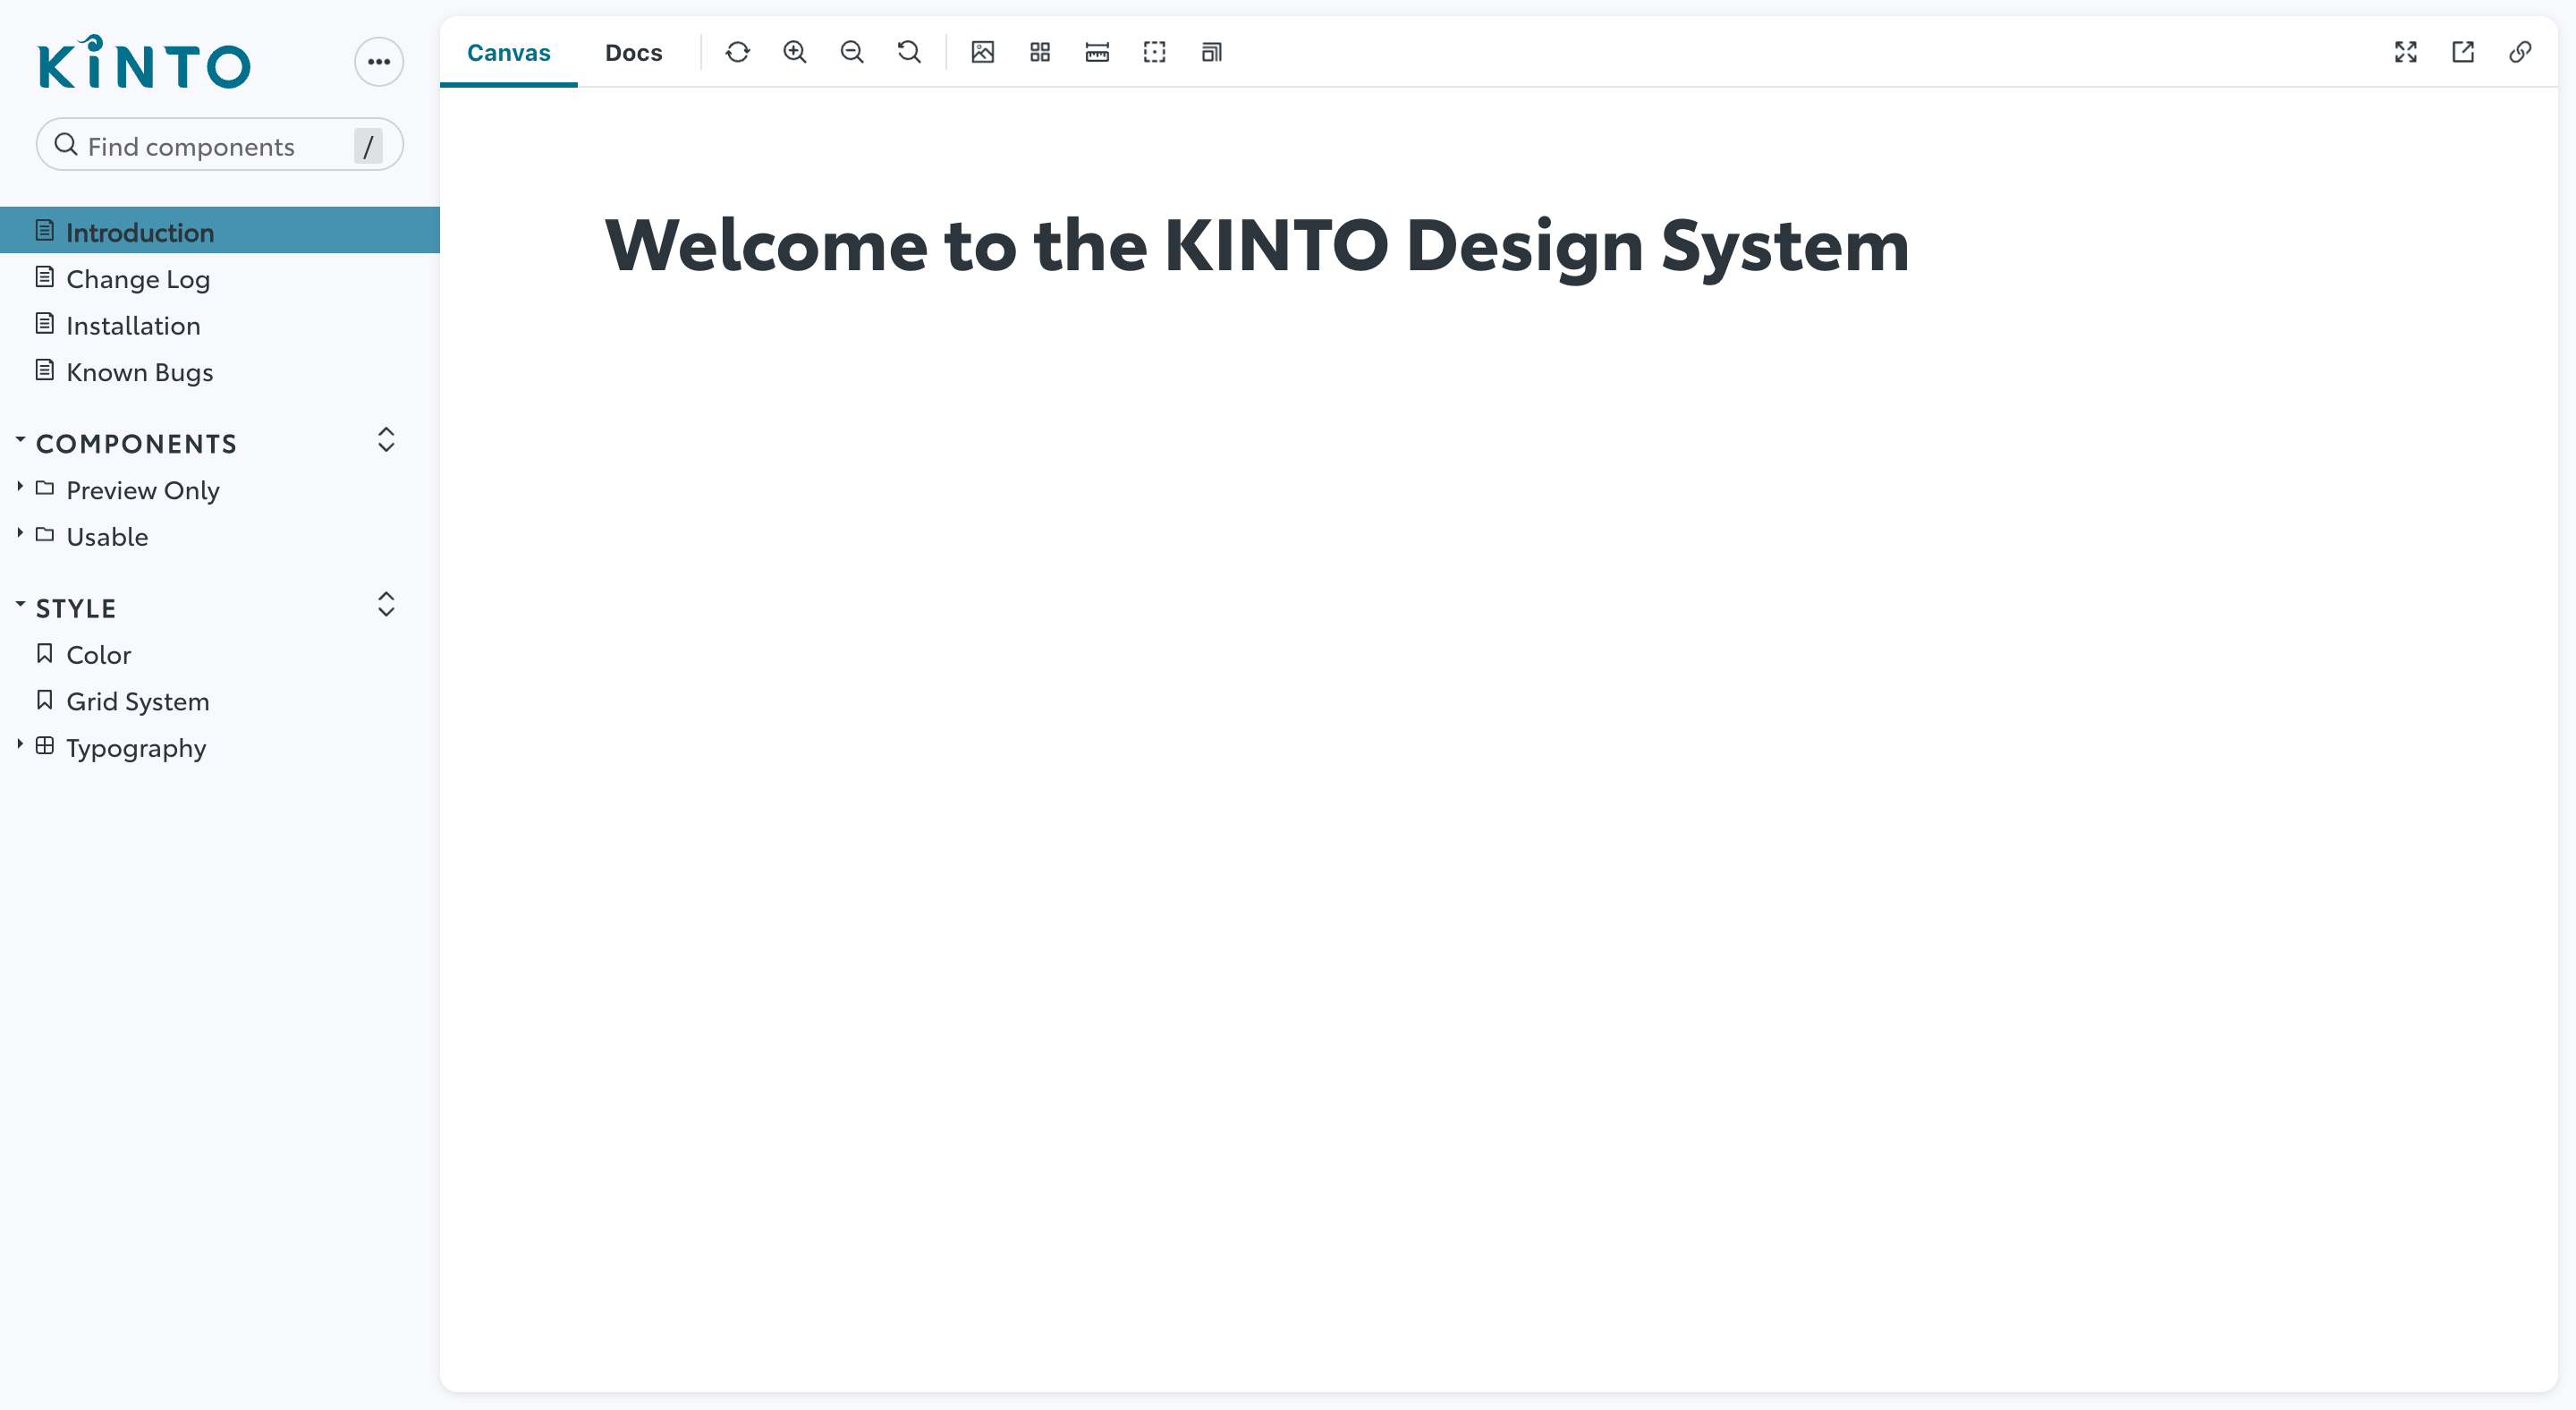
Specifically, we replaced the logo with our company's logo and fonts, then adjusted font size and colors. As is the case for implementing documentation, @storybook/theming
must also be installed to make these changes. Since this is included in @storybook/addon-essentials
, you can start by creating a manager.js
file in the .storybook
directory and specifying a specific theme. For reference, our company uses the following settings.
import { addons } from '@storybook/addons'
import { create } from '@storybook/theming'
addons.setConfig({
theme: create({
// This is a base setting included in Storybook: you can pick between "light" and "dark"
base: 'light',
brandTitle: 'XXXX XXXX',
brandUrl: 'xxxxxxxxxxxx',
brandImage: 'Image path',
brandTarget: '_blank',
appBorderRadius: 10,
textColor: '#2C353B',
textInverseColor: '#FFFFFF',
barTextColor: '#2C353B',
barSelectedColor: '#00708D',
})
})
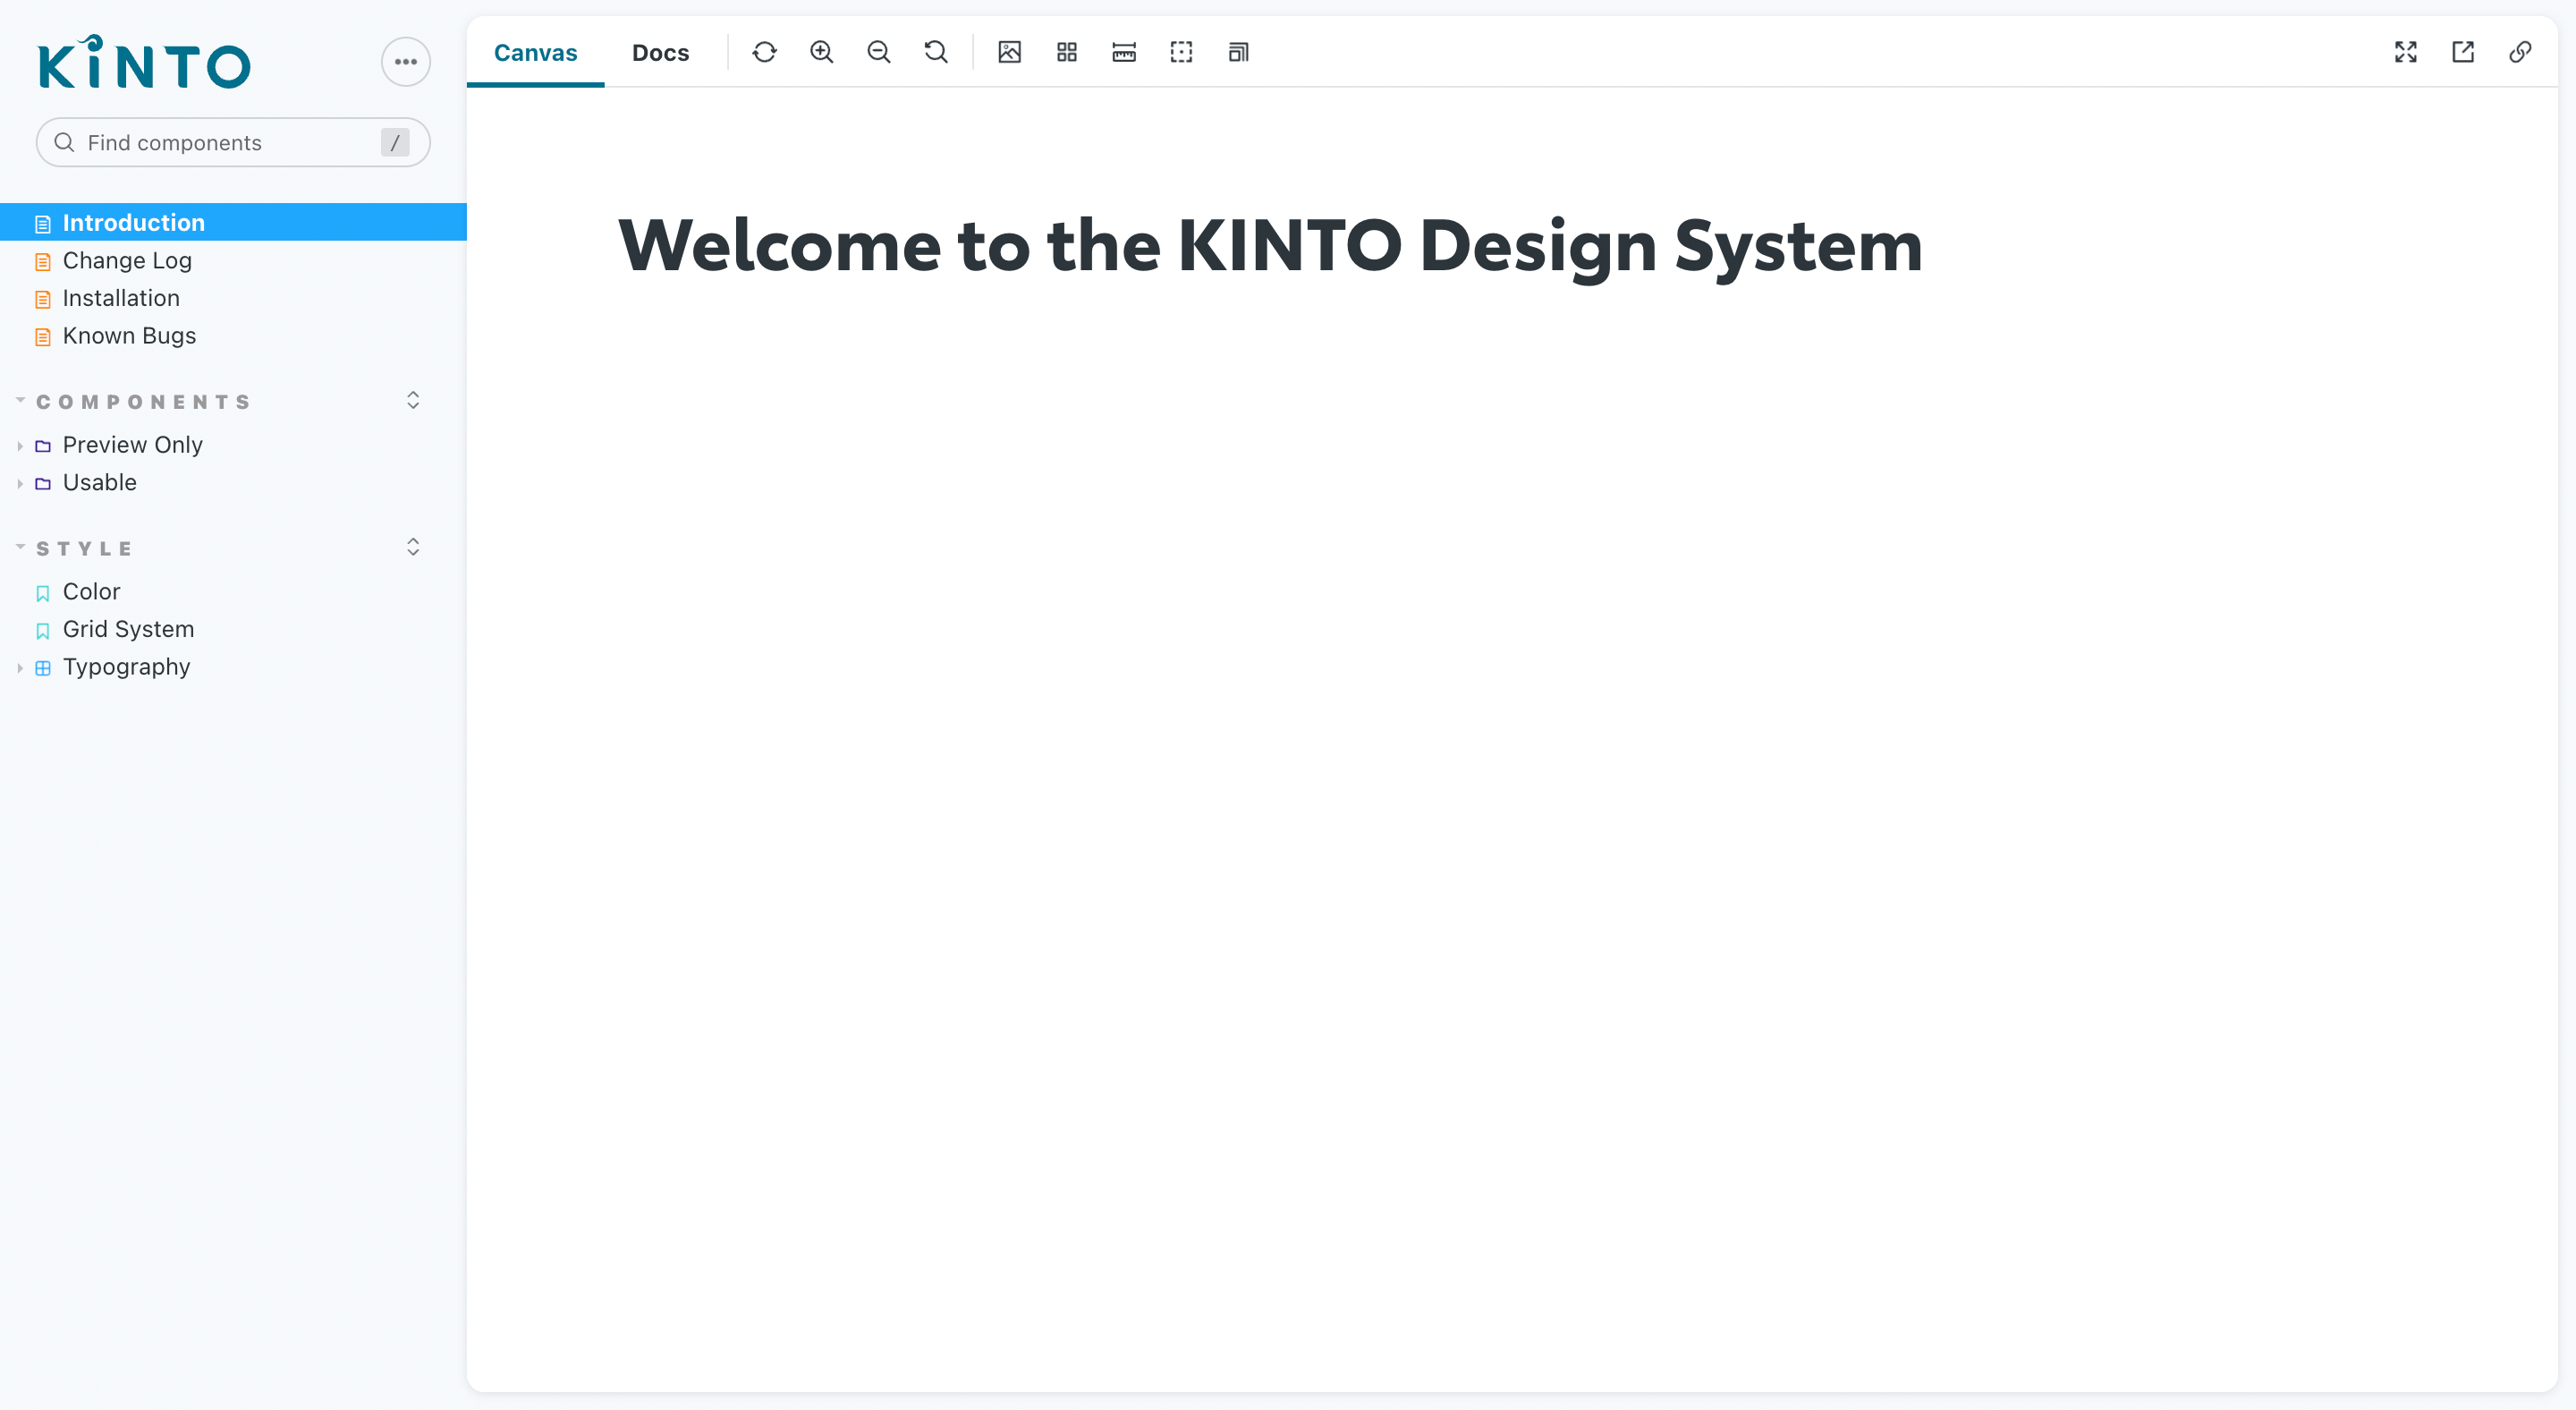
The company's identity is much clearer now, but there are further adjustments that can be made to customize the appearance of our site by using CSS directly. If you create a file called manager-head.html
in the .storybook
directory mentioned earlier, CSS code written in this file will be reflected in the Storybook UI (you will need to restart the development environment).
As an example, below is the UI after adjusting it for our company.
You can now render commonly used components such as buttons and a variety of input methods. Afterwards, you can prepare an environment that coworkers can view, allowing involved parties to review it.
Next Steps
Using Storybook, we developed each component and made them available for designers and developers around the world to use as reference. But this measure is just the first step. We are already working on various things in-house, but we have listed a few below that we would like to be able to do in the future.
Publish Case Studies Using Multiple Components Together Rather Than Individual Components
There are templates available that use multiple components together. For example, a log-in form is composed of an email address and password field, a checkbox for remembering log-in status and a "Login" button. However, being able to review these components together in Storybook would help development proceed much faster. In the future, we would also like to be able to review page units.
Publish Component Libraries
If there are components that you want to include in your own projects, for example, you currently need to copy the required source code from the Storybook repository. In addition to the possibility of copy errors, if you want to change component specifications in the future, you would need to modify the source code of every project that has already been completed. By writing private libraries and installing them in every project, components can be easily reused. The benefit of this approach is that when new components are completed or the specifications of existing components are changed, these changes can be reflected simply by updating the version using a package manager (of course, this does require thorough enforcement of a version management process).
Final Thoughts about Storybook
The introduction of this tool is just one step towards the development of a universal design system, but many of the benefits of using Storybook in the development process were apparent the very first time we used it.
- Developing components individually makes it possible to separate them from dynamic elements and focus on adjusting their appearance
- Using Stories makes it possible to reproduce actual use cases
- The person in charge of each project can use this tool as a reference when developing interfaces
We hope to continue introducing Storybook throughout the company to promote efficient interface development.
関連記事 | Related Posts
My experience as an application engineer in KINTO Technologies
Improving User Experience with Subtle Scroll Adjustments on HTML Anchor Tags (<a> Tag)
フロントエンドチームリーダーに就任して思ったこと
Build Your Front-end with Atomic Design!
Introducing KINTO Design System
December and January Welcomes: Introducing the New Members
We are hiring!
【フロントエンドエンジニア(コンテンツ開発)】新車サブスク開発G/東京
新車サブスク開発グループについてTOYOTAのクルマのサブスクリプションサービスである『 KINTO ONE 』のWebサイトの開発、運用をしています。業務内容トヨタグループの金融、モビリティサービスの内製開発組織である同社にて、自社サービスである、クルマのサブスクリプションサービス『KINTO ONE』のWebサイトコンテンツの開発・運用業務を担っていただきます。
【フロントエンドエンジニア】新車サブスク開発G/東京
新車サブスク開発グループについてTOYOTAのクルマのサブスクリプションサービスである『 KINTO ONE 』のWebサイトの開発、運用をしています。業務内容トヨタグループの金融、モビリティサービスの内製開発組織である同社にて、自社サービスである、TOYOTAのクルマのサブスクリプションサービス『KINTO ONE』のWebサイトの開発、運用を行っていただきます。