Figmaのバリアブル機能を使ってみよう!(初心者向け)

はじめに
こんにちは! KINTO テクノロジーズ、プロジェクト推進Gの青嶋と申します。
Figmaに新たに追加されたバリアブル機能ですが、とても便利なのに日本語で書かれたチュートリアルが少ないかなという思いから、僭越ながら初心者の方にもご参考になればということで記事を書かせていただきました。
Figmaのバリアブル機能を使ってショッピングカートのモックアップを作ってみよう!
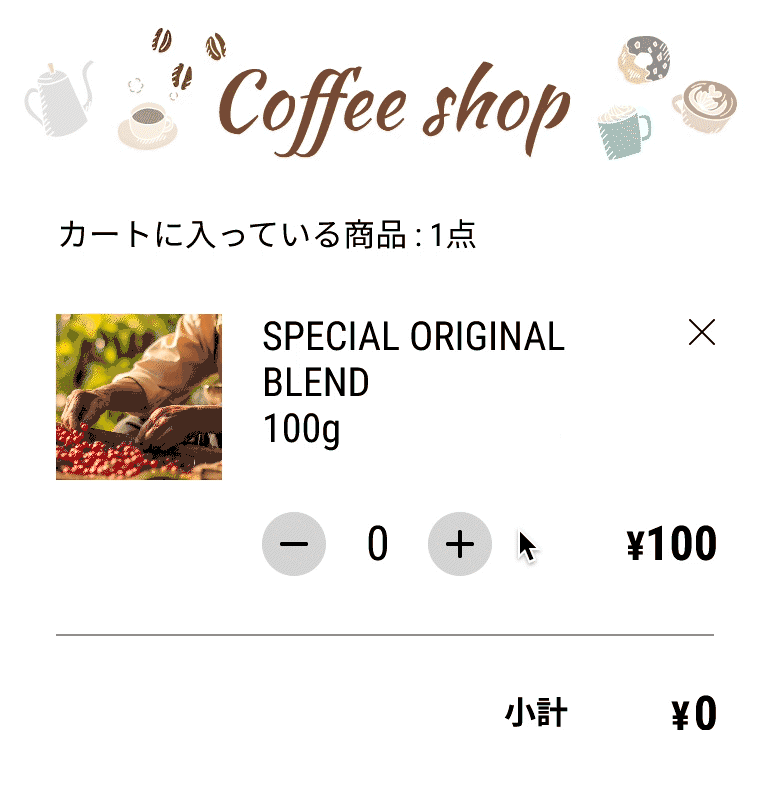
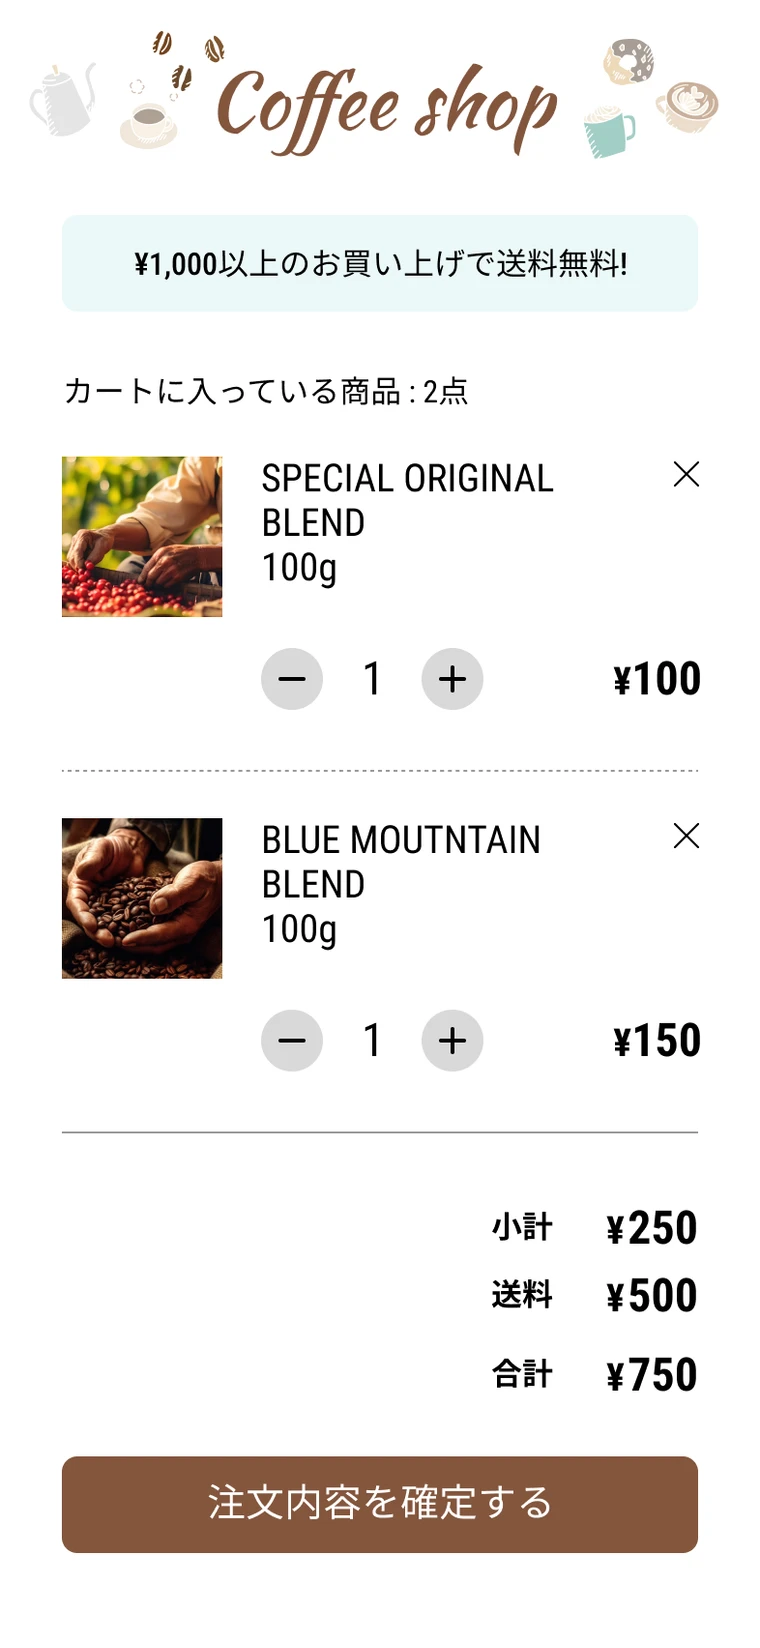 ショッピングカート 完成図 ショッピングカート 完成図 |
Figmaのバリアブルの機能を使ってインタラクティブに動作するショッピングカートの機能を作ってみようという内容で2回に分けて説明していきたいと思います。
パート1はバリアブルの説明に始まり、商品数を増やしたり減らしたりできるカウントアップ機能と商品の個数に応じた小計を計算する機能を説明したいと思います。
パート2はカート内の商品数を2つに増やした上で小計の計算、送料無料設定、合計金額の設定、送料無料になったときに文言を変更する設定について書いていきたいと思います。
【パート1】
- バリアブルとは
- パーツ作成
- まずはカウントアップ機能
- 変数の作り方、割当方
- カウントアップ機能の作成
- 小計設定
【パート2】
- 商品を2つに増やしてみる
- 小計の設定
- 送料無料設定
- 合計の設定
- 送料無料の文言に変更
- 完成
【パート1】
バリアブルとは
バリアブルとは2023年6月にFigmaに追加された新機能の一つで、オプジェクトに割当てることのできる変数の事です。バリアブルとは英語のvariableの事で、日本語では変数と呼ばれます。
変数とは”色々な情報や値を一時的に持っておく「箱」のようなもの”などと説明される事が多いです。
Figmaで用意されているバリアブルの種類は4つ(数字、色、テキスト、ブーリアン値)で、この4種類の情報や値をバリアブルに代入できることになります。しかし種類をまたがることはできないようですので、「数値」の変数を途中で「テキスト」に変更することはできないようです。
パーツ作成
では早速制作に入っていきたいのですが、今回作りたい機能は以下の2つの機能になります。
カウントアップ機能:プラスボタンを押したら商品の個数が増え、マイナスボタンを押したら個数が減る
小計設定:個数に合わせて、合計金額が変わる
まずこれらの機能を作るために必要なパーツを作成し、バリアブルの作り方と割当て方をお伝えしたいと思います。
ベースパーツ作成
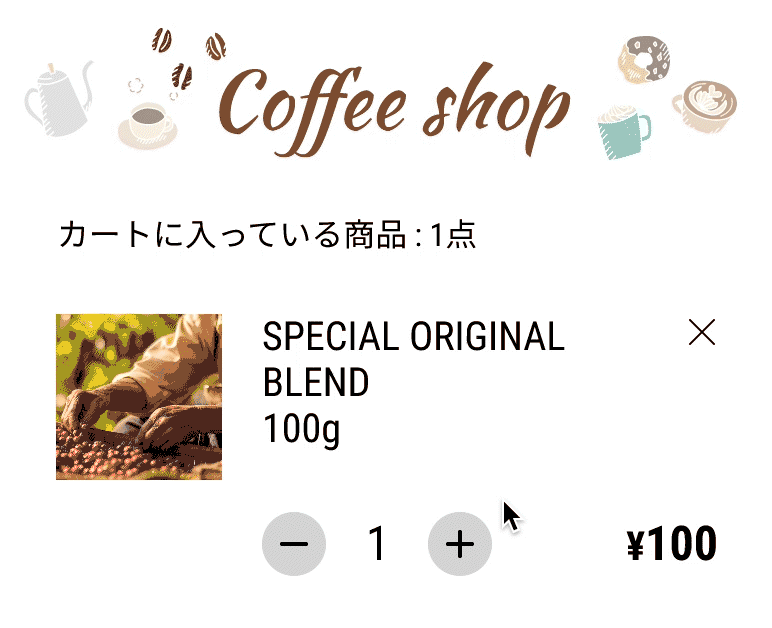
カウントアップ機能を作るに当たって、ジョッピングカートのベースとしてコーヒーショップをイメージしたデザインを作成し、コーヒー豆がカートに入っている状態を用意しました。
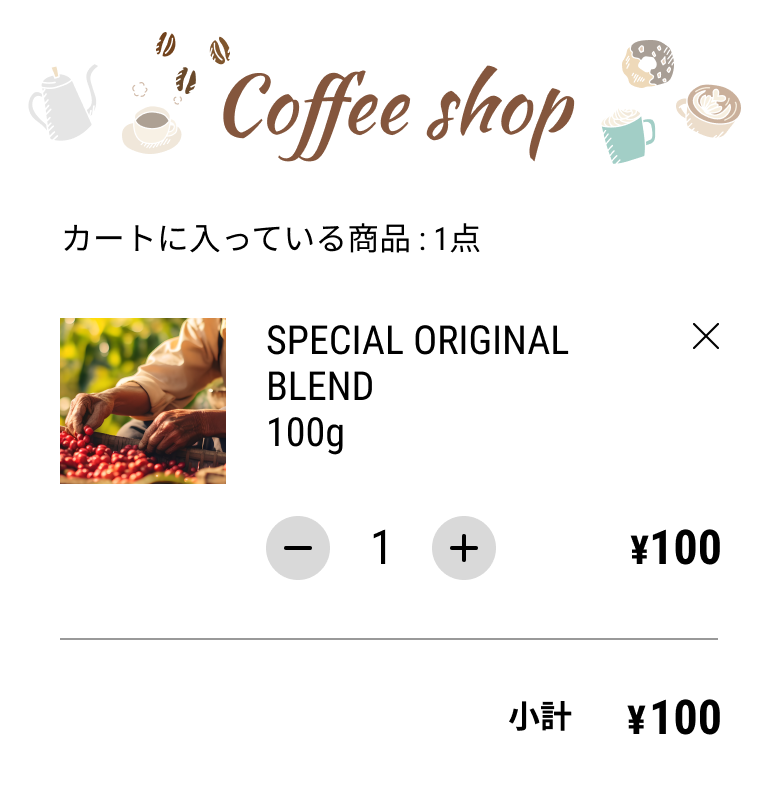 ベースパーツ 商品が1つカートに入っている状態 ベースパーツ 商品が1つカートに入っている状態 |
ボタンパーツ作成
続いてボタンにマウスオーバーした時にボタンの色が変わるアクションを入れ込みたいので、ボタンのコンポーネントを作成しバリアントを作成します。サンプルではデフォルト状態は薄いグレーでマウスオーバー状態は濃いグレーに設定しました。
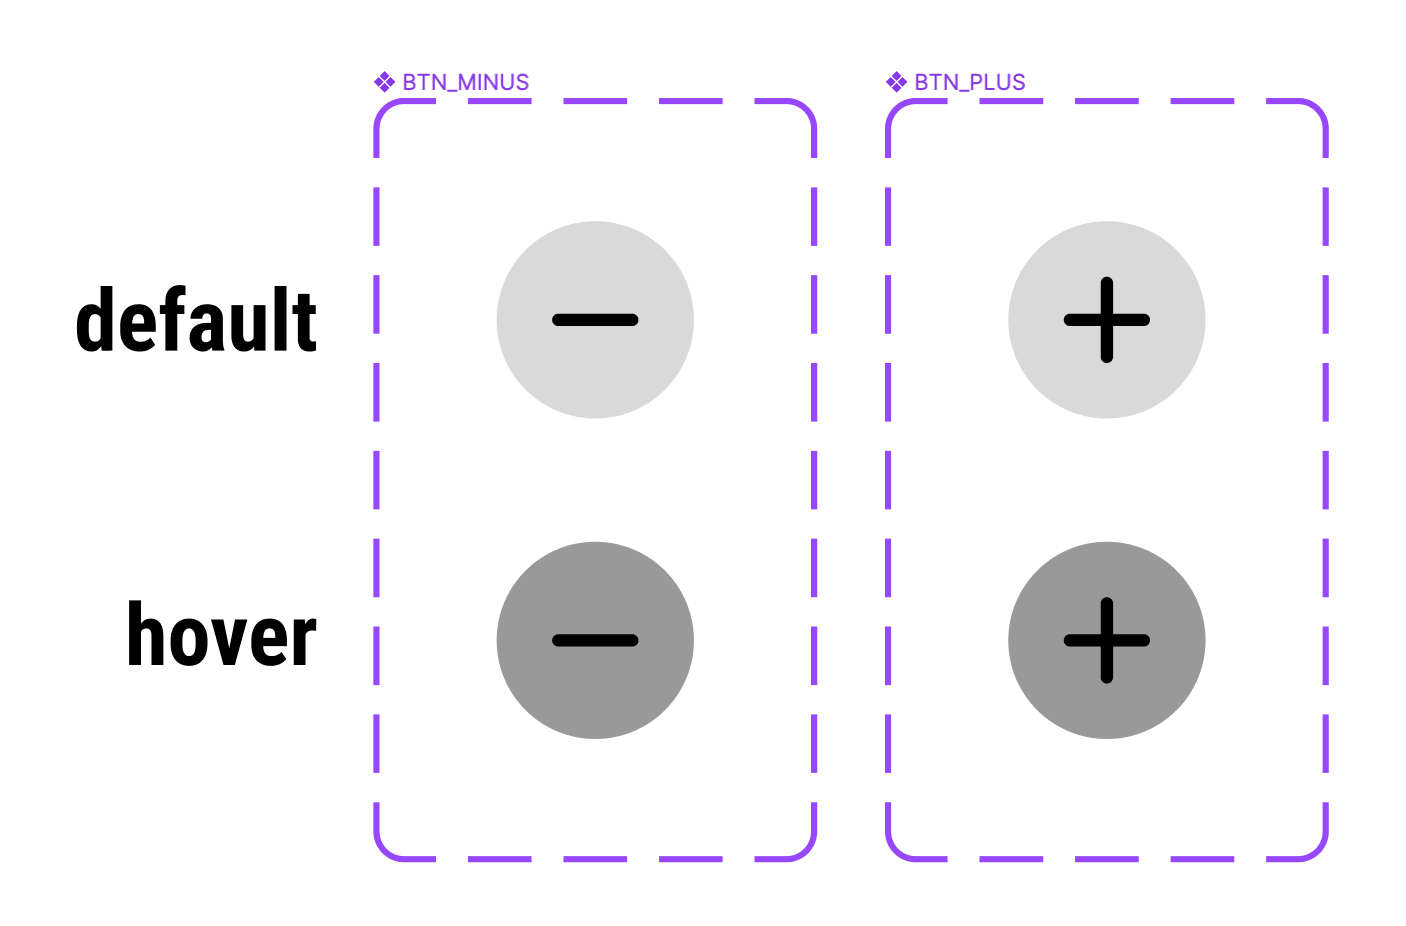 ボタンのバリアントを作成 ボタンのバリアントを作成 |
バリアブルの作り方、割当方
必要なパーツが揃いましたのでここからはバリアブルの作り方と割当て方を説明していきます。
バリアブルとは主に(クリックなどのアクションによって)変化させたいオブジェクトに対して割当てるものになります。例えばプラスボタンやマイナスボタンを押した時に商品の個数を変化させたいので、個数の数字に対してバリアブルを割当てることになります。
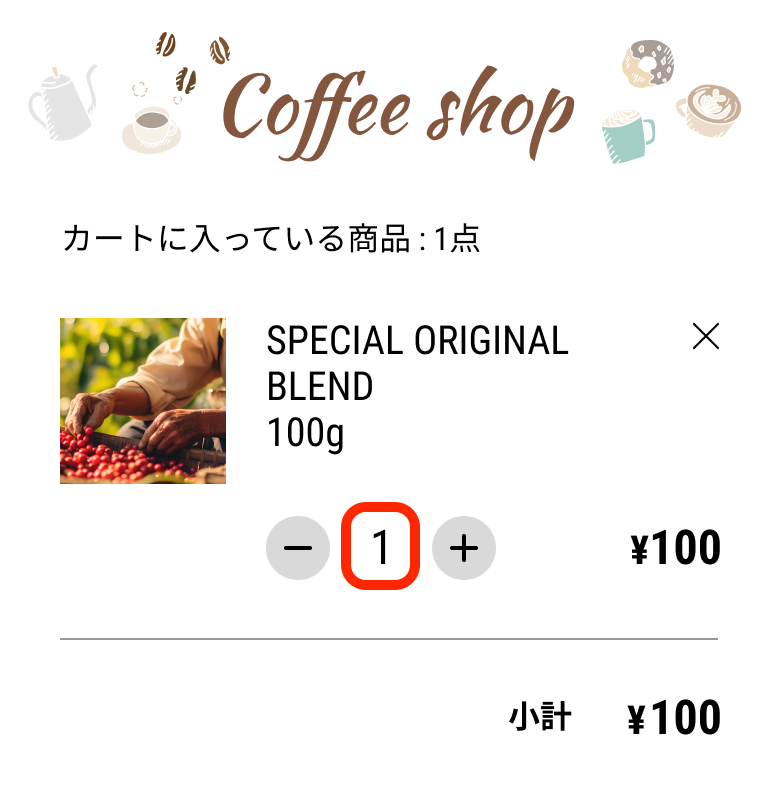 赤枠の個数部分に対してバリアブルを割当てます 赤枠の個数部分に対してバリアブルを割当てます |
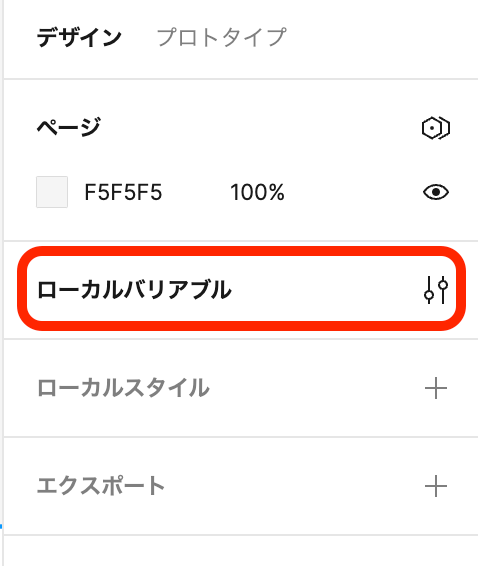
バリアブルを作成するには右カラムから「ローカルバリアブル」をクリックしウィンドウを開き、ウィンドウ左下にある「バリアブルを作成」ボタンをクリックします。
 |
 |
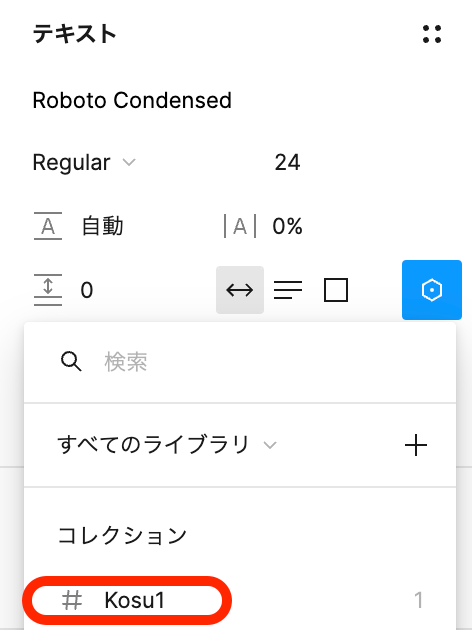
今回は個数なので種類は「数値」を選択し名前は「個数」にちなんで”Kosu1”としました。そしてすでにカートに商品が1つ入っている状態を想定しているのでMode1欄に入れる数字は1にします。これでバリアブルが1つ作成されました。
次にこのバリアブルをオブジェクトに割当てていきます。
デザイン上の数字の1を選択し、右カラム内のテキスト情報欄にある八角形のアイコン(三点リーダーの上)をクリックします。
すると作成したバリアブルの一覧リストが出てきますので、そこからKosu1を選択します。
これでバリアブルの割当てが完了しました。
 割当て可能なバリアブルの一覧がリストで出現 割当て可能なバリアブルの一覧がリストで出現 |
プラスボタンとマイナスボタンに挟まれた「1」にはバリアブル「Kosu1」が割当てられ、値として1が代入されています。この値を2に変えるとオブジェクトの方の数字も2に変わります。
カウントアップ機能の作成
パーツも揃いバリアブルの設定もできたので、次にプラスボタンを押したら商品の個数が増えるという機能を作っていきたいと思います。
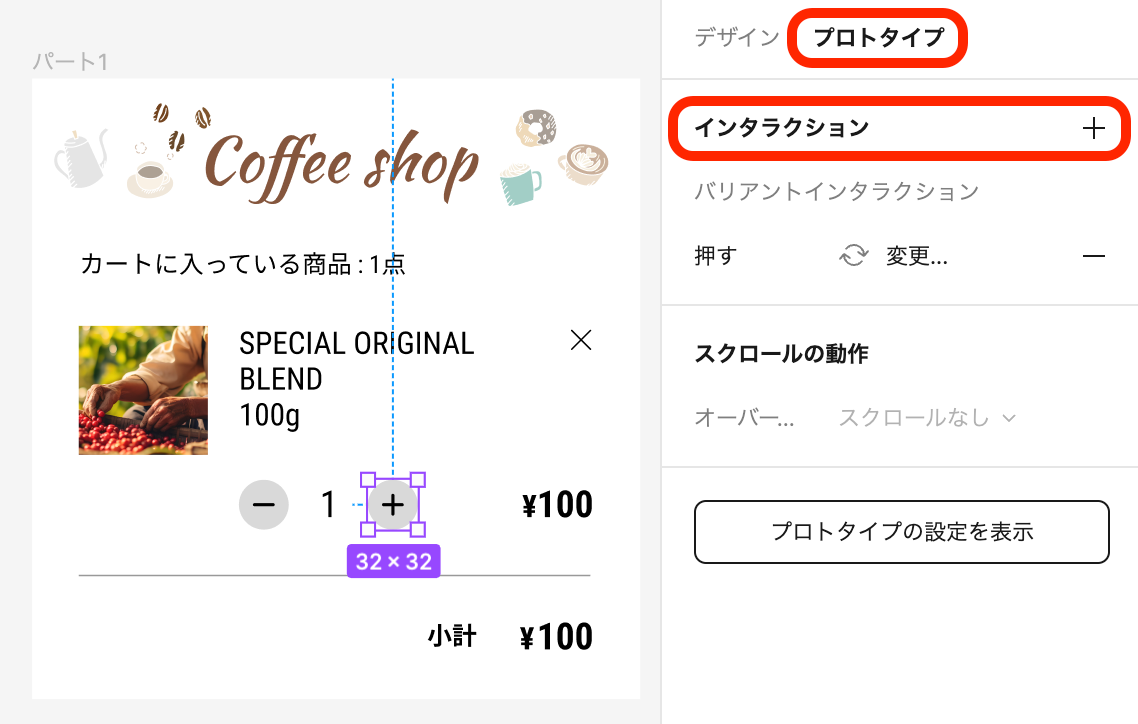
そのためにはプラスボタンにアクションを割当てる必要がありますので、プラスボタンを選択し右カラムの最上部にある「プロトタイプ」のテキストをクリックしてモード変更をした後、「インタラクション」の右にある+マークをクリックすることでマウスアクションを割当てることが可能になります。
 バリアブルを選択して式を記入します。 バリアブルを選択して式を記入します。 |
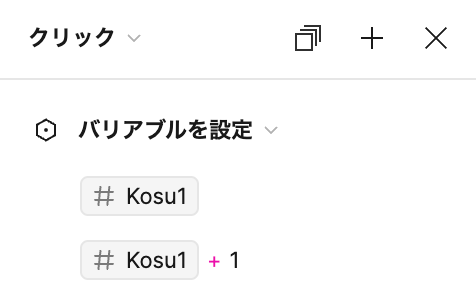
アクションの種類としてはプラスボタンをクリックした時に個数を増やしたいので、デフォルト設定の「クリック」のままで大丈夫です。そして「バリアブルを設定」を選択し、以下の手順で設定します。
- クリックした時に変化させたいバリアブルを選択
- クリックした時にどうなるかの式を記入
記入を終えると図のようになります。
 バリアブルを選択して式を記入します。 バリアブルを選択して式を記入します。 |
この式は、(プラスボタンをクリックした時に)Kosu1を(=上の段)Kosu1+1する(=下の段) ということを表しており、Kosu1が1の時にプラスボタンをクリックしたら、1+1で2になります。これをプレビューすると、プラスボタンをクリックするたびに個数が1つずつ増えていくことが確認できると思います。
これと同じ様にマイナスボタンにもアクションを割当てていくのですが、マイナスボタンの時は1つ注意することがあります。それはプラスボタンと違い、なんの制限(条件)も付けないと個数がマイナスになってしまうことです。
この様な場合は以下の図の様な「条件付きアクション(if文)」を設定する必要があります。
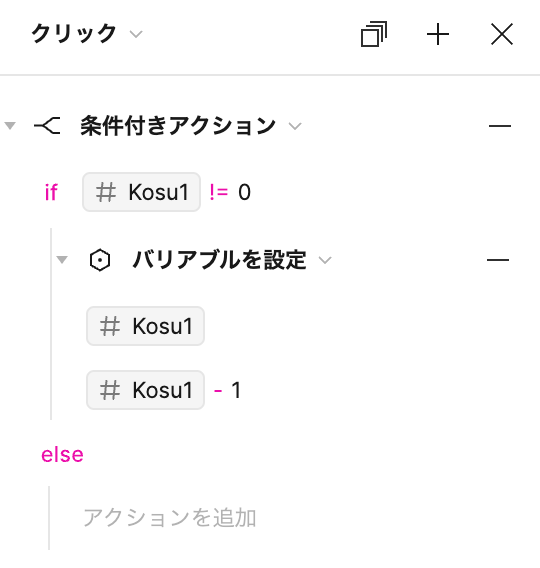 |
この式は、Kosu1が0でない場合、Kosu1をKosu1から-1した状態にするということを表しています。例えばKosu1が1の時にマイナスボタンをクリックしたら、1-1で0になります。ですがKosu1が0の時にマイナスボタンをクリックしても何もアクションは起きないので0のままになります。
これをプレビューするとプラスボタンクリックで数が増えていき、マイナスボタンクリックで数が減り且つ0以下にはならないことが確認できると思います。
 カウントアップ機能の動き カウントアップ機能の動き |
以上でカウントアップ機能は完成です。
小計設定
最後に小計を設定していきたいと思います。パート1では商品が1つしか無いのでその合計金額を小計として扱います。
バリアブル作成と割当て
小計も個数に応じて変化するオブジェクトですので、バリアブルを設定する必要があります。先程と同じ手順でバリアブルを作成し名前はShoukeiとしました。そしてショッピングカートには元々商品が1つ入っている状態を想定していますので、小計は¥100となり代入する値は100となります。
数字へのバリアブル割当ても先程と同じ手順で行います。
 赤枠の金額部分に対してバリアブルを割当てます 赤枠の金額部分に対してバリアブルを割当てます |
ボタンへのアクション入力
小計金額を導くには個数の場合と同じくプラスボタンやマイナスボタンを押した分だけ商品の値段を増減させるという方法でも実現可能ですが、multiplication(掛け算)の演算子を使用して個数×値段でも可能です。さらにプラスボタンとマイナスボタン両方に同じ式を使用する事ができるので少しだけ楽ができます。
記入を終えると図のようになります。
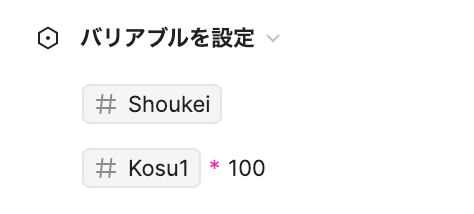 |
この式は、ShoukeiをKosu1 x 100の状態にするということを表していますので、Kosu1が1の場合は小計=1x100となり、¥100となります。
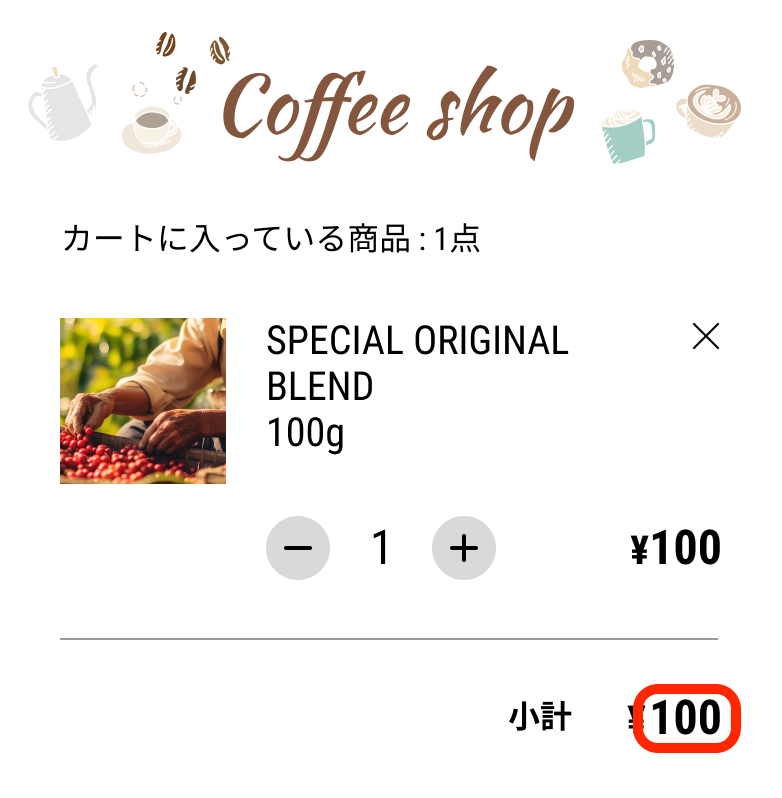
これをプレビューするとプラス(マイナス)ボタンクリックで商品数が増減し、それに伴って小計の値段も変化することが確認できると思います。
 小計の動き 小計の動き |
以上で小計設定は完成です。
パート1でお伝えした内容だけでも例えば「いいねボタン」や簡単なカート機能のモックを作ることは可能ですので色々と応用が効くと思います。
パート1はここまでとなります。次回パート2は応用編としてカート内の商品を2つに増やし一定の金額を超えたら送料無料にするといった内容をお伝えしたいと思います。
この内容が参考になれば幸いです。
関連記事 | Related Posts


We are hiring!
プロダクトマネージャー(Webプロダクト)/KINTOプロダクトマネジメントG/東京
KINTOプロダクトマネジメントグループについてTOYOTAのクルマのサブスクリプションサービスである『 KINTO 』のWebサイトの開発、運用をしています。
【福岡拠点立ち上げ】オープンポジション(エンジニア)
やっていること国内サービスでは、トヨタのクルマのサブスクリプションサービスである『 KINTO 』を中心に、移動のよろこびを提供する『 モビリティーマーケット 』、MaaSサービスの『 my route(マイルート) 』など、トヨタグループが展開する各種サービスの開発・運営を担っています。