Svelteでユニットテスト - Svelte不定期連載-02

こんにちは(こんばんは)、Svelte不定期連載その2です。
過去の記事はこちら
- SvelteKit + Svelte を1年間くらい使ってみた知見など※SvelteKit メジャーリリース対応済み
- Svelteと他JSフレームワークとの比較 - Svelte不定期連載-01
- Svelteでユニットテスト - Svelte不定期連載-02
今回はSvelteのユニットテストについて書いていこうと思います。
モジュールはこちら。
Vitest + jsdom + @testing-library/svelte
の3つを使用して行います。
Vitest
viteというツールを使ったテストフレームワークです。
viteを使用しているため非常に高速に動作します。
jsdom
Node.jsでDOMを使うライブラリです。
HTMLをパースし、web APIをコールすることができます.
@testing-library
様々なフレームワークをサポートしているテストライブラリです。
Svelteだけではなく、ReactやVueなどももちろんサポートしています。
環境設定
まずは以下でモジュールたちを追加します。
※パッケージマネージャーはお好みで、今回はyarnで行います。
yarn add vitest jsdom @testing-library/svelte @types/jest
※今回はTS(TypeScript)で行うので @types/jest も追加します。testファイルにも型を追加したいためです。
無論、TSで書かれている場合は必要ありません。
config
次はvite.config.jsにtest用の記述を追加します。
import { sveltekit } from '@sveltejs/kit/vite';

/** @type {import('vite').UserConfig} */
const config = {
  plugins: [sveltekit()],
  // ここから下を追加
  test: {
    // testの対象ファイル
    include: ['src/**/*.{test,spec}.{js,ts}'],
    globals: true,
    // testの環境
    environment: 'jsdom'
  }
};

export default config;
jsdomはenvironmentで設定しています。
package.json
package.jsonにも以下を追記します。
※書かなくても yarn vitestで実行できます。
"test": "vitest"
これでテストの準備ができました。
実際にテストをしてみよう
よくある加算減算ボタンのあるコンポーネントでテストを書いていこうと思います。
コンポーネント側
まずテストしたいコンポーネントを用意します。
<script lang="ts">
  let count:number = 0;
</script>

<!-- 減算するボタン -->
<button on:click={() => (count -= 1)} aria-label="減算">-</button>
<!-- 定義したcount変数 -->
{count}
<!-- 加算するボタン -->
<button on:click={() => (count += 1)} aria-label="加算">+</button>
testing-libraryの方で加算・減算とそれぞれ読み取る必要があるため本記事ではaria-labelで設定します。
これでコンポーネントの作成は終わりです。
簡素ですが以下のようなコンポーネントが画面に描画されます。
プラスボタンを押すと加算処理、マイナスボタンを押すと減算処理が実行されます。
完成図

テスト
では単体テストのファイルに移ります。
コンポーネントの数や好みにもよりますが、同階層に置くほうが、視線やカーソルが行ったり来たりしなくて好きです。
import { render, fireEvent, screen } from '@testing-library/svelte';
// $lib はsrc/libのエイリアス
import Counter from '$lib/components/Counter.svelte';

describe('Counter.svelte', async () => {
 // 初期値
  test('カウンターの初期値は0', async () => {
    render(Counter);
    expect(screen.getByText('0')).toBeTruthy();
  });
  test('減算処理', async () => {
    render(Counter);
    // ボタンを定義
    const decreaseButton = screen.getByLabelText('減算');
    // イベントを定義
    await fireEvent.click(decreaseButton);
    const counter = await screen.findByText('-1');
    expect(counter).toBeTruthy();
  });
  test('加算処理', async () => {
    render(Counter);
    const increaseButton = screen.getByLabelText('加算');
    await fireEvent.click(increaseButton);
    const counter = await screen.findByText('1');
    expect(counter).toBeTruthy();
  });
});
これでテストも用意できました。
テスト単位で紐解いてみてみましょう。
  test('カウンターの初期値は0', async () => {
    render(Counter);
    expect(screen.getByText('0')).toBeTruthy();
  });
カウンターの初期値は0というテスト項目に基づいて、
まず import Counter from '$lib/components/Counter.svelte';で呼び出している Counterコンポーネントをrender(描画)してます。
そして、Counterコンポーネントが初期値で持つ値が0かどうかの審議をtoBeTruthyというマッチャーで行っています。
※マッチャーとはテストを評価する際の関数といった理解でおおよそ大丈夫です。
詳しくはJest公式をご覧ください。
Jest
続いて減算処理のテストについて。
加算処理・減算処理ともに、同じようなロジックなので今回は減算処理のみ触れます。
  test('減算処理', async () => {
    render(Counter);
    // ボタンを定義
    const decreaseButton = screen.getByLabelText('減算');
    // fireEventでイベントを定義
    await fireEvent.click(decreaseButton);
    //
    const counter = await screen.findByText('-1');
    expect(counter).toBeTruthy();
  });
減算処理のテストでは、下記の流れでテストをしています。
- コンポーネントを描画
- コンポーネント内のボタンを定義
- クリックイベントを設定
- 実際に減算された値は-1であるかの真偽
testing-library、async/awaitでスッキリしていて、わかりやすくSvelteとの親和性よいですね。
加算処理のテストはfindByTextの値が違うだけで、他部分は重複するので割愛します。
実行してみる
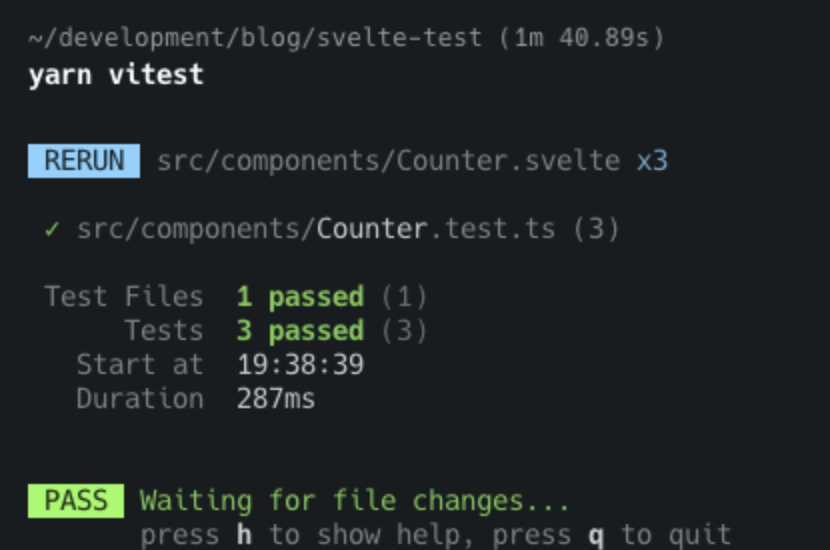
これをyarn testすると

このような感じでテストをパスすると、グリーンでPASSしました。というような結果がコンソールに出力されます。
ではテストに失敗してみます。
<script lang="ts">
  // 0 => 1
  let count:number = 1;
</script>

<!-- 減算するボタン -->
<button on:click={() => (count -= 1)} aria-label="減算">-</button>
<!-- 定義したcount変数 -->
{count}
<!-- 加算するボタン -->
<button on:click={() => (count += 1)} aria-label="加算">+</button>
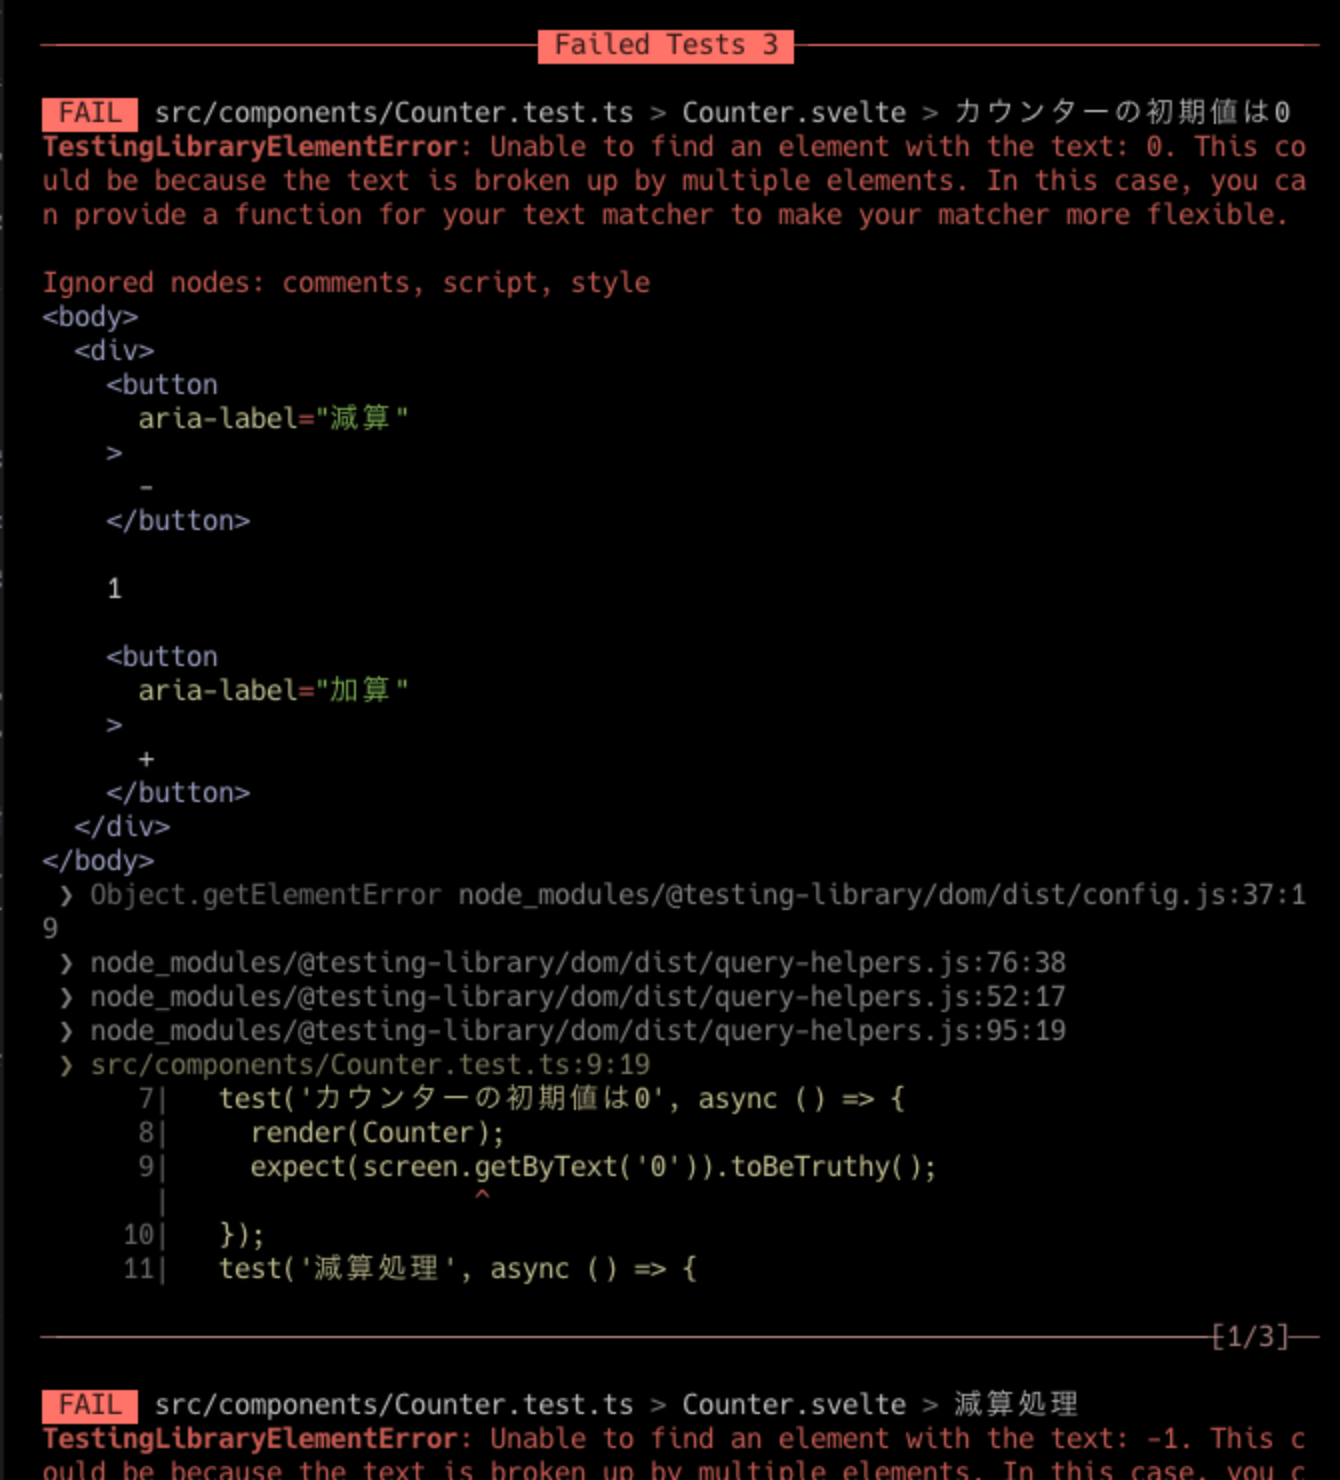
テストファイルでは初期値は0を想定しているので、1という値がセットされているとエラーになります
間違えてた際でも、以下のようにエラーが出力されます。

またこのように下にエラーの詳細が次のように並びます。カウンターコンポーネントの初期値は0を想定しています。
というようなエラー文が表示されているのがわかります、

簡単ではありますが。上記で単体テストができました。
設定ファイル、テスト実行ファイルともに記述が少なくかけるので重宝しそうです。
以上、Svelteでユニットテストの回でした。
次回はSvelteKitにStorybookを導入してみます。
次回もお楽しみに!
関連記事 | Related Posts
We are hiring!
【フロントエンドエンジニア(リードクラス)】プロジェクト推進G/東京
配属グループについて▶新サービス開発部 プロジェクト推進グループ 中古車サブスク開発チームTOYOTAのクルマのサブスクリプションサービスである『 KINTO ONE 中古車 』のWebサイトの開発、運用を中心に、その他サービスの開発、運用も行っています。
【フロントエンドエンジニア(コンテンツ開発)】新車サブスク開発G/大阪・福岡
新車サブスク開発グループについてTOYOTAのクルマのサブスクリプションサービスである『 KINTO ONE 』のWebサイトの開発、運用をしています。業務内容トヨタグループの金融、モビリティサービスの内製開発組織である同社にて、自社サービスである、クルマのサブスクリプションサービス『KINTO ONE』のWebサイトコンテンツの開発・運用業務を担っていただきます。


